Celebrate Spring!

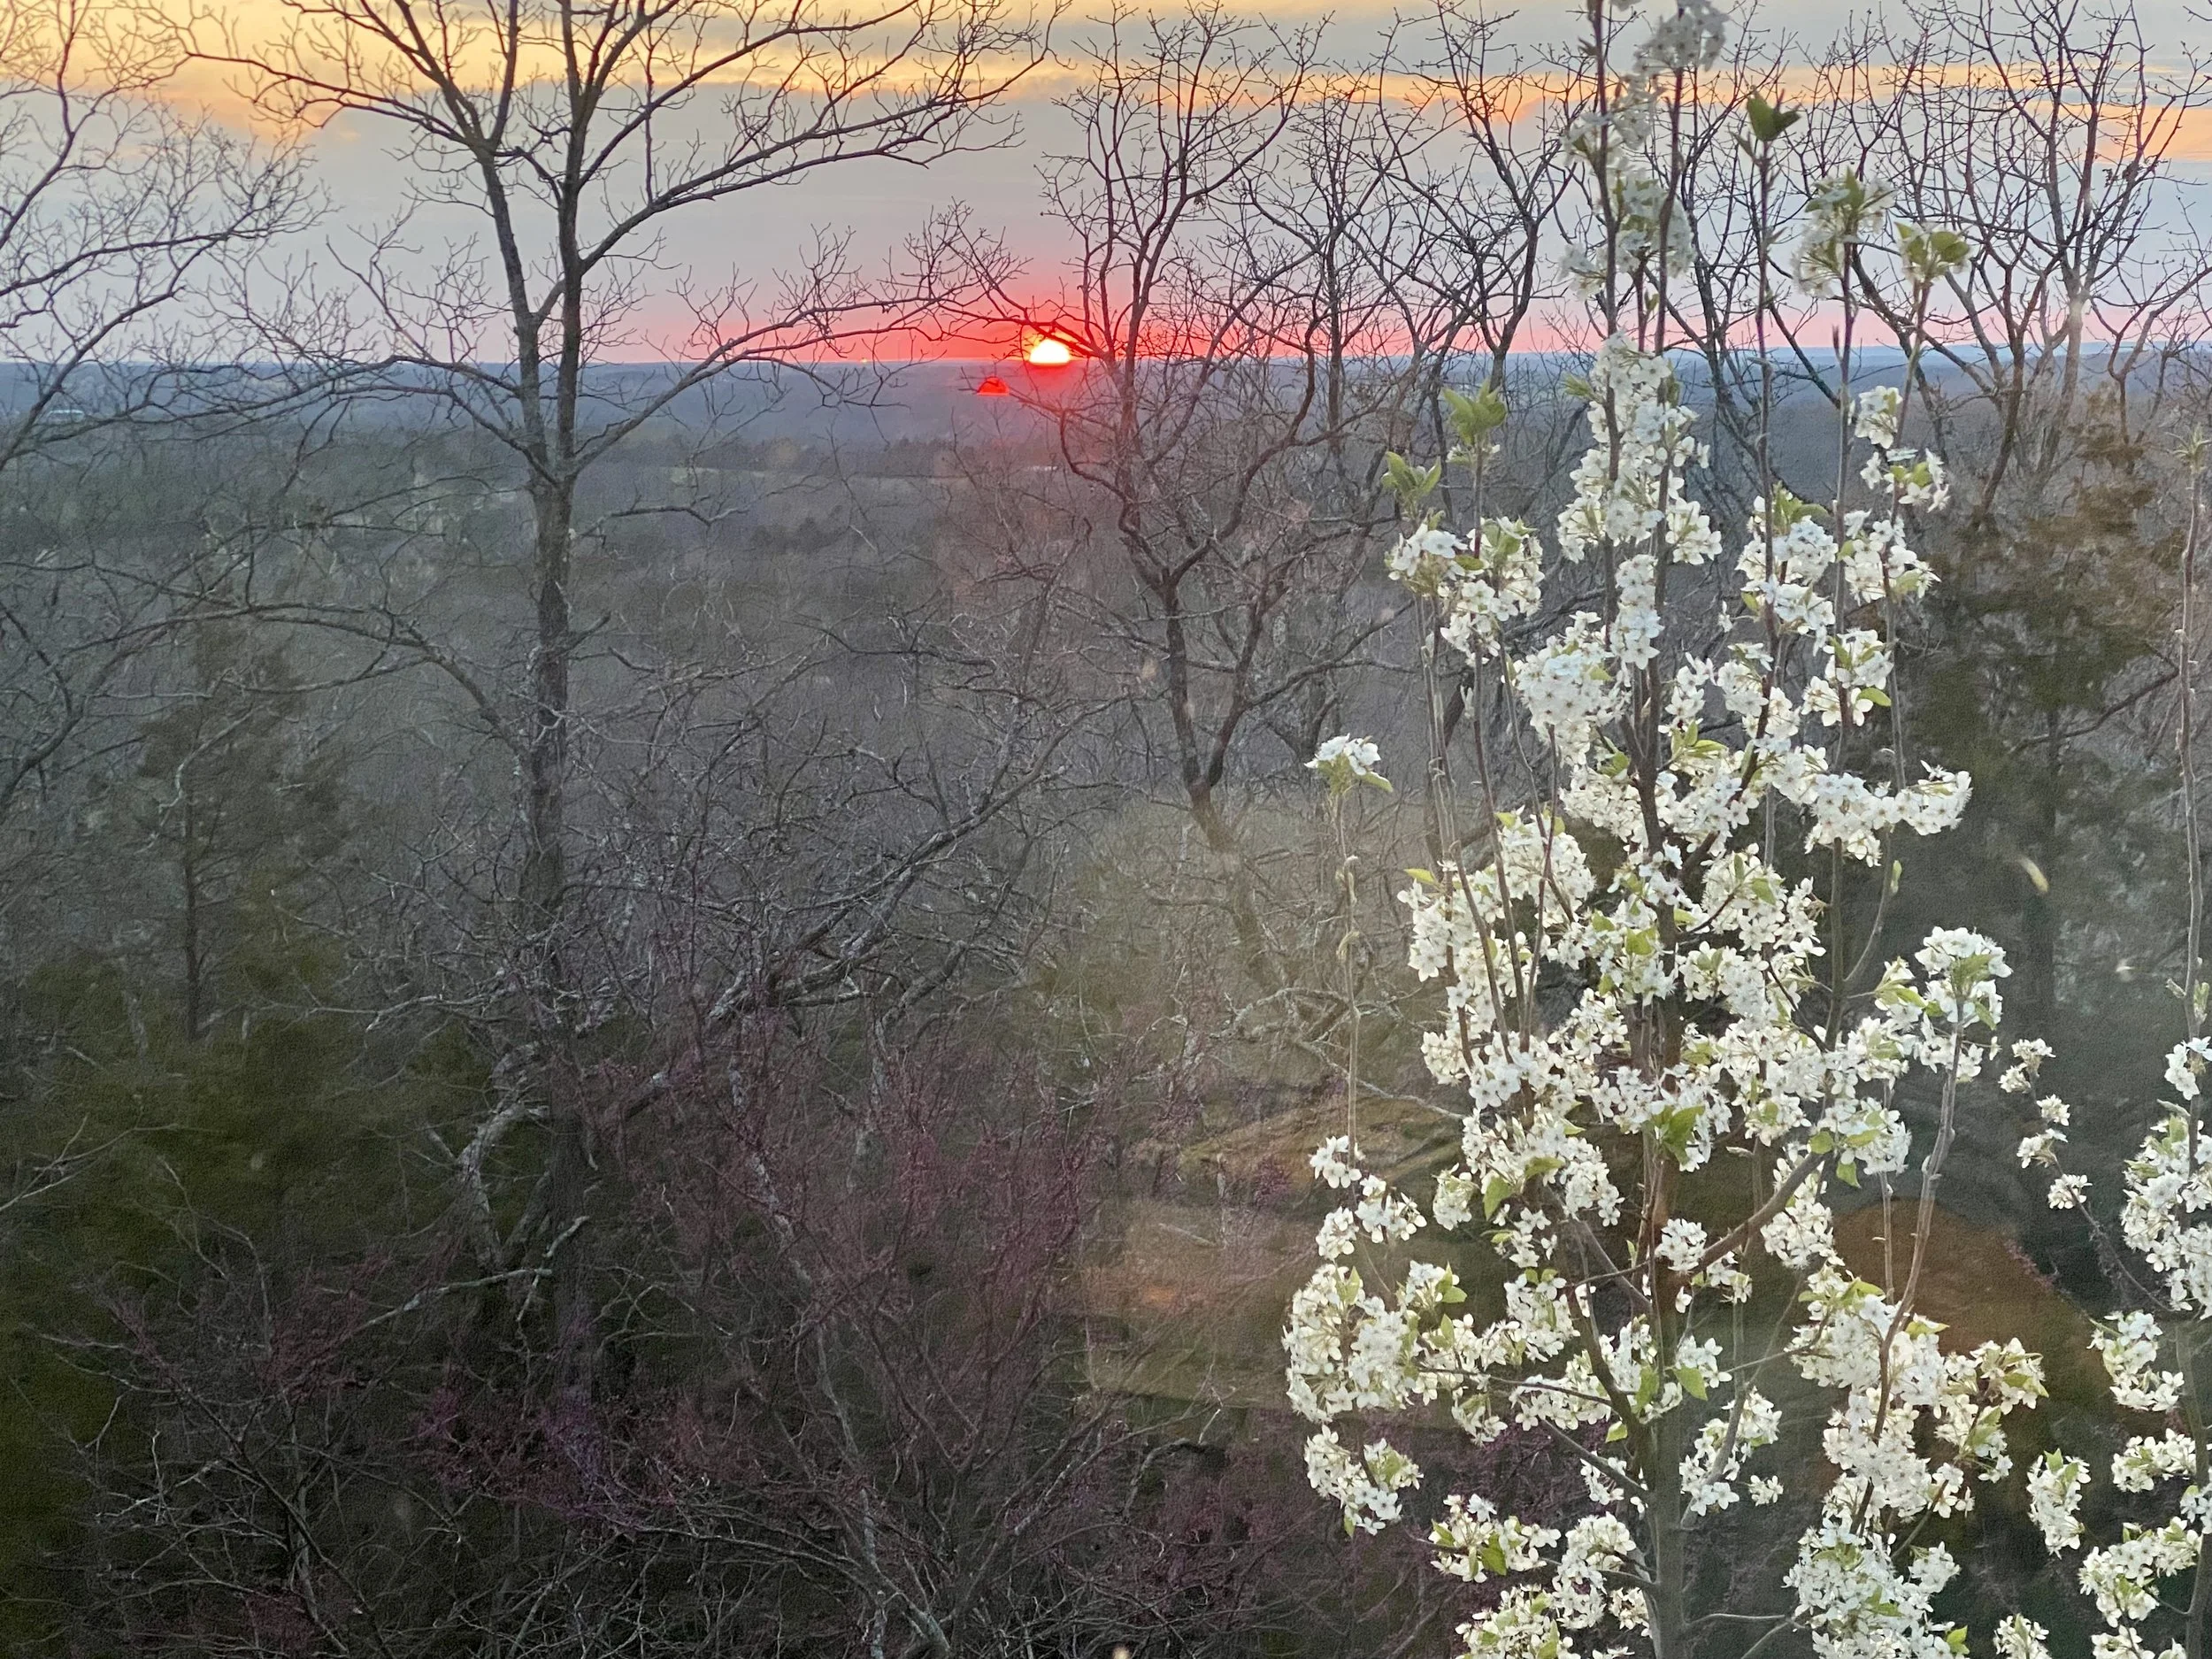
Watching and photographing sunsets is a lovely way to end a spring day. (charlotte ekker wiggins photo)

Celebrate Spring!

There’s something special about spring. When we get those sunny days in the 70s with low or no humidity, it’s hard for me to go back inside. I confess, I putter around the garden and soak up sunshine.

As spring heads our way, there are a number of things we can do to celebrate. Here are some of my favorites.

  1. Picnic in the Park: Pack a basket with your favorite snacks, sandwiches, and drinks, and head to a nearby park for a leisurely picnic surrounded by blooming flowers and chirping birds.

  2. Birdwatch: While you’re on your picnic, grab a pair of binoculars and a field guide, and identify the various bird species returning for the season. Do you know which ones migrate besides hummingbirds?

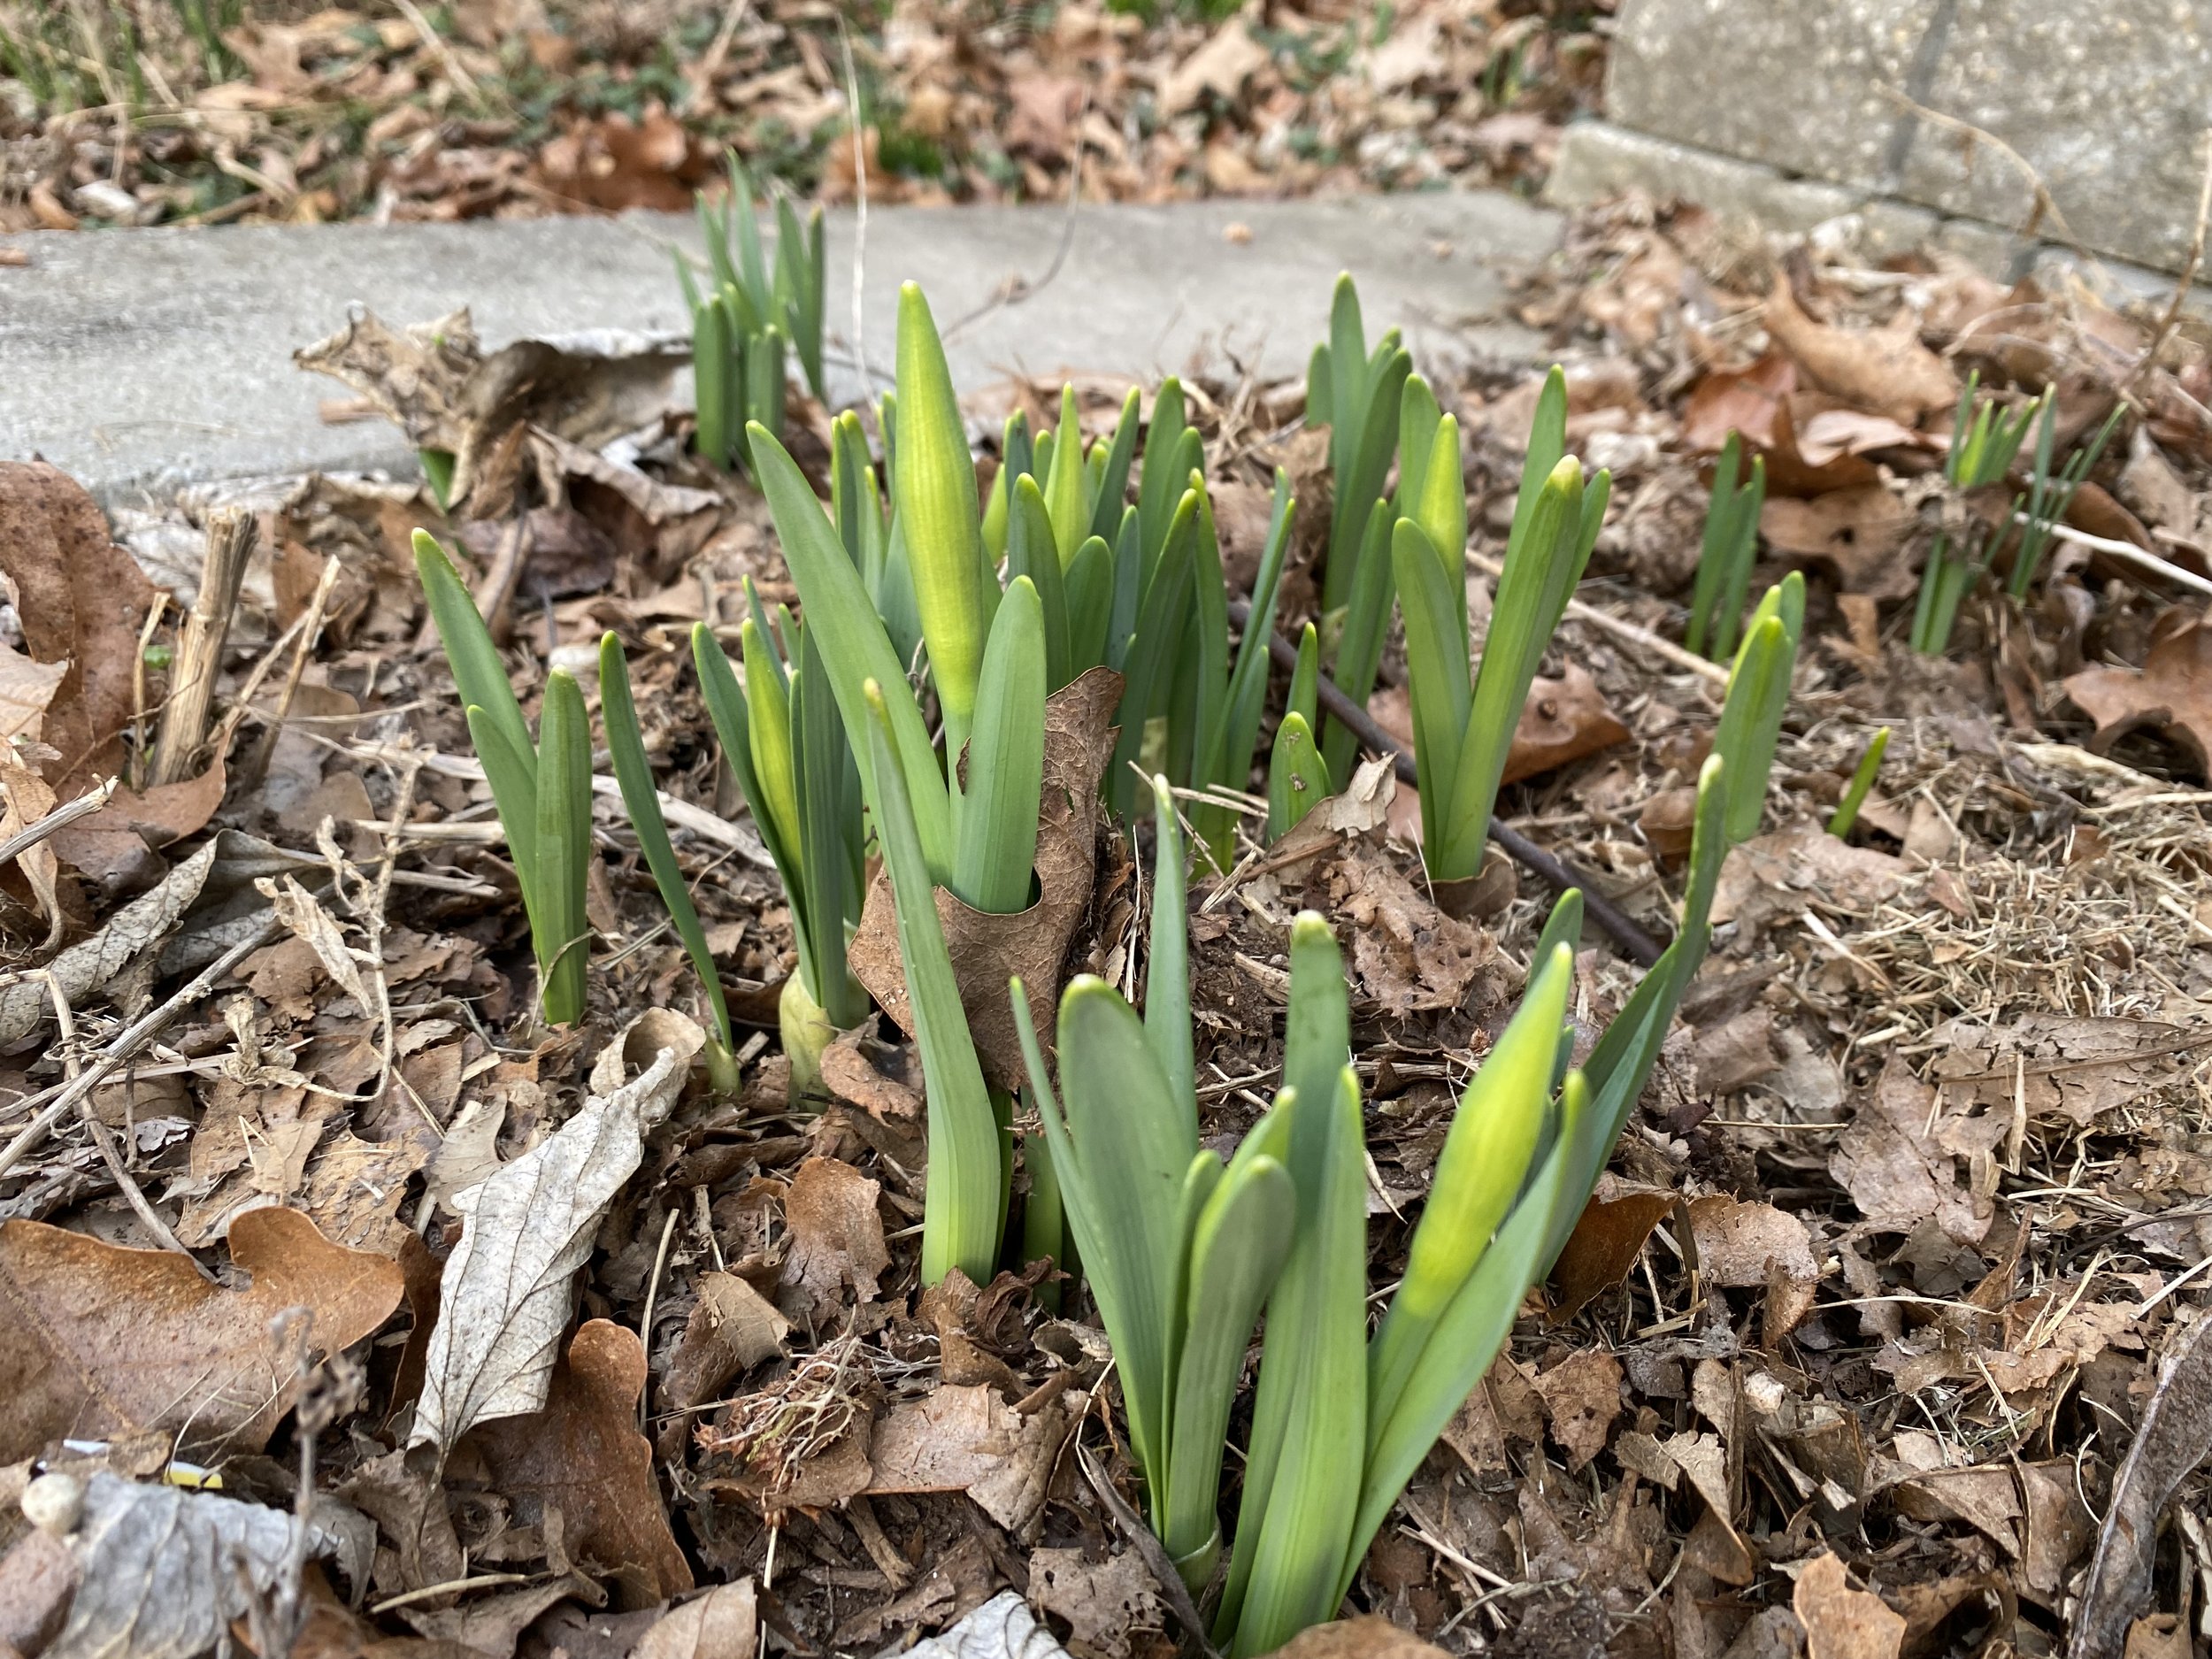
  3. Hike: Explore nature trails and take in the sights and sounds of spring. Look for budding flowers, emerging wildlife, and flowing streams along the way. Doesn’t have to be a trek; check out your local parks and trails and identify what’s growing.

  4. Ride a Bike. Dust off your bicycle and go for a scenic ride through the countryside or along a designated bike path. I’ve been meaning to do this for years; maybe this will be my lucky year.

  5. Photography: Capture the beauty of spring with your camera or smartphone. Take a nature walk and photograph blooming flowers, buzzing bees, and vibrant landscapes. Join a guided photography workshop and learn new photography techniques.

  6. Nature Scavenger Hunt: Organize a scavenger hunt for friends or family in a local park or nature reserve. Create a list of items to find, such as different types of flowers, animal tracks, or specific tree species.

  7. Kayaking or Canoeing: Explore lakes, rivers, or coastal areas by kayak or canoe. Paddle along tranquil waters, soaking in the sights and sounds of nature awakening after winter.

  8. Campfire Cookout: Gather around a campfire with friends or family and cook up delicious meals or snacks. Roast marshmallows, grill hot dogs, or make foil-wrapped dinners while sharing stories and laughter.

  9. Stargazing: Spend a clear evening stargazing in a remote location away from city lights. Bring a telescope or simply lie back and marvel at the constellations, planets, and shooting stars visible in the spring sky.

  10. Gardening: Start a garden or tend to existing ones. Plant herbs and cool season crops such as onions, lettuce, spinach. Enjoy the satisfaction of watching them grow and use them in cooking. Homegrown does taste better!

    In other words, let’s get off our phone/ipad/laptop/computers and get outside.

    What’s your favorite way to enjoy spring?

    For more tips on gardening, beekeeping, cooking and easy home decor, subscribe to my weekly Garden Notes.

    Charlotte

Moth Orchid Care

Reblooming moth orchids inside brighten up a winter day. (charlotte ekker wiggins photo)

Moth Orchid Care

Moth orchids are favorite holiday gifts although I tend to buy them for myself after they’ve bloomed and are discounted. They can be found at most grocery stores and big box stores sometimes in the checkout aisles. Although an orchid scientifically known as Phalaenopsis, these are the easiest to care for orchids.

Don’t pass them up thinking they are hard to maintain because they’re not. They do best with less water than more, indirect light and, when they do bloom, the flowers last for months.

Here's a general guide on how to care for moth orchids:

  • Light:

    • Moth orchids prefer bright, indirect light. Avoid direct sunlight, especially during the hottest parts of the day.

    • A shaded east or west-facing window is ideal. If the leaves are dark green, they might not be getting enough light; if they're reddish, they might be getting too much.

  • Temperature:

    • Moth orchids thrive in temperatures between 65°F to 75°F (18°C to 24°C) during the day and a slightly cooler range at night.

    • Protect them from drafts and sudden temperature changes.

    • Don’t place them on top of hot surfaces.

  • Watering:

    • Water the orchid when the top inch of the potting mix feels dry. Water thoroughly, allowing excess water to drain away.

    • Avoid letting the orchid sit in standing water, as this can lead to root rot.

    • Do NOT water with ice cubes. These are tropical plants; they will do better with room temperature water.

  • Humidity:

    • Moth orchids prefer high humidity. You can increase humidity by placing a tray of water near the orchid or using a humidifier.

    • Misting the air around the plant can also help.

  • Potting Mix:

    • Use a well-draining orchid mix that includes bark, sphagnum moss, and perlite.

    • Repot the orchid every 1-2 years, or when the potting mix breaks down.

  • Fertilizing:

    • Feed your moth orchid with a balanced orchid fertilizer every 2-4 weeks during the growing season (spring and summer).

    • Dilute the fertilizer to half or a quarter of the recommended strength to avoid over-fertilizing.

  • Pruning:

    • Remove dead or yellowing leaves with clean, sharp scissors or pruning shears.

    • After the orchid has finished blooming, you can trim the flower spike just above a node to encourage the development of a new spike.

  • Air Circulation:

    • Good air circulation is essential. Avoid overcrowding plants, and ensure there is space between leaves to prevent the development of fungal issues.

  • Pests and Diseases:

    • Keep an eye out for pests like scale, mites, or aphids. If you notice any issues, treat them promptly.

    • Watch for signs of fungal or bacterial diseases, and address them immediately by removing affected parts or using appropriate treatments.

  • Patience: Orchids are slow-growing plants. Some may grow a new spike right after blooming, others may take months before they are ready to re-bloom. Be patient and consistent with your care routine and these flowers will re-bloom for years!

Moth orchids make lovely gifts any time of the year. Pick ones with unopened buds for the longest lasting blooms.

For more tips on gardening, beekeeping, cooking and easy home decor, subscribe to my weekly Garden Notes.

Charlotte

Christmas Eve Traditions

regardless of where I was on christmas, cat stockings were hung by the fire. (charlotte ekker wiggins photo)

Christmas Eve Traditions

I often hear about US Christmas day traditions but not much about Christmas Eve traditions. Are yours on this list?

  1. Attending a Candlelight Service: Many families go to church for a special Christmas Eve service, often featuring carol singing and candle lighting. One of the favorite services is midnight mass.

  2. Decorating the Christmas Tree: Some families wait until Christmas Eve to decorate the tree together, making it a special prelude to the big day.

  3. Setting Up Trains: For years our family would set out intricate train tracks around the Christmas tree and spend hours trying to keep four train engines from running into each other. Cats would also chase after the moving engines, making the juggling act even more fun.

    4. Preparing a Special Meal: Whether it's a feast or a simpler gathering, many families have a special meal on Christmas Eve. It could be traditional dishes or a family favorite. Our family liked to make cookies and then share them with people in our extended family.

    5. Opening One Present: Some families allow children (and sometimes adults) to open one present on Christmas Eve. In our family, we loved opening a book and then spending the rest of the evening reading as we munched on Christmas cookies.

    6. Reading Christmas Stories and Watching Movies: Gathering to read classic Christmas stories and watching favorite holiday movies is a cozy tradition for many. I've watched a number of movies I had never seen before visiting family over the holidays.

    7. Setting out Treats for Santa and Reindeer: Children often leave out cookies and milk for Santa and carrots or oats for the reindeer. That works in homes without pets. Our Santa cookies usually had kitty nibbles before we headed off to bed Christmas Eve. 

    8.Family Game Night: Playing board games, card games, or engaging in other family-friendly activities is a fun way to spend Christmas Eve together. When our family gets together for the holidays, playing board games is on the agenda but usually on and after Christmas day.

    9. Visiting Family or Friends: Some people spend Christmas Eve visiting relatives or hosting friends for a festive get-together. When I had stepchildren years ago, we would spend Christmas Eve visiting the special people in our lives and leaving plates of cookies as a thank you.

    10. Exchanging Gifts: In some cultures, the tradition is to exchange gifts on Christmas Eve rather than on Christmas Day itself. When I was very young, gifts were exchanged and opened on January 6.

What other Christmas Eve traditions do you have?

Charlotte

For more tips on easy home decor, gardening, beekeeping and cooking subscribe to my weekly Garden Notes.

Picking Poinsettias

Poinsettias now are available in a variety of colors and sparkles. (charlotte ekker wiggins photo)

Picking Poinsettias

Poinsettias are a favorite holiday decor and gift. So much so that each year in the US new hybrids appear based on the original red Mexican stock.

To pick the longest lasting poinsettias, it’s easy to focus on the colored leaves, called bracts. The poinsettia flowers are found in the center of those colored leaves usually in tiny bunches.

yellow poinsettia centers are the actual flowers. (charlotte ekker wiggins photo)

To select the longest-lasting poinsettias, select poinsettias with the yellow center flowers at the beginning of their blooming cycle.

this poinsettia will last the longest since center flowers are just opening. (charlotte ekker wiggins photo)

While you are doing your poinsettia buying, pick up a clear plant saucer that fits the pot.

Once the poinsettias arrive at their intended destination, poke holes through the decorative foil and place the saucer underneath.

Most poinsettias have short lives because they are over watered.

last year’s sparkle-covered poinsettia is reblooming this year in white. (charlotte ekker wiggins photo)

I prefer to remove the foil and place the poinsettia in a decorative basket with a clear plant saucer inside.

One more thought: Don’t pass up those poinsettias on sale. This poinsettia in photo is a poinsettia I purchased at the end of the holiday season on sale last year. It had been sprayed a coral color and now is showing it’s true colors!

For more tips on easy home decor, gardening, beekeeping and cooking subscribe to my weekly Garden Notes.

Charlotte

Live Christmas Tree Care

where I live people buy live cut christmas tree from our local optimist club. (charlotte ekker wiggins photo)

Live Christmas Tree Care

I think whether you use a live Christmas tree or an artificial one tends to depend on what you did as a child. We grew up with artificial trees but the sale of live trees where I live is a popular Optimist Club yearly fundraiser.

Here are ten tips to help keep live cut Christmas trees fresh for a longer duration:

  1. Choose a Fresh Tree: Select a tree with vibrant, green needles that don't fall off easily when touched. Check the trunk's stickiness; a freshly cut tree will have a sticky resin base.

  2. Make a Fresh Cut: Upon bringing the tree home, make a straight cut across the base (about 1-2 inches up) to open up the tree's pores, enabling it to absorb water more effectively.

  3. Water Regularly: Place the tree in a stand with a water reservoir and ensure it's always submerged in water. Trees can drink a surprising amount of water, so check and refill the stand daily.

  4. Location Matters: Keep the tree away from direct heat sources like radiators, fireplaces, or heating vents. Heat can accelerate the drying process, causing the tree to lose needles faster.

  5. Use a Tree Preservative: Consider using a commercial tree preservative or make your own by mixing water with sugar, corn syrup, or aspirin. This can help keep the tree hydrated and healthy.

  6. Mist the Tree: Spritzing the tree with water using a spray bottle can help maintain humidity levels around the needles and prevent them from drying out too quickly.

  7. Cover the Base: Consider covering the base of the tree stand with a decorative tree skirt to help retain moisture by preventing rapid evaporation.

  8. Prune Regularly: Remove any dead or dry branches promptly to reduce stress on the tree and maintain its appearance throughout the holiday season.

  9. Monitor for Pests: Inspect the tree regularly for pests like aphids, spiders, or mites. If found, gently vacuum or shake the tree outdoors to remove them.

  10. Dispose Properly: Once the holiday season is over, promptly dispose of the tree. Recycle it by mulching or turning it into wood chips to prevent it from becoming a fire hazard.

Adhering to these tips can significantly prolong the freshness and appearance of your live cut Christmas tree throughout the holiday season.

For more tips on gardening, beekeeping, cooking and easy home decor, subscribe to my weekly Garden Notes.

Charlotte

Setting Up Artificial Tree

this is my business office artificial christmas tree that stays up all year. the ornaments are customer gifts. flowers on either side are geraniums. (charlotte ekker wiggins photo)

Setting Up Artificial Christmas Tree

Setting up an artificial tree can be a challenge especially if you have young children and pets. And by pets I mean specifically cats.

Choose a good location: Select a spot in your home that's spacious enough to accommodate the tree and where it can be easily seen. Ensure there's an electrical outlet nearby for lights and that it’s not close to heat sources. If you have pets, tie up the tree to something stable: a pole works. You can also place the tree in a room corner where the tree can be tied with fishing line to two opposite hooks, or add the back of a chair next to the tree for support.

Tie Up the tree: See item 1. I really mean it. If you are new to the cat world, it’s about to be changed especially if you don’t do this. Most cats see Christmas trees as giant toys.

Assemble the tree: Follow the manufacturer's instructions for assembling your artificial tree. You can also buy wonderful pre-loved trees at thrift stores, already assembled. Typically you will start with the base and work your way up, connecting different sections. Make sure all the branches are properly fluffed and arranged to give the tree a full appearance. Periodically check for visitors. My all white cat Margaret used to
"hide" among the limbs and reach out to anyone walking by.

Ensure stability: Once assembled, ensure the tree is stable and secure. Adjust the base and branches as needed to make sure it stands straight and doesn't wobble. Wobbling will be greatly reduced when you remove the cats.

Add lights: Test the lights before putting them on the tree to ensure they're working properly. If your tree doesn't come pre-lit, start by stringing the lights. I like to start at the top so the end of the lights are close to the plug-in. Observe how your cats react to the lights; make sure they are not being chewed with admiration.

Add decorations: After the lights are in place, it's time to add ornaments, garlands, and other decorations. Add the garland or ribbon first. Then add larger or heavier decorations; fill in with smaller ones. Be creative and add a variety of colors and textures, and don’t forget ornaments with sentimental value. If you have pets, don’t use silver garland or tinsel. Pets may eat those and need a vet visit to remove.

I also place unbreakable ornaments on the bottom within paw distance.

Top it off: Finish the tree by adding a tree topper. Common choices include stars, angels, bows - at my house it’s Santa mouse.

Fluff and adjust: Once everything is on the tree, step back and take a look. Adjust any branches or decorations that might be out of place. Some people are very picky, others just enjoy the view. If there is a disagreement, go get a cup of hot chocolate. Is it really worth fighting over?

Tree skirt or stand: Place a tree skirt around the base of the tree to cover the stand. I use a basket. If you don’t have a tree skirt, use a towel, sheet or old sweatshirt. No one cares, honestly. Won’t it soon be covered in gifts and napping cats?

Check for Cats: Inevitably you will have a cat or four in your new play toy - I mean, Christmas tree. That’s why unbreakable ornaments go on the bottom at my house, those seem to beckon my feline crew to mischief. My tree is also attached to a wall hook and away from nearby surfaces my cats can use as jumping off points. During the holidays I also know I can find my cats napping under the tree, sometimes on top of gift boxes so I have a few decoys for napping spots.

Cat tree: Years ago, I gave up and gave my cat Margaret her own Christmas tree with one sole white bird ornament. She loved to hide in it and swat at passersby and yes, she left my other Christmas tree alone.

Enjoy: now fix the hot chocolate and see if you can spot the cats in, and under your tree!

For more tips on gardening, beekeeping, cooking and easy home decor, subscribe to my weekly Garden Notes.

Charlotte

Best Cat Gift

patti Cake supervising all fred remodeling their cat tree box. (charlotte ekker wiggins photo)

Best Cat Gift

Safe to say I have a lifetime of experience finding, and making, cat gifts. Of all of the cat gifts I’ve tried, a cardboard box remains the top cat gift.

A couple of years ago, I tried a cat tower that I could mix and match depending on the interest of my cats. About a year later, this is what’s left of the cat tower. Yes, the whole left side is gone.

all fred is also remodeling this higher cost kitty tower. (charlotte ekker wiggins photo)

Frankly what the cardboard box looks like is more an issue for the people, not the cats. A number of retailers now sell cardboard boxes detailed out as houses, cars and trucks.

My cats have destroyed all of them within a couple of days.

Save yourself some money and head over to a recycling center, or keep an eye on store trash areas and pick up free cardboard boxes. If you shop online, those boxes can be favorites. After emptying them I let me cats check them out in case they like one or two.

Banana shipping boxes also have a top and bottom, making the box sturdier. Our Catnip Bar Drive Thru is made out of banana shipping boxes. One cat sits inside the box on its side and the rest play through the two openings.

The key is to have an opening in the box where the cats can get in and out and have a chewing starting point. My vet says tearing cardboard is fine; it keeps the cats busy as long as they don’t swallow the cardboard.

I used to spray paint boxes but I didn’t have box engineers back then. Now that I have two cats that tear up the cardboard I keep them safely away from paint exposure.

Boxes with soft cardboard are my cats favorites. (Charlotte ekker wiggins photo)

These hardier cardboard boxes have survived a number of assaults for several months. I grant you, not the prettiest of boxes but the cats have a great deal of enjoyment with them. Isn’t that what counts?

For more tips on gardening, beekeeping, cooking and easy home decor, subscribe to my weekly Garden Notes.

Charlotte

Getting Ready for Winter

hot tea, a cozy throw and a pot of new amaryllis bulbs. All i need is a good book! (charlotte ekker wiggins photo)

Getting Ready for Winter

I love having four different seasons. The one I prepare for the most is winter, a busy time in terms of planning for next year. There are chores I don’t enjoy doing, such as deciding what plants get to spend winter inside and fun tasks such as stocking up on new teas. Here are some other suggestions to help you get ready for winter:

  1. Garden, Apiary and Plants:

    • Move sensitive plants indoors or into a greenhouse.

    • Mulch outdoor plants to protect their roots from freezing.

    • Trim tree branches to prevent ice damage.

    • Cover delicate plants with burlap or protective cloth.

    • Tuck bees into hives by closing the entrances and adding wind breaks.

  2. Emergency Supplies:

    • Stock up on essentials: food, water, medications, and toiletries. Don’t forget pet food and pet supplies.

    • Prepare an emergency kit with flashlights, batteries, and first-aid supplies.

    • Keep extra blankets, warm clothing, and sturdy footwear handy.

  3. Winterize Your Home:

    • Check insulation and weather stripping.

    • Inspect and clean chimneys and fireplaces.

    • Ensure heating systems are working efficiently.

    • Seal gaps and cracks in windows and doors.

  4. Vehicle Maintenance:

    • Check tires, brakes, and windshield wipers.

    • Keep an emergency kit in your car with blankets, snacks, and a shovel.

    • Consider switching to winter tires for better traction.

  5. Pipes and Plumbing:

    • Insulate pipes to prevent freezing and bursting.

    • Drain outdoor faucets and garden hoses.

    • Know how to shut off your water supply in case of emergencies.

  6. Health Precautions:

    • Get a flu shot to stay healthy during the flu season.

    • Wash hands frequently to prevent the spread of illnesses.

    • Stock up on cold and flu remedies.

Those are the practical things. Now to be ready to be cozy:

  1. Stock Up on Comfort Food:

    • Prepare hearty soups, stews, and casseroles.

    • Bake cookies, pies, and other winter treats.

    • Stock up on hot chocolate, tea, and coffee.

  2. Create a Cozy Home Environment:

    • Arrange warm blankets and throws on chairs and sofas.

    • Use soft, warm lighting like candles and fairy lights.

    • Invest in a good bookshelf to save your books and create a reading nook.

    • Make comfy napping spots for your pets.

  3. Engage in Indoor Hobbies:

    • Start a new book or join a book club.

    • Explore winter crafts like knitting or painting.

    • Learn to play a musical instrument.

  4. Prepare for Power Outages:

    • Have board games and puzzles ready for entertainment.

    • Keep a portable phone charger and power bank handy.

    • Use a battery-operated radio for weather updates.

  5. Stay Connected with Loved Ones:

    • Plan cozy gatherings with friends and family.

    • Schedule video calls to stay connected with distant relatives.

    • Organize potluck dinners or game nights.

  6. Practice Mindfulness:

    • Try meditation or yoga to stay calm and centered.

    • Keep a gratitude journal to focus on positive aspects of life.

    • Spend time in nature when weather permits, even if it's just a short walk.

By combining practical preparations with comforting activities, you can ensure a safe, warm, and enjoyable winter season. Stay warm and cozy!

Charlotte

Magnetic Book Marks

Magnetic Book Marks

I’ve included magnetic book marks over the years in most of my gift books. Sometimes I use photos, the favorite book mark, as well as a holiday cards.

You probably already have possible book marks at home but you may need to buy the magnetic strips.

You will need:

  • Cardboard, either new stock or re-use holiday and birthday cards.

  • Magnet strips, available at most craft stores. You can also re-use magnet strips from other projects.

  • Different-colored marking pens.

  • Magazine cut-outs, copies of favorite photos, stickers.

  • Paper glue.

  • Paper scissors.

To make:

Cut cardboard into 4x1.5 inch cardboard strips. You can make them bigger or smaller as long as it is a rectangle.

Fold so one side is slightly smaller than the other. Decide whether to attach at the top of the page or to the right side.

Decorate the smaller size with a photo or design. Decorate the larger side with a dedication and signature.

Cut magnet strip into two pieces. Remove backing. Glue magnet inside the shorter size; glue the other magnet to the first piece, then fold cardboard to the second magnet so both magnet pieces match. Allow15 minutes to dry.

Apply to a book, or a gift book, as page markers or give all by themselves as handmade gifts.

I made myself a few out of cards and use them every day!

Charlotte

Attend Book Parties for Gift Ideas

setting up my seating area for the november 9, 2023 online national garden bureau and garden communicators international book partyl (charlotte ekker wiggins photo)

Attend Book Parties for Gift Ideas

There are a number of ways one can pursue to decide what books to give as gifts. Thanks to our 2020 pandemic, one of the easiest ways is to attend online book parties where one can get to know the authors and get a feel for what is in their books.

Here’s one coming up, National Garden Bureau and Garden Communicators International's virtual book party “Authors Talk Gardening” Thursday, November 9, 2023 6 P.M. CST/7:00 PM ET online. They will feature four exciting gardening books and their authors, followed by one-on-one author breakout rooms. Pre-register via Zoom

So who are you going to meet besides me?

•   "Susan Betz is an Honorary Master Gardener, author and garden communicator.  She has been actively involved in growing and using herbs to educate the public about gardening and the natural world for more than 35 years. Susan is a member of the International Herb Association, Garden Communicators, the Ecological Landscape Alliance, and National Garden Bureau. She is a life member of the Herb Society of America and a charter member of their Native Herb Conservation committee and the Society’s sustainable garden initiative. She is the author of How to Grow Beautiful Herbs Indoors, For Flavor, Fragrance and Fun.

  Shelley Cramm loves to see the ancient words of Scripture come alive in today’s gardens. She is the author of My Father is the Gardener, writes regularly for her Devotions Blog and speaks to garden clubs and faith groups about plants of the Bible and the garden connection. Her background includes a Master of Architecture, work in architectural and garden design, and leadership of Bible study groups, Toastmasters International, and Garden Communicators International. Inspiration to write about plants grew out of a routine of morning journaling and an enduring hope to finish the laundry and get out to the garden.

•   Michael Perry, AKA Mr. Plant Geek, hails from the U&K and is a fun and cheeky persona who has been involved in gardening and plants since he was just five years old. Mr. Plant Geek encompasses both an online and TV personality. He also fronts a successful blog and has created a unique range of clothing and accessories made for “Plant Geeks.” His book is Hortus Curious, a visual menagerie of the weirdest and wackiest plant species, written in a very accessible way.

•   Charlotte Ekker Wiggins is an award-winning author, beekeeper and gardener. Her one acre Missouri garden, where her neighbors said nothing would grow, is now a Monarch Way Station, Certified Wildlife Habitat and working apiary. She featured how she developed Bluebird Gardens April 2019 in her TEDx “why bugs matter.”  As a Master Gardener Emeritus, she focuses on native plants that provide food and cover for native bees and other pollinators. She is also a Great Plains Master Beekeeping Certified Master Beekeeper, developing books and classes to help beekeepers learn scientifically based best management practices. She keeps native and honey bees, mostly outdoors."
 
Besides meeting the authors, there will be book giveaways for in-person attendees. I’ve been to two previous book parties and enjoyed getting to know the authors and why they wrote their books.

So mark your calendars for November 9, plan on what tea you're going to sip and pre-register here.

See you November 9!   Charlotte

This Little Piggy

This little vintage quilt pig is adorable down to its ears and snout. (charlotte ekker wiggins photo)

This Little Piggy

I have to confess, I have favorites. And this little vintage cutter quilt pig is at the top of my list.

Cutter quilts are pre-loved quilts that have areas where the cotton fabric is bald from wear. These quilts are then repurposed into pillows and animals to preserve the memories and recycle the good parts of the quilts.

This vintage little pig was made out of a cutter quilt. You will see some wear spots, which gives the vintage pig a vintage character.

The design of this pig includes a charming detail, a wrinkled pig tail.

okay, and the cute wrinkled pig tail, too! (charlotte ekker wiggins photo)

Adding a vintage quilt animal to a sofa or chair is an easy and quick way to bring a vintage vibe into a space. Don’t be surprised if the vintage quilt animal becomes the focal point, they usually are!

off to your new home! (charlotte ekker wiggins photo)

This is a unique vintage quilt animal now getting sent off to a new home. We have a few more still available.

Safe travels!

Charlotte

Extending the Bouquet

extend a small bouquet by gathering flowers of the same and similar colors. (charlotte ekker wiggins photo)

Extending the Bouquet

Sometimes our gardens don’t have much blooming but we still want to bring flesh flowers inside. Or need a bouquet to give and cheer someone.

  • One option is to gather flowers of the same color. Even if you only have one geranium, one vinca and one rose, for example, together then can make a lovely tiny bouquet. Having the flowers in the same color make them look cohesive.

The key is to have small vases that look full with only a few flowers.

  • If you already have flowers in a vase and need to refresh it, compost the faded flowers and replace with a couple of stems out of your garden. Re-cut all of the flower stems and replace the vase water.

  • If you don’t have cats that like to munch on greenery, remove spent flowers and add garden greenery such as Liriope, also called Monkey Grass, leaves.

    Having fresh flowers around uplift spirits so don’t overlook enjoying only a handful in a small vase.

    Charlotte

Small Flower Vases

This colorful syrup dispenser is one of my favorite small flower vases holding geraniums, phlox and wild germander. (charlotte ekker wiggins photo)

Small Flower Vases

Let’s face it, sometimes we don’t have huge armfuls of flowers to make bouquets to enjoy in our homes and offices. Especially this time of year, when record hot temperatures and a drought are challenging our gardens, we’re lucky to find a bloom here and there to bring inside.

added my little handblown bee for the finishing touch! (charlotte ekker wiggins photo)

That’s when small flower vases come in handy, and they don’t have to be actual vases.

What you’re looking for is something small enough to fit on a table or shelf that will highlight one or two flowers.

here are some other pitchers and containers with handles that make charming flower vases. (charlotte ekker wiggins photo)

Syrup and Creamers

When I stop by thrift stores and yard sales, I look out for creamers and syrup dispensers. They come in a variety of shapes and sizes so I scope out ones that will fit nicely on a desk or table without taking over the space.

These small vessels are perfect for making small fresh flower bouquets. At times all I find growing in my garden is one or two flowers. With a little greenery those can nicely make a pop of freshness.

toothpick holders make excellent small flower vases. (charlotte ekker wiggins photo)

Crystal Toothpick Holders

If you like something more formal, keep an eye out for crystal toothpick holders. I’ve found two sizes, both excellent for tiny bouquets. The only issue is you need to keep an eye on the water level or they can easily go dry.

Personalized Gift Ideas

Over the years I’ve also collected these small vases to give as gifts full of flowers. Especially for hospitals and friends recovering from surgery, the smaller flower arrangements are easier to manage.

Regardless of size, keep several sizes handy so you can enjoy flowers inside all year around!

Charlotte

When to Cut Daffodils

Cut daffodils still in bud when flower colors are starting to show. (charlotte ekker wiggins photo)

When to Cut Daffodils

Friends have told me over the years that they have a hard time deciding when to cut daffodils to bring inside so here are a few tips.

When walking through your garden, look for the daffodils that are bending over. Check the stems. You will find some daffodil stems have been bruised by weather. Those are the ones you should cut since the damaged stems won’t be able to feed the top flower.

Once inside, trim the dry part of the stem off so the fresh stem can take in water.

Bruised stem daffodils are perfect candidates for cutting to bring inside. (Charlotte Ekker Wiggins photo)

My second tip is look for daffodils getting ready to bud. Cutting daffodils in bud form will give them a longer vase life. You want to cut the buds after some flower color is showing, not when the buds are still all green.

Once flower buds are in water, they will open when inside and exposed to warmer temperatures.

Look for daffodils showing color in their buds. (Charlotte Ekker Wiggins photo)

As you search for buds with color, cut the ones that may be lying on the ground. Not all of them break where they bend but their stems may be damaged. That way you won’t feel as bad cutting the flowers, and you leave standing flowers to enjoy in the garden.

These yellow daffodil buds are ready to be cut for an inside bouquet. (Charlotte Ekker Wiggins photo)

So how early should you cut the buds?

Wait until the stem is fully extended and the buds are starting to show color.

These daffodil buds need a little more growth before being cut. (Charlotte Ekker Wiggins photo)

Once inside, place them in water and replace the water every day or every other day.

One more note: don’t mix daffodils with other flowers, they have a toxin that will kill off other blooms.

If you want to mix them, let daffodils sit in water for 24 to 36 hours first so the toxins can drain. Replace the water; then mix other flowers with the daffodils.

only a few daffodils to bring inside? place them next to a mirror to double the size. (charlotte ekker wiggins photo)

If you just have a few daffodils in bloom, cut them to enjoy inside. If you place them next to a mirror you will double your daffodil supply.

There are few flowers that brighten up a room than a bouquet of bright daffodils!

Charlotte

Dried Flower Wreaths

I refresh this flower wreath every year with dried flowers from my garden. (charlotte ekker wiggins photo)

Dried Flower Wreaths

I love natural flower wreaths with dried flowers, especially ones from my garden.

I’ve had this dried flower wreath in the picture for several decades. It hangs in my den where I can enjoy it all year around.

I refresh it every year with dried flowers out of my garden. I also add flowers I can’t grow, such as red roses.

twine is my best friend to tie flower stems up to hang to dry. (charlotte ekker wiggins photo)

To dry the flowers, I tie their stems and dry them upside down from shelf hooks in my garage.

Sometimes I gather flowers that have also dried in the garden. Autumn ‘Joy’ Sedum has interesting texture when it dries and doesn’t usually have to be harvested and dried in my garage.

red florist roses are dried after being enjoyed in a flower vase. (charlotte ekker wiggins photo)

The hardest color to grow, and add, is blue so I focus on dried lavender, which also gives my dried wreath a nice scent.

You can find the wreath forms at any hobby or the crafts section of big box stores. You can also make your own if you have wild grape vines, which are now protected in some US states from being harvested.

If you can’t find a form, you can also make one from #6 hardware cloth, which is large enough to have spots to weave the dried flower stems. These wreath forms may require a filler plant to cover the write but tthey are worth the effort!

Charlotte

Pruned Flowers Bouquet

This bouquet is made up of flowers that were pruned. (Charlotte Ekker Wiggins photo)

Pruned Flowers Bouquet

Most of us think of cutting fresh flowers for a bouquet but have you considered using the flowers you deadhead or otherwise pruned?

As you trim your flowering bushes and potted plants, save those with flower buds, flowers and even flower seed heads to include in a bouquet or two of cut flowers for home decor.

This little bouquet was made from flowers I trimmed off of geraniums and vinca potted bushes. They were getting too lanky so needed to be trimmed back to grow bushier.

The red roses were trimmed from a discarded climbing rose branch.

And the light pink vincas were from another bouquet that was destined for composting until I realized I could add them to this flower grouping.

To best group these flowers together, find a flower vase that accommodates the shortest stem and then cut the rest to match. Cutting the stems also gives the flowers a fresh stem for taking up water.

By themselves they were not exciting but grouped together these discards make a lovely splash of color in my den.

And imagine making a bouquet of plant trimmings for someone who may be in the hospital or otherwise away from their favorite garden!

Charlotte

How to Dry Catnip

Shirley Honey volunteers to quality check the latest fresh catnip batch. (Charlotte Ekker Wiggins phtoto)

How to Dry Catnip

It seems early to think about Christmas but if you make gifts for cats, this is the time to get that homegrown catnip dried.

Catnip is a perennial herb that, when dried, most cats love. Catnip also makes a nice winter tea.

To pick the catnip at the best time, you want it before it starts generating flowers, that’s when the catnip will be strongest.

It’s time to dry catnip for winter tea and handmade cat gifts. (Photo by Charlotte Ekker Wiggins)

You can dry just the catnip leaves or leave the stems on to dry.

I also leave a separate patch of catnip to flower since bees love it. See the tiny flower heads on the top?

Cut catnip before it blooms to retain its strongest flavor. (Photo by Charlotte Ekker Wiggins)

How to Dry Catnip

Cut the catnip stalks about 4 inches from the bottom. Catnip stalks, like most mints, will have square hollow stalks.

Carefully remove leaves. Only use leaves from plants that haven’t been treated with pesticides or other chemicals.

Place catnip leaves in an open weave basket lined with a paper towel or a cotton napkin. You want a container where air can travel through it. Glass and porcelain containers retain moisture.

If you have saved those little silica gel packets that come with shoes and other items, this is the time to use them. Tuck them under the paper towel to help speed up the catnip drying process.

Silica gel packets will help speed up the catnip-drying time. (Photo by Charlotte Ekker Wiggins)

You want the catnip leaves sitting on top of the paper towels. The paper towels will help absorb moisture as the leaves dry out.

Place the basket in a warm spot. I place my drying baskets on top of my refrigerator.

Turn them every day or so until they are dry.

You can wait to remove plant stalks until after they are dry. (Photo by Charlotte Ekker Wiggins)

If you use cotton napkins, those also make good reusable drying surfaces for catnip.

You can also dry catnip on cloth napkins placed over silica gel packs. (Photo by Charlotte Ekker Wiggins)

Once dry, you can easily remove the dried stalks.

Store in an airtight container for later use.

I also sprinkle cat toy storage containers with the freshly dried catnip to refresh catnip toys.

And those catnip-infused baskets?

I let my cats enjoy playing in them, that helps me to ensure the quality of the dried catnip.

Boo Boo Bartholomew, left, trying to curl up in a small catnip-infused basket. (Photo by Charlotte Ekker Wiggins)

You can also buy dried catnip for homemade toys. Over the years, though, friends and family have told me their cats didn’t like catnip until they tried my toys. I am convinced it is because my toys are made with homegrown fresh catnip.

Christmas is only three months away!

Charlotte

Bouquet Roses

Bouquet Roses

Undoubtedly one of the easiest ways to freshen a room is to add flowers. Whether blooming on a plant or in a fresh bouquet, flowers quickly brighten up a space - and a mood.

This time of year, early fall, is a good time to shop plant sales to find good bouquet flowers.

One of my favorites are “Drift” roses, a small shrub rose that grows small flowers low to the ground, several flowers on one stem.

I found some cut a few years ago and was delighted to find how long they lasted in a vase as a cut flower. Since my flower “arrangements” tend to be simple - a spray of cut roses in a vase can be enough - knowing that these have a long vase life is important.

This variety comes in several colors from white to coral, pink and red. Since they are shrub roses, they tend to be hardier than tea roses, which can be difficult to grow in my soil conditions.

Climbing Roses

You can also use hardy climbing roses for bouquets. Usually a little thornier to handle, these hardy roses will also last a long time in a vase.

So start looking at those late season plant sales and pick up some roses you would like to include in next year’s bouquets.

Charlotte

How to Personalize a Gift with Honey

I package my honey in small food grade plastic jars for easy shipping. (Charlotte Ekker Wiggins photo)

How to Personalize a Gift with Honey

Over the years of gift-wrapping and personalized gifts, it gives me pleasure to know people appreciate the extra effort we make to make the gifts special. One of the things I started to include when I have them is small jars of Bluebird Gardens honey.

I don’t always have them so I don’t market them. And when I do, I just sneak a 2 ounce jar or two into a package.

Recently newlyweds sent me a lovely thank you note, not for the personalized quilt that was included but for the honey.

So just a reminder personalizing a gift with a card, with embroidery, with special wrapping paper - can also include adding a jar of local honey. Honey on a frame is different from one side to the next so if you can hand extract honey into small jars you will have different flavors.

If you aren’t a beekeeper you can find local honey at your local farmer’s market. And if you contact a beekeeper about wanting small jars for wedding and party gifts, I am sure they will be glad to help you.

Charlotte

Lilac Bouquets

Bouquet of fresh-cut lilacs now in my den. (Charlotte Ekker Wiggins ph

Lilac Bouquets

One of my favorite spring flowers are often overlooked for home decor. That’s a shame because old-fashioned lilacs have a lovely scent that can easily fill a room and, with a little trick, can be long-lasting cut flowers.

The trick to using lilacs in flower vases is how you cut them.

With most flowers, a clean bottom cut will ensure that water gets into the flower and keeps them fresh longer.

I use clippers to carefully make two vertical cuts at the woody stem bottom. (Charlotte Ekker Wiggins photo)

The same principle works for lilacs only you also have to make a vertical cut at the stem bottom. The extra one or two vertical cuts provides a wider surface for water uptake, giving the lovely cut flowers a longer life in a vase.

Select lilac flowers still budding for long lasting cut flowers. (Charlotte Ekker Wiggins photo)

Also cut the lilac flowers when they are still in bud and starting to open.

Finally don’t place flower vases full of lilacs close to warm spots like vents, televisions and sunny windows. Keep your flower base full of lilacs in a cool shady spot and you will enjoy the lovely scent for several days.

Now that the lilacs have bloomed, iris and peonies should be blooming next.

Charlotte