Picking Daffodils

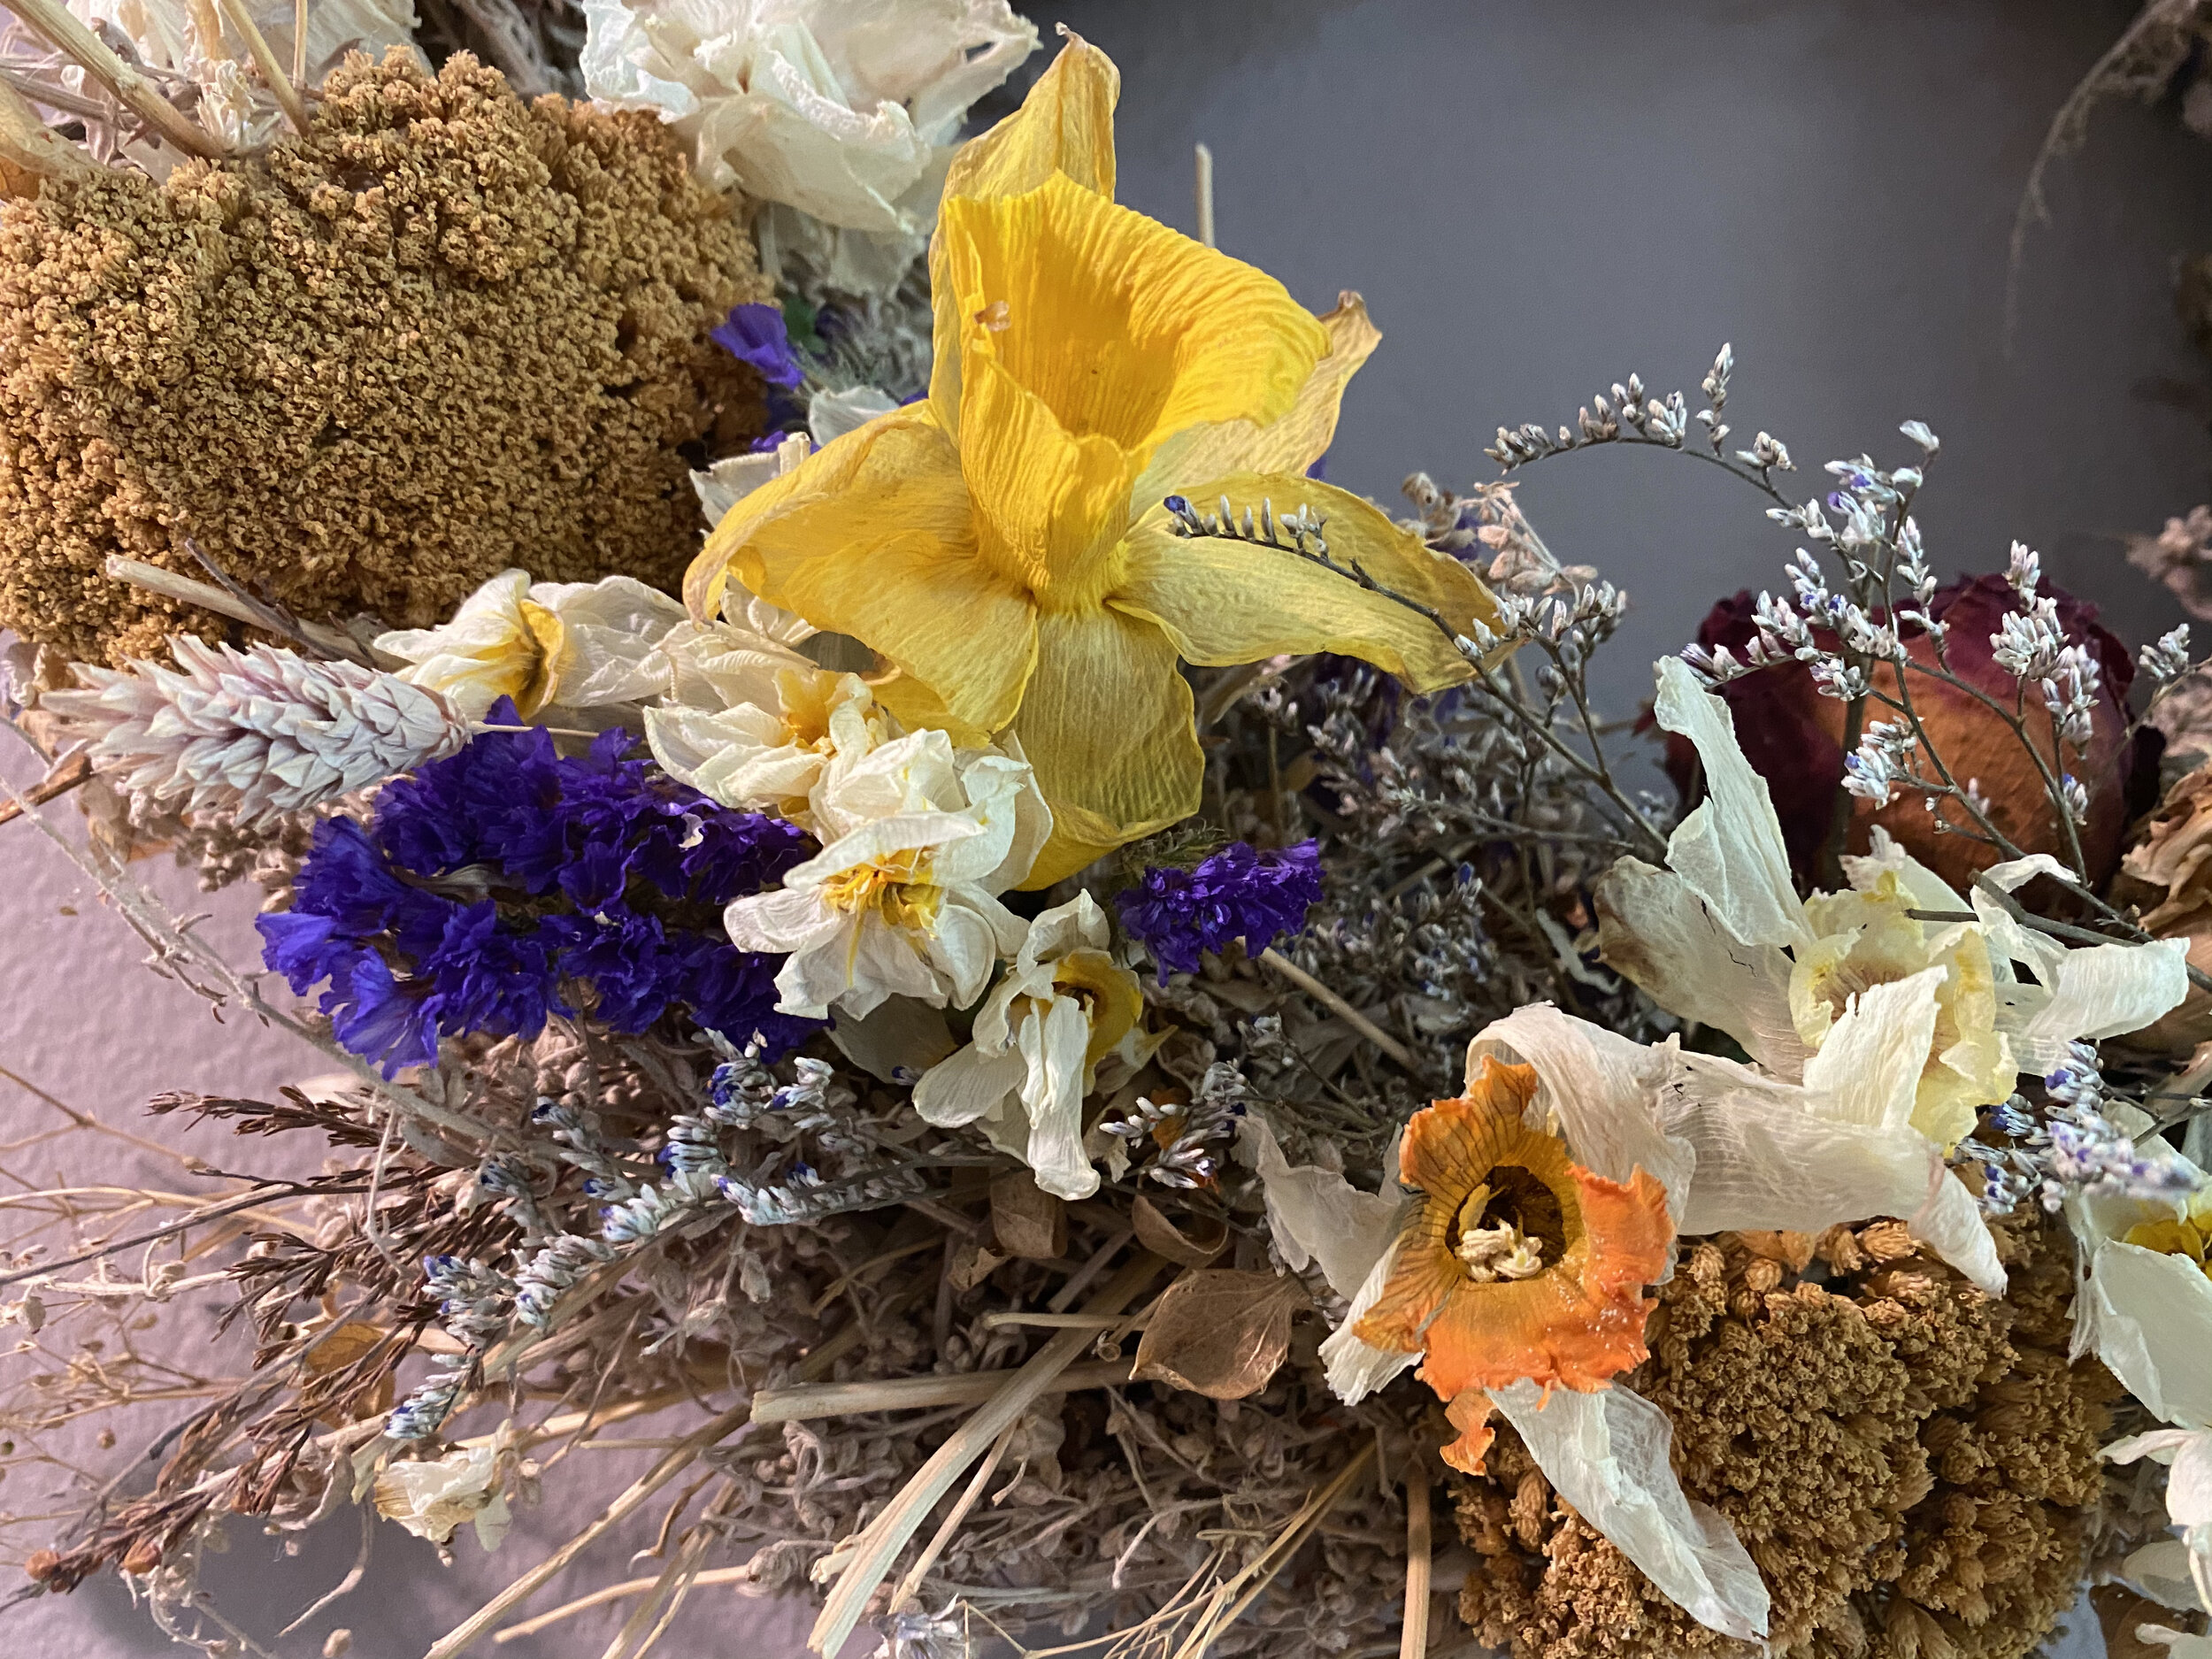
A vase of daffodils will easily brighten any room. Here, Ice Follies. (Charlotte Ekker Wiggins photo)

Picking Daffodil

Some of my daffodils got an early start on spring this year, blooming almost a month earlier than they have in the past. I was good with that; there are few things that easily brighten a room, or spirits, than a bouquet of fresh daffodils.

Friends have told me over the years that they have a hard time deciding when to cut daffodils to bring inside so here are a few tips.

When walking through your garden, look for the daffodils that are bending over. Check the stems. You will find some daffodil stems have been bruised by weather. Those are the ones you should cut since the damaged stems won’t be able to feed the top flower.

Once inside, trim the dry part of the stem off so the fresh stem can take in water.

Bruised stem daffodils are perfect candidates for cutting to bring inside. (Charlotte Ekker Wiggins photo)

My second tip is look for daffodils getting ready to bud. Cutting daffodils in bud form will give them a longer vase life.

They will happily open when inside and exposed to warmer temperatures.

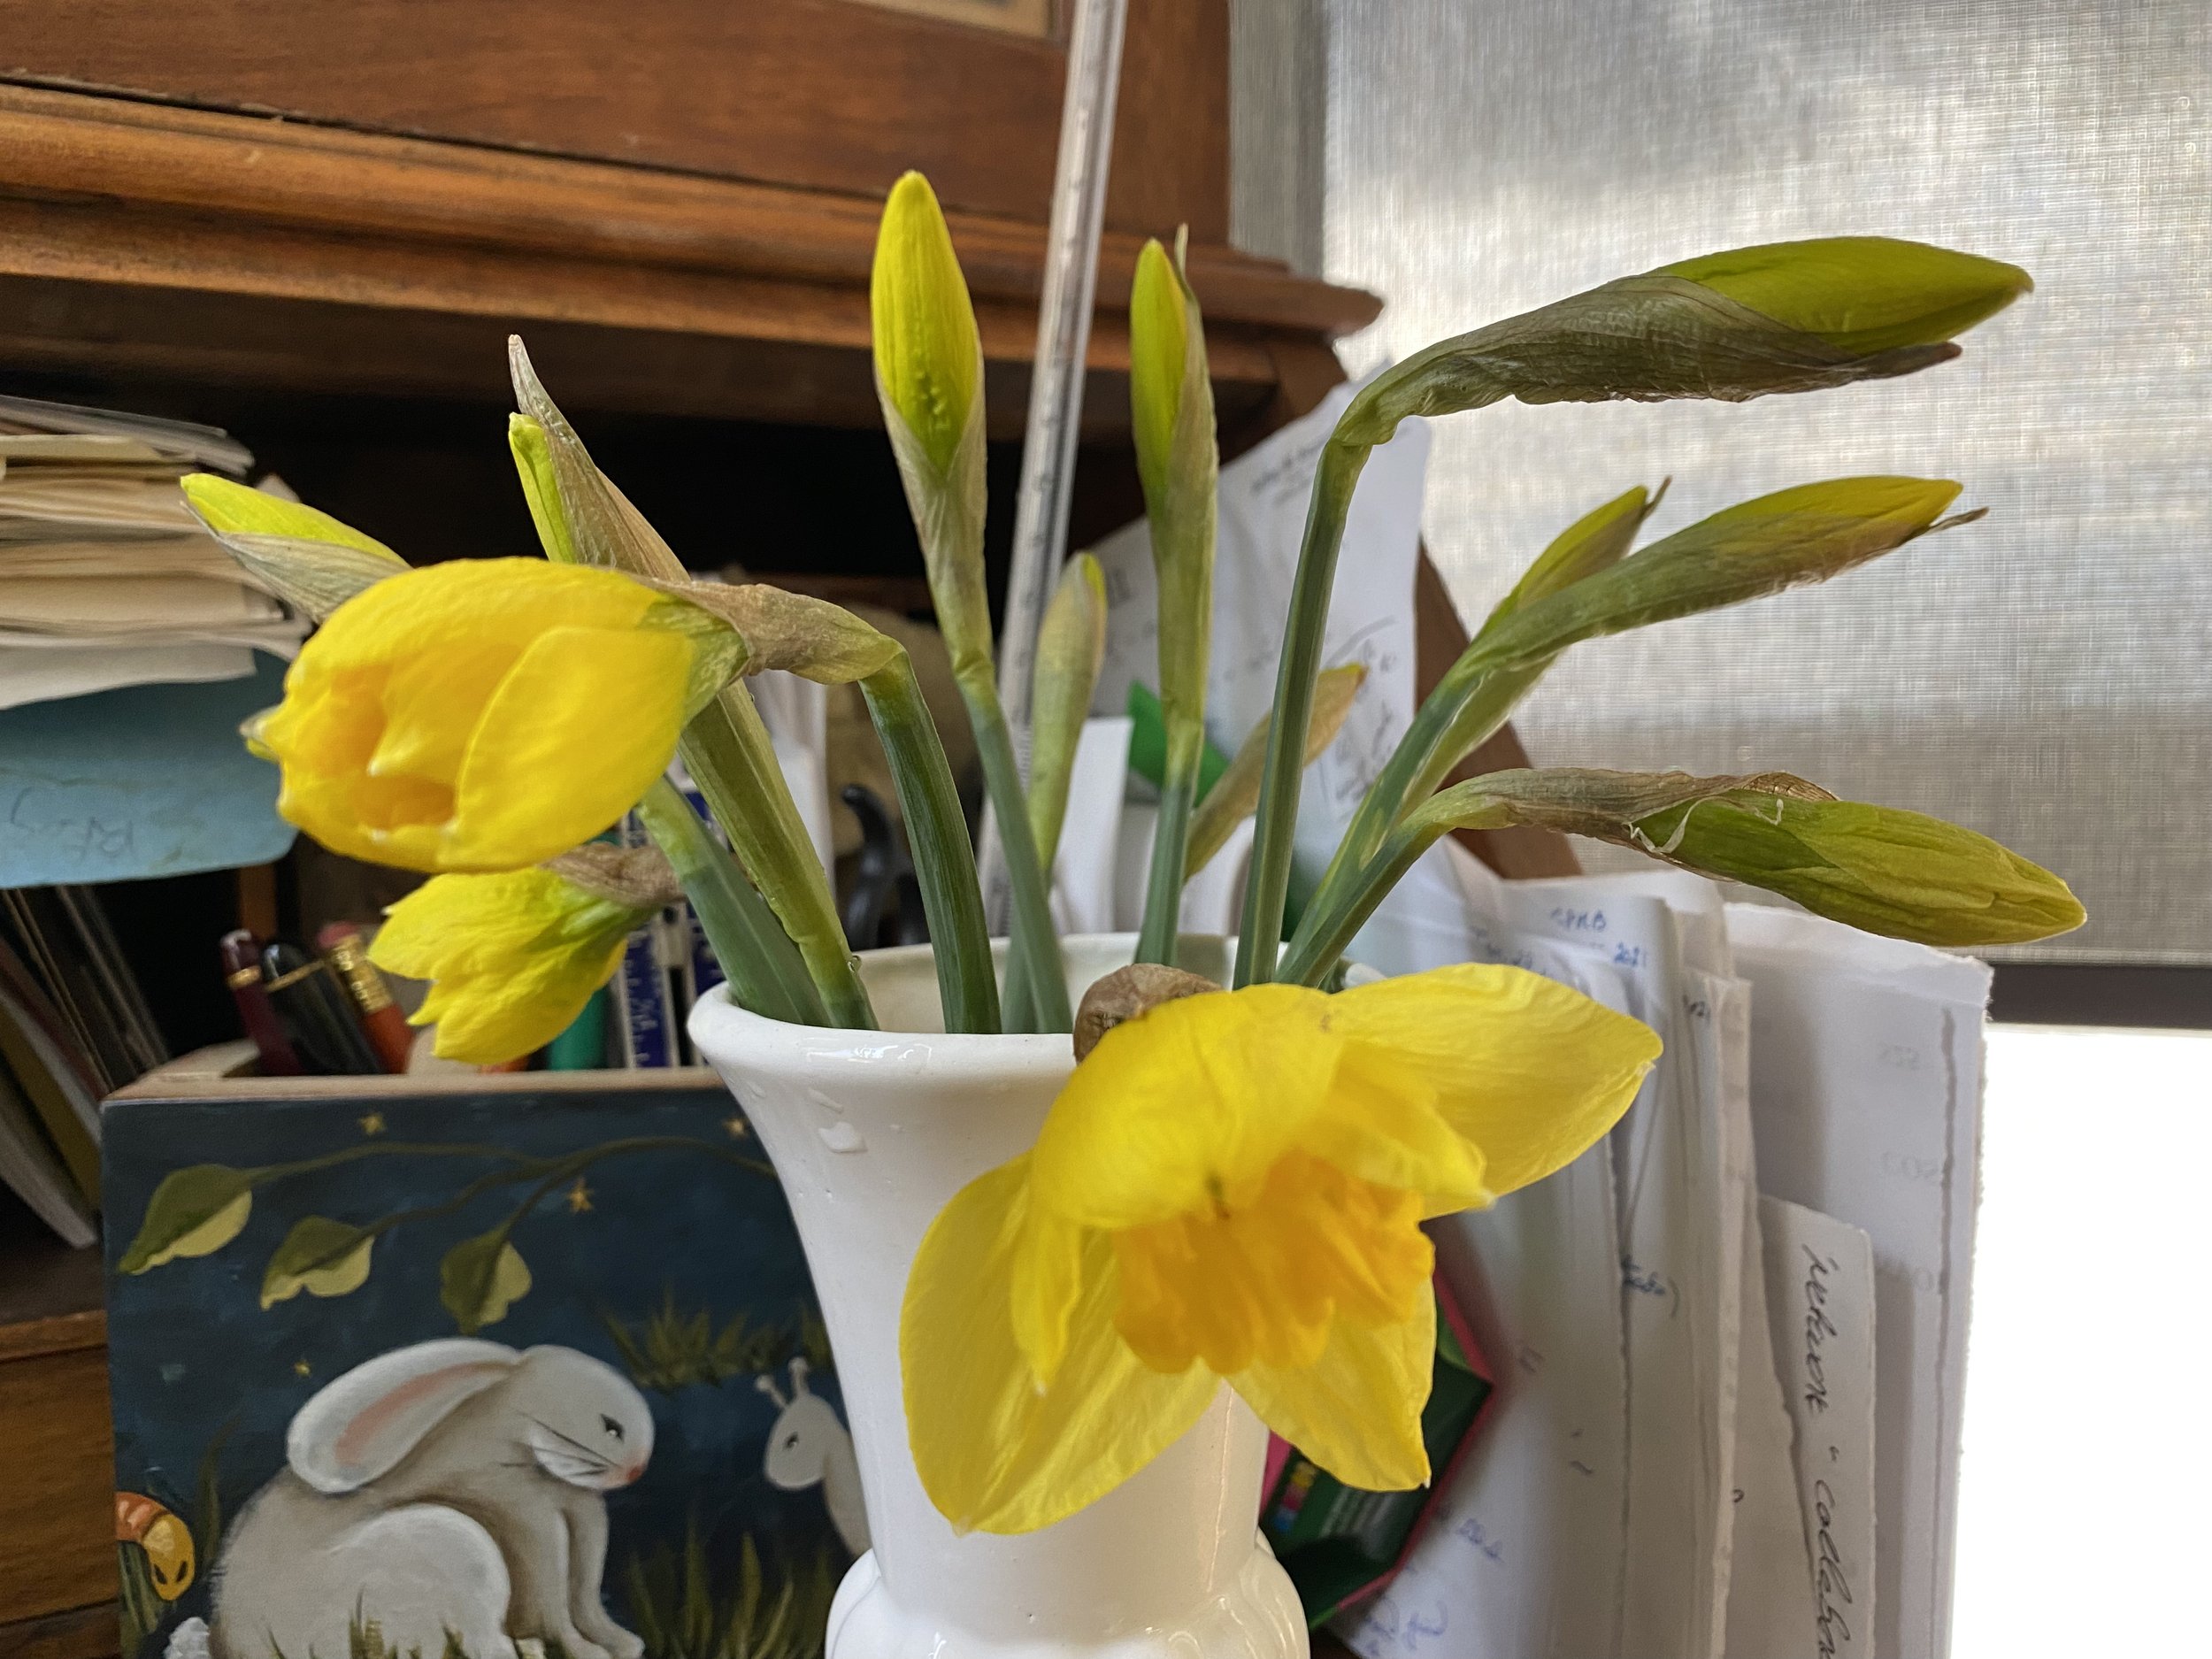
Look for daffodils showing color in their buds. (Charlotte Ekker Wiggins photo)

As you search for buds with color, cut the ones that may be lying on the ground. Not all of them break where they bend but their stems may be damaged. That way you won’t feel as bad cutting the flowers and you leave standing flowers to enjoy in the garden.

These yellow daffodil buds are ready to be cut for an inside bouquet. (Charlotte Ekker Wiggins photo)

So how early should you cut the buds?

Wait until the stem is fully extended and the buds are starting to show color.

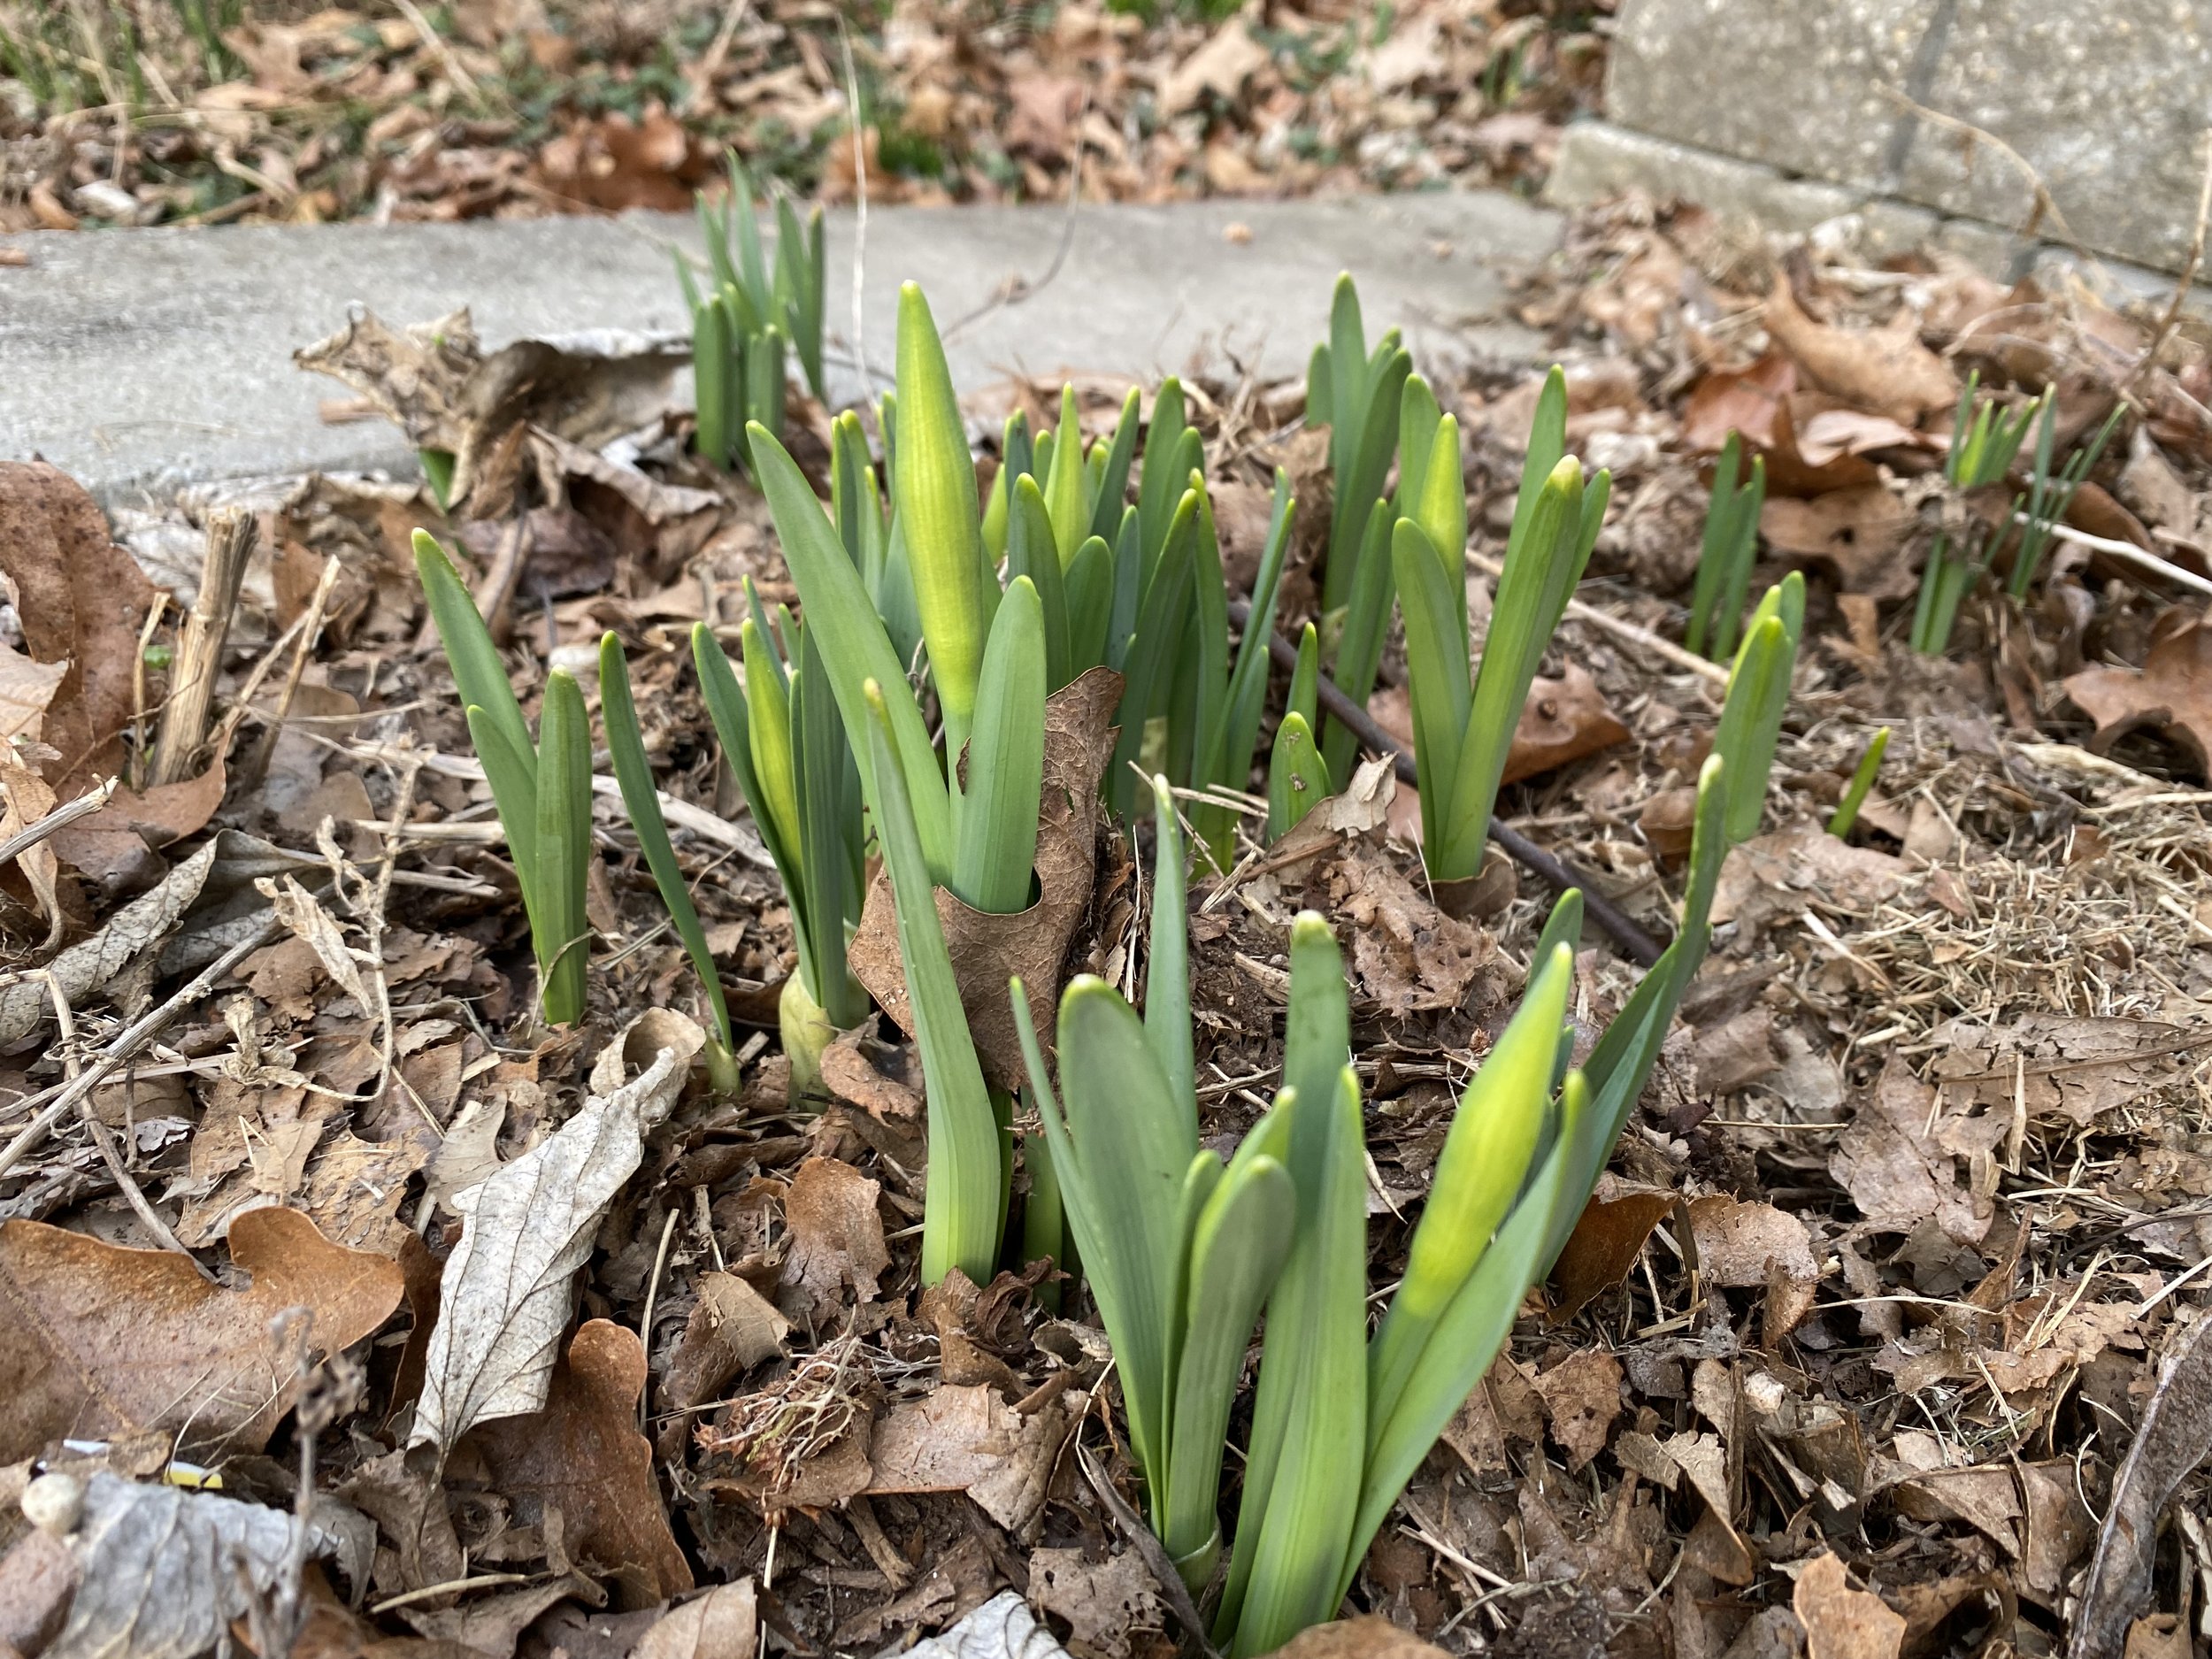
These daffodil buds need a little more growth before being cut. (Charlotte Ekker Wiggins photo)

Once inside, place them in water and replace the water every day or every other day.

One more note: don’t mix daffodils with other flowers, they have a toxin that will kill off other blooms. If you want to mix them, let daffodils sit in water for 24 to 36 hours first so the toxins can drain.

Happy spring!

Charlotte

Amaryllis Care Tips

Apple Blossom re-blooming Amaryllis keeping me company in winter. (Charlotte Ekker Wiggins photo)

Amaryllis Care Tips

If you received an Amaryllis as a gift over the holidays, or any time of the year, here are 16 handy tips on enjoying the lovely flowers and then keeping the bulb healthy so that it blooms again. And again.

Amaryllis brighten up a winter and can bloom for a long time. (Photo by Charlotte Ekker Wiggins)

These orange Amaryllis bulbs were in wax sleeves and on sale when I first brought them home. After several months re-growing roots, they bloomed. (Charlotte Ekker Wiggins photo)

Amaryllis are the South American cousins to surprise lilies. In North America, they can spend summers outside but need to be kept inside over our harsh winters. They are usually sold around Christmas for holiday gifts and understandably so. The bulbs are fun to watch as the flower stems grow. The flowers themselves are beautiful and striking and they can easily brighten up a room corner without taking up a lot of space.

Plant by covering only the roots and cut off the stalk once Amaryllis finish blooming. (Photo by Charlotte Ekker Wiggins)

Plant by covering only the roots and cut off the stalk once Amaryllis finish blooming. (Charlotte Ekker Wiggins)

Tip 1. Plant your Amaryllis bulb in new soil with only the bottom half of the bulb in soil. Do not cover the whole bulb in soil.

Tip 2. Add a stake next to the planted bulb so that you can use it to tie up the growing flower stem. Amaryllis can have 2-feet tall flower stems.

Tip 3. Water around the base of the bulb to keep the soil moist but not soggy.

Cut spent blooms to save plant from making seeds and preserve energy. (Photo by Charlotte Ekker Wiggins)

Cutting spent blooms from this Apple Blossom Amaryllis saves the plant from making seeds and preserve energy. (Charlotte Ekker Wiggins photo)

Tip 4. Once the bulb starts to flower, remove spent flowers so energy goes into the remaining blooms.

Tip 5. When flowers are spent, cut the flower stalk at the base of the bulb.

Once blooms are spent, keep watering so plant grows leaves to collect solar energy. (Photo by Charlotte Ekker Wiggins)

Once blooms are spent, keep watering so plant grows leaves to collect solar energy. (Charlotte Ekker Wiggins photo)

Tip 6. Keep watering bulb until leaves spring from the bulb.

Tip 8. Keep watering so leaves can collect sun and recharge the bulb. This can take about 6 months.

Tip 9. If the bulb is still green with leaves after the danger of frost, place the bulb outside in a shady area.

Tip 10. Once green leaves have died back, stop watering for 8 weeks. You can remove the bulbs and store them in a brown bag in a cool 55F spot or just leave them in the pot. Before watering, replace the top 2 inches of soil.

Tip 11. You can wait until you see the tip of a bud to start watering or time the watering 6 weeks prior to when you want the bulb to bloom.

Tip 11.5. When buying Amaryllis bulbs, look for that little bud tip coming out of the top of the bulb. Go ahead and open the box and look, seeing that beginning round bud tip means you will have at least one flower stalk. Look carefully. If the green tip is skinny that means leaves are starting and you won’t have a flower.

Tip 12. Once Amaryllis are ready to bloom - these are Red Lion Amaryllis bulbs re-blooming - add a stake next to the stems to keep them from falling over. (Charlotte Ekker Wiggins photo)

Tip 13. If you get leaves and not buds, your bulb needs another growing cycle to collect sun to store as energy in the bulb. Follow tips 8-10 and try again.

Tip 14. You may also find tiny baby bulbs growing on the side. You can remove those tiny bulbs and place then in a separate pot so they can keep growing.

There are a number of Amaryllis varieties, mine are usually on sale ones. (Photo by Charlotte Ekker Wiggins)

There are a number of Amaryllis varieties, mine are usually on sale ones. (Charlotte Ekker Wiggins photo)

15. Amaryllis bulbs sold in wax bulb covers may survive if you remove the wax and get the bulbs in soil to regrow cut off roots. Be patient, those bulbs have been traumatized so need to re-establish themselves before they flower.

16. As leaves are growing, feed your Amaryllis bulbs with a multi-purpose fertilizer in water or time release granules.

17. Amaryllis can bloom in sunless spots but will need to be placed back in indirect sun so leaves can collect energy.

Amaryllis bulbs are lovely, fun bulbs to grow and, with a little care, will re-bloom for years to come. I have some bulbs that have been re-blooming now for more than 6 years.

Charlotte

Re-Blooming Moth Orchids

favorite white moth orchids. (charlotte ekker wiggins photo)

Re-Blooming Moth Orchids

You’ve probably seen these in your local grocery store floral section and home and garden store. Maybe you were given one as a gift. Moth orchids are a favorite gift flower for major holidays from Christmas and Valentine’s Day to Mother’s Day.

I love giving moth orchids as gifts myself because they are easy to grow and, with a little exposure to cool conditions, will re-bloom year after year.

Valentine’s Day gift moth orchid, love the polka dots! (Charlotte Ekker Wiggins photo)

Moth Orchids Background

Phalaenopsis Blume, commonly known as moth orchids, are a genus of about 70 species in the Orchid family.

Orchids in this genus have long, coarse roots, short, leafy stems and long-lasting, flat flowers arranged in a flowering stem that often branches near the end. These orchids are native to India, Taiwan, China, Southeast Asia, New Guinea and Australia with the majority in Indonesia and the Philippines.

Sign of new growth, a new moth orchid stem with buds. (Charlotte Ekker Wiggins photo)

I was given my first moth orchid a good 15 years ago or so. Since then, I keep a little stable of continuing-blooming orchids around the house. They not only are long-blooming but they are easy to grow.

Don’t Over Water

The biggest challenge is over-watering. If your moth orchid still has decorative foil around the pot, discard the foil and give the pot a saucer.

Some of these moth orchids are promoted as getting two ice cubes a week. I personally prefer not to give my tropical orchids something cold. I give them a splash of water once a week out of a room temperature watering can. If I had to guess, it’s closer to 1/8th cup of water.

Another option is to immerse your orchid in room temperature water for a few minutes, then let the water completely drain out of the orchid pot.

Indirect Light

Blooming moth orchid flowers will last longer if they are kept out of direct light.

In between blooming cycles, the orchids like indirect light as well. Mine seem to do well in southeast windows.

Cool Temperatures

Once they’ve finished blooming, I also move my moth orchids to the basement where they get indirect southern light. The basement is also cooler than the rest of the house and that cool period triggers new growth.

Give your orchid fertilizer only after it’s bloomed. I give mine half the recommended amount.

This is the 4th time these white moth orchids have re-bloomed. (Charlotte Ekker Wiggins photo)

Bug Management

Sometimes in winter some of my moth orchids will get aphids. A warm water bath following by a towel trying is a good start. Then I spray with alcohol to remove anything I missed.

Although there are a variety of different-colored moth orchids, the white ones are often used in TV studio and staged home decor.

Another white moth orchid currently in bloom. (Charlotte Ekker Wiggins photo)

This white moth orchid is another re-blooming one I’ve had for many years. To keep track of colors, I cut up an old blind and have the colors marked on the blind piece and snuck into the tree bark.

Not all of them, it’s still fun to now know what color will re-bloom until it does.

Charlotte

Napping Blanket Fold

Fold blankets so they can easily be pulled over your legs. (Charlotte Ekker Wiggins photo)

Napping Blanket Fold

We are getting ready for another winter storm with much rain followed by ice and snow. And lots of traffic accidents because people don’t slow down when weather conditions change. The forecasters have been careful with snow accumulation predictions so far except to say at least 4 inches. Where I live in the US Midwest, that’s a call to go grocery shopping, and to stay home if you have the luxury of doing so.

I like winter storms. I like what they do for gardens, adding back moisture and stratifying wildflower seeds. It’s also a good excuse to recharge batteries so besides getting groceries, I like to check my blankets for napping readiness. There are few things more fun to do in the middle of a winter storm than curl up with a book, a cat, and a warm blanket that entices one to a nap.

For years I have kept lap quilts and throws at the foot of beds. I used to fold them once in the middle, then once again before settling them. However, when I was ready to take a nap, it was hard to pull them over my legs so I developed a new folding technique.

Etta Girl almost gets lost in the folds of this equally gray fake fur throw. (Charlotte Ekker Wiggins photo)

First, the fake fur throw in the photo was purchased at a local thrift store for the two kittens I found abandoned on a county road in 2020. The idea was the throw would give them a sense of having Mom around. They didn’t spend much time on it as little kitten nuggets but they sure like it now that they are teenage cats. Especially on cold, winter days.

James A Mess likes to curl up on mama throw in the mornings. (Charlotte Ekker Wiggins photo)

So back to the original topic, the idea is to make it easier to pull the throw at the foot of the bed over your legs when all you want to do is nap.

I tweaked the approach a little, starting with turning the open end of the fold towards the pillow.

Reverse the blanket folds so the opening is towards pillows. (Charlotte Ekker Wiggins photo)

That worked for a while but I was still getting my legs caught up in the blanket as it unfolded.

Then I started folding the throw in thirds, leaving the open top end facing the bed pillows. That’s what creates the fold facing bed pillows.

That way once you fall, or crawl, into bed, all you have to do is tug the top end of the throw to pull it over yourself.

Fold the blanket in thirds instead of fourths. (Charlotte Ekker Wiggins photo)

If you have a cat sleeping on the throw, it’s also a more gentle way to move the cat towards you with the least disturbance.

It may take a couple of tries to get the idea but once you can easily move the cat, take a nap and cover yourself, you won’t go back folding your lap quilts and throws any other way.

Pull the blanket top to unfold it over your legs as you nap. (Charlotte Ekker Wiggins photo)

Now I may have forgotten a step or two so I plan to confirm this technique as soon as the snow storm hits. Or the nap, whichever comes first!

Charlotte

Cyclamen Care Tips

A white cyclamen gift keeps me company in the kitchen. (Photo by Charlotte Ekker Wiggins)

Cyclamen Care Tips

I can’t remember the last time I had a blooming cyclamen but I’m back in the fan club with this white variety now keeping me company in the kitchen.

Cyclamen is a member of the Primrose family, and grows around the Mediterranean. The species that has achieved houseplant status, Cyclamen persicum, originates from Persia, present-day Iran. The philosopher Plato described the plant as far back as the 4th century BC.

The small plants have very interesting heart-shaped marked leaves and flowers sitting on top of long stems.

When I was growing cyclamen a few years back, I remember I was most successful growing them in the east window with indirect sunlight. I also marked them as the leaves died off. The plant needs a couple of months of rest before starting a new growing cycle.

Another challenge is over-watering. Water only when the soil feels dry to the touch but don’t let them sit without water for long, they like to have consistent moisture.

Once blooms fade, leaves start turning yellow and fall off. (Photo by Charlotte Ekker Wiggins)

Yellow leaves can be caused by a couple of issues. Too much water will prompt leaves to lose their green color. The leaves will also turn as the plant starts to fade.

Flowers will also develop seed heads, which I cut off so the plant doesn’t exhaust itself.

Once the leaves die back, give the plant a rest for 1-2 months, then start watering again to see it re-bloom.

Charlotte

Holiday Poinsettia Care

Charming gift poinsettia from a neighbor keeping me company in the kitchen. (Photo by Charlotte Ekker Wiggins)

Holiday Poinsettia Care

Millions of poinsettias will be making their way from retailers to homes this week, a popular holiday decorating as well as gift item. One of the biggest mistakes I see people making, especially in temperatures below 70F, is taking the poinsettias out from a warm environment into cold. If you are purchasing poinsettias for whatever reason, ask them to be wrapped and, better yet, have a lightweight blanket you can place around the plant(s) as you move them to a warm car you drive close to the retailer entrance.

These are tropical plants, native of Mexico, and they don’t do well in colder temperatures. If you want to extend their life span, make sure to keep them warm as you move them home and present them as gifts. I keep brown bags stashed in the garage just for this kind of contingency. Brown bags will help protect the delicate poinsettia bracts from the cold.

Secondly, when shopping for a poinsettia, look in the center for tighly-closed yellow buds, those are the actual flowers. Poinsettias without yellow centers are older and won’t last as long.

Finally, place your poinsettias away from a heat source in indirect light.

If they have tin foil over the pot, remove the tin foil and add a saucer underneath. Don’t overwater, keep the soil moist without being water logged.

With a little care, you can keep your poinsettias through the year to re-bloom next year.

Last year’s gift poinsettias re-blooming for this year. (Photo by Charlotte Ekker Wiggins)

This was a gift poinsettia from two years ago now that has survived construction, poor watering schedule and getting knocked over a couple of times while it was summering outside.

The bracts, or leaves when they are green are a pretty shape and color and can easily be included in with other shade plants. I like them bunched up with my straight-leaf Bromeliads under trees in summer.

If you would rather not have to water anything, you can add the poinsettia vibe in your home decor with our crochet poinsettia throw.

Poinsettias emit a white sap when cut or broken. For some time it was assumed the sap was poisonous but it isn’t. I don’t let me cats chew the bracts but that’s more for the aesthetics of it.

One last note: poinsettias are red and may continue to bloom into Valentine’s Day, February 14 so enjoy these lovely plants through several seasons.

Charlotte

Fabrics N More Store

Fabrics N More, Rolla, Missouri, 2100 North Bishop, is a crafters delight. (Photo by Charlotte Ekker Wiggins)

Fabrics N More Store

Most communities have a variety of retail stores and one of the most sought-after for quilters and crafters is a fabric store. Luckily for me, our mid-Missouri small college town has a gem of a store in Fabrics N More at 2100 North Bishop, behind Big O Tires off Highway 63 North.

Open Mondays, Tuesdays and Fridays from 11 am. to 3 p.m., the store carries a nice range of fabrics from 100% cottons quilters love to fleece, flannels and specialty patterns. Since I buy Bluebird Gardens custom quilt fabrics from the same supplier, I can attest to the fabric’s high quality and good pricing.

For those just starting to learn how to select fabrics, Shelley Gregory notes the fabric’s manufacturer is listed on the edge of the fabric, along with the name, in case someone is trying to find an extra yard or two to finish a project.

One of the extra bonuses of shopping here is that there are large glass windows nearby so one can more easily match fabric colors by looking at them in natural light. I can’t tell you how many times I picked up a fabric under artificial lighting only to find it was just a tad off when I got it home.

Fabrics N More Store Owner Shelley Gregory also offers quilting services. (Photo by Charlotte Ekker Wiggins)

Shelley and her brother Gary opened the store many years ago. In addition to a wide variety of quality fabrics, Shelley also offers overall pattern quilting services for those wanting to get quilts machine quilted. That’s a great service to have since most quilters who piece their quilt tops don’t actually finish their own quilts by quilting but depend on others for the finishing steps.

Tables with fabrics have pricing posted in the center. (Photo by Charlotte Ekker Wiggins)

The traditional way to finish a handmade quilt is to use white cotton on the back. For many years, Bluebird Gardens quilts have used other fabric colors on the back to make our custom quilts reversible, giving the quilt a double life. It’s not always easy to find potential quilt backing fabrics so Shelley currently has a selection of patterned floral fabrics that nicely fit the bill.

Today’s find, cotton fabrics perfect for quilt backing. (Photo by Charlotte Ekker Wiggins)

For many beginning quilters, deciding what pattern to put on their first quilts also can be daunting. I’ve listened to Shelley over the years walk a customer through quilting options and make excellent recommendations on what quilting pattern to select.

One of the many overall quilt patterns available. (Photo by Charlotte Ekker Wiggins)

Machine quilting rates are as follows:

Crib $26

Twin $31

Full/queen $41

King $51

California King $56

Hand binding $20

Making a backing $5

Shelley notes to make sure backing is at least 5 inches bigger on all sides so there’s enough fabric to cover the quilt top as it is quilted. The stitching will take up some of those extra inches.

And one more surprise at this favorite fabric store of mine, Shelley carries a wonderful supply of embroidery thread. She said she bought out some other store inventories to keep her supply nicely stocked. I have a hard time not walking by not one but two sections and slipping a few pieces home with me, just in case.

Another treat, a wonderful source of embroidery thread. (Photo by Charlotte Ekker Wiggins)

So as you get started on Christmas gifts - and maybe are finishing some you started earlier this year - add this fabric store as a go to place to check for fabrics, embroidery floss and quilting. And tell Shelley I sent you!

Charlotte

Drying Flowers

Russian sage, a favorite dried flower for wreaths, hanging up in my garage to dry. (Photo by Charlotte Ekker Wiggins)

Drying Flowers

Some of us may remember when wedding and dance bouquets were dried and saved under glass, either a dome or in a picture frame or shadow box. A friend of mine said she just goes to a hobby store and buys her dried flowers. Certainly an option but a lot more expensive than walking through your garden and gathering a few stems to dry.

Now for years I thought drying flowers was a complicated process. After I started, I found in general popular flowers can easily be dried for use in wreaths, bouquets and home decor including vases and baskets.

Start by looking at what flowers dry naturally still on the plant stem. Some will hold their shape; others may have pretty seed pods. It’s a great opportunity to leisurely walk through your garden and observe your plants at the various stages. I tend to leave seeds on the stem for birds and have found some interesting seed pod shapes once the seeds were consumed.

How to Cut Flowers for Drying

When cutting flowers to dry, cut long stems to they can easily be tied and hung to dry.

The shelf brackets with hooks can also hold paper towels. (Photo by Charlotte Ekker Wigigns)

I didn’t plan this when I was putting garage shelves in but they sure come in handy for flower drying. I have these metal shelf brackets that include a hook at the end. I have a round closet pole running through them on the bottom rung where I keep easy to reach paper towels and, right now, dried flowers hanging.

These shelf hooks make easy flower hanging spots. (Photo by Charlotte Ekker Wiggins)

Here’s another view of the metal shelf brackets with hooks on the end and two tied up drying flower bouquets.

Keep stems long so they can easily hang from the shelf brackets. (Photo by Charlotte Ekker Wiggins)

I first tie the end of the stems, then make a second loop with a bow tie that hangs from the hooks. If the flowers are heavy, I may do a double knot to keep them from falling.

To make it easier to dry flowers, I keep a ball of twine with scissors close to the hanging brackets. I like this twine because it easily dries if it comes in contact with wet stems.

Keep a ball of twine and scissors handy. (Photo by Charlotte Ekker Wiggins)

Once dry, I spray with a clear coat of polyurethane outside and let dry before I bring them in to help preserve them. I can remember my mother using hair spray before polyurethane!

Over the growing season, I add dried flowers to this inside wreath hanging in my den. This year it has daffodils, roses, yarrow, sedum, balloon flowers, straw flowers, lavender, Russian sage and some dried seeds with an interesting shape.

Flowers that don’t dry well this way include marigolds, daisies and zinnias.

Every year the wreath looks a little different depending on what dried flowers I add.

Dried greenery and lavender decorate this grapevine and make a sweet welcome. (Photo by Charlotte Ekker Wiggins)

I don’t spray this wreath; it’s hanging on an inside wall without sun exposure so the dried flowers are protected from fading.

This wreath reminds me of the Vintage Knitted Flower Quilt where each block features a different flower.

Drying and preserving flowers from someone’s garden would make a sweet personalized gift!

Charlotte

Get Ready for Holidays

Ship gift packages a good three weeks earlier this year. (Photo by Charlotte Ekker Wiggins)

Get Ready for Holidays

Everywhere one looks, the predictions are that this is going to be a tough holiday if one doesn’t plan ahead. And by ahead I don’t mean calling us typically on December 15 and asking for gifts to be delivered by December 25. Although we have assisted in the past I can tell you now this year that just won’t be possible. Our shipping carriers have already notified us of planned delays as well as increased shipping prices. Your best bet is to plan ahead.

Here are some tips on how to get ready for the holidays:

  1. Think three gifts. Gift-giving is a holiday tradition but it may be more challenging this year because of supply shortages and delivery issues. A friend started her family tradition by giving three gifts per person inspired by the Three Wise Men who visited Jesus Christ in Bethlehem. One gift is practical; one gift is spiritual and one gift is a secret desire of some sort. Half the fun is planning each gift.

  2. Plan on back ups. Because inventory will be in short supply, plan on backup gifts if your first choices are not currently available. Chances are hight that if the item is out of stock it won’t be available this holiday season.

  3. Shop online early. From short inventory to delays in shipping, if you want to increase your chances of getting the gift items you want for the December holidays, order them no later than November 1.

  4. Enlist family members to help you find, or make, items. I enjoy treasure hunts but only if I have time to do the hunting.

  5. Think quilts. If there ever was a time we all need comfort, this is one of those times. Quilts not only provide comfort and warmth but they help to quickly update any room decor by turning into a wall hanging. I like Twelve Good Wishes Quilt and Wall Hanging.

  6. Plan events together. After the COVID 2020 quarantine and the ongoing worldwide pandemic, just being with friends and family is a gift all of its own. Instead of focusing on gifts, plan events where you can safely share time with family and friends.

  7. No custom orders. We usually close off custom orders by September 15 to ensure we get all of the holiday gifts made and delivered in plenty of time. This year we cut off custom orders September 1 and are still working on wrapping up orders for this year. If you want something custom, start planning for 2022 and plan on at least 3 months from when all of the details are finalized and in hand. Paying extra will not speed up the process; our items are handmade and we maintain a high level of quality and craftsmanship.

  8. Ship by November 15. If you are sending gifts through the mail, plan on shipping a good three weeks earlier than you usually do. I am setting November 15 as the personal deadline to get any gift packages shipped this year. The shortage of drivers and the usual higher shipping volume this time of year makes deliveries challenging. Take the pressure off of you, and the delivery services, by shipping early.

    Charlotte

Small Flower Bouquets

All of these flowers were bent or otherwise severed from their stems. (Photo by Charlotte Ekker Wiggins)

All of these flowers were bent or otherwise severed from their stems. (Photo by Charlotte Ekker Wiggins)

Small Flower Bouquets

As garden bounty hits mid-season, it’s easy to focus on big flower bouquets for home decor but think again. Small flower bouquets are more practical and convenient, and you can use those flowers that were bent or inadvertently cut.

I was not feeling my best earlier this week so I headed out to the garden to do some maintenance. In the process, I ended up with a handful of flowers that were broken off from their stems. It could be a deeper cut than I intended to make when clearing an area, or my brushing against a stem and breaking it in the process. Whatever the accident, I brought those flowers inside to enjoy in a flower vase close to my working space.

This small flower bouquet in the photo started out with two small red zinnias that were knocked over in a rain storm. I added a few springs of purple monkey grass flowers to fill out the vase, then I broke a stem of surprise lilies. There’s a dahlia bud in there somewhere, too, I bring whatever flowers inside to add to the bouquet.

These scented roses were cut off of plants I’m getting into the ground. (Photo by Charlotte Ekker Wiggins)

These scented roses were cut off of plants I’m getting into the ground. (Photo by Charlotte Ekker Wiggins)

Another opportunity to make small flower bouquets is when you are planting. Plants need to concentrate their energy getting their roots established. I cut off the flowers of those plants and bring them inside so the flowers don’t sap the plant’s energy.

When the flowers start to fade, I will compost those and look for something new to add.

Having small flower bouquets are a quick way to brighten your day and to enjoy those “oppsie” cut flowers.

Charlotte

Fresh Catnip

Catnip is an easy to grow herb cats enjoy fresh or dried. (Photo by Charlotte Ekker Wiggins)

Catnip is an easy to grow herb cats enjoy fresh or dried. (Photo by Charlotte Ekker Wiggins)

Fresh Catnip

It’s midsummer where I live in the US Midwest. If you haven’t started growing your own fresh catnip to make into gifts, there’s still time. You can either start it from seed or pick up a starter plant from your local home and garden center, I saw some at two home and garden centers earlier today.

Catnip, Nepeta cataria, is a common herb and a member of the mint family. I’ve successfully grown it for years in my limestone hillside garden. It grows in most soils and is easy to grow from either seeds or starter plants.

Effects of Catnip

According to PetMD, about 60% of cats respond to catnip. Cats have an extra scent organ called the vomeronasal gland in the roof of their mouth. This special pathway allows scents that are collected in the nose and mouth to be carried to the brain.

Nepetalactone is the oil that’s found within the catnip plant’s leaves that can cause behavioral changes in cats. Catnip scent mimics feline sex hormones, so cats enjoying this substance will often display behaviors similar to a female cat in heat. Both male and female cats can experience the effects.

With dry catnip, cats may show overt signs of affection, relaxation, and happiness. Other cats will display active behaviors, such as playfulness and sometimes even aggression. For cats that have a positive experience with catnip, it can help reduce anxiety and even relieve pain. Some veterinarians have recommended using catnip to help with separation anxiety if a cat will be home alone for an extended period of time.

Quality Field Testing

All of my cats have enjoyed dried catnip over the years. They seem to know which are homemade toys with dry catnip and which ones are store-purchased. They also like to roll in the catnip drying basket so I keep it high and off the ground.

With fresh catnip, they have developed a taste for a tiny spring or leaf every day. Once they have their treat they seem relaxed and settle into a morning nap, the inspiration for my sleeping cats quilt design.

I don’t give them more than a couple of leaves at a time so they don’t get a tummy ache.

Catnip Gifts

You can buy dried catnip, too but I prefer to raise my own without using any chemicals. I harvest the leaves through spring and dry them in paper-lined baskets over my refrigerator. Once dry, I store the dried leaves in a glass container for later use.

Interestingly enough, I learned a few years back that bees also love catnip so I am encouraging any and every plant to grow wherever it settles. I harvest leaves before it flowers to get the strongest catnip, then the bees get the flowers. Once the flowers turn to seed, they then will grow more catnip plants. I haven’t had much luck so far timing trying to collect the seeds before they get naturally dispersed.

James A. Mess, top, and Etta Girl, bottom, enjoy a fresh catnip sprig daily. (Photo by Charlotte Ekker Wiggins)

James A. Mess, top, and Etta Girl, bottom, enjoy a fresh catnip sprig daily. (Photo by Charlotte Ekker Wiggins)

Catnip leaves have also been used to make tea, and the flowers are said to relieve coughs. It’s also a main ingredient in some natural bug sprays. 

Catnip Gift Ideas

If you have several plants started, you can pot each plant for a gift to another catnip-loving plant. When planted outside, they are perennials so they will come back from year to year.

Once dry, you can make small jars of dried leaves as gifts. Add a tag explaining what it is and how to use it. Every Christmas I make felt toys full of dry catnip for friends and family. If your cats don’t respond to store-purchased catnip toys, try freshly-dried catnip and see if their reaction changes. Many store toys have old dry catnip that has lost its scent.

This winter I am going to try to winter the catnip pot over inside, maybe in a hanging basket. We all know that poor catnip plant will not safely make it inside if if I keep it low to the ground and within easy paw reach!

Charlotte

Ode to Mulch

The mulched path from the front of my house where I release turtles. (Photo by Charlotte Ekker Wiggins)

The mulched path from the front of my house where I release turtles. (Photo by Charlotte Ekker Wiggins)

Ode to Mulch

If you have relatives and friends visiting; if you are selling your house or you just want a pick me up as you drive up to your house, get some mulch. Mulching flower beds and walkways is the quickest and easiest way to give your home and garden landscaping a new and finished look. Think of mulch as your garden’s carpet, giving your landscape a finished look.

By definition, mulch is a protective ground cover that reduces evaporation of soil moisture, helps maintain uniform soil temperatures, reduces soil erosion, controls weeds, and, in the case of organic mulches, enriches the soil. And, may I add again, it makes your garden look great.

Mulches are classified as organic or inorganic.  The organic mulches include straw, compost, leaves, pine needles and barks.  Inorganic mulches include plastic, rocks, chips and other non-plant materials.

Benefits of Garden Mulch

I use organic garden mulch for a variety of good reasons:

1. Mulch prevents soil moisture loss by up to 70 percent.  This is especially true with a reasonably thick layer of organic mulches. 

2. Mulches help keep the soil cooler in the summer and warmer in the winter. It also keeps soil temperature even and reduces fluctuating soil temperatures, helping to give plants a better growing environment.

3. Mulching helps reduce rain splash and runoff, especially gardening as I do on a Missouri limestone hillside. Reducing splash and runoff can significantly reduce the spread of several types of plant disease organisms.

4. If you use a thick mulch layer such as 4-to-6 inches, you should reduce the growth of unwanted plants. And if you like herbs, you will find herbs love that growing environment!

5. Organic garden mulches will also enrich the soil as they decay. The humus they form provides nutrients to the soil, which helps refresh and keep soil healthy.

6. Mulch helps give my garden areas a finished look. Think of garden mulch as your garden’s carpet!

Most Common Garden Mulches

Here are some of the more common organic garden mulches:

Wood Chips. I get mine from our local recycling center. I want the older wood chips, the ones that have started to decompose and are not generating heat in the process. If I do get the more recently chipped wood, I use those on paths where I don’t want plant growth and let a pile for flower beds sit for half a month before using.

Leaves.  Leaves are one to the least expensive mulches.  I apply leaves as mulch in the fall when I can access ample supplies from our local recycling center. Leaves are slow to decompose and provide winter cover for a number of beneficial garden bugs.

Pine needles.  Abundant in some areas, this popular mulch provides a uniform covering for beds and pathways.  Because pine needles are moderately acid, they are well-suited for acid-loving plants such as azaleas and gardenias.

My handyman found me this little wood chipper so I can make my own mulch. (Photo by Charlotte Ekker Wiggins)

My handyman found me this little wood chipper so I can make my own mulch. (Photo by Charlotte Ekker Wiggins)

More on Garden Mulch

Now there are a number of different tinted mulches on the market. Steer away from those if you can. The best mulch is the natural, chipped wood. You can even buy a “chipper” and make your own mulch from downed tree limbs. I have a small one that is helping to clean up downed branches that will get returned to the garden in even smaller pieces so that it can be re-incorporated into soil.

For nearby trees, don’t pile the garden mulch up against trunks. Make a well between the tree trunk and the mulch to help capture rain water and keep the mulch away from tree trunks.

Another advantage of putting mulch on garden paths is that it’s kind to your knees. Mulch cushions your walk on paths making the experience much more enjoyable.

Oh, I don’t plan on moving any time soon, I have a wonderful recycling center right where I live.

Charlotte

Dry Daffodils

Every year I update this dried flower wreath with dry daffodils. (Photo by Charlotte Ekker Wiggins)

Every year I update this dried flower wreath with dry daffodils. (Photo by Charlotte Ekker Wiggins)

Dry Daffodils

Don’t toss out those dried up daffodils in your flower vases, you can dry them out further and add them to dried flower arrangements and wreaths. Or start your own with a basic wreath form and have fun adding flowers with special memories.

And if you just want something interested to add to a book case, just leave those dried daffodils in a flower vase, they will retain their color.

IMG_1369.jpeg

I use dried daffodils to update my dried flowers wreath. The wreath was a gift several decades ago so it an use periodic refreshing. One of the unexpected flowers I now like to add is daffodils.

Daffodils are long-lived in gardens and flower vases. After enjoying them in a vase, I will set them aside to dry. Once the daffodils are dry, I place them in a jar without water to allow the stems to dry out. Depending on your room conditions, this can take a few days to a couple of weeks.

You can also tie the stems together and hang them upside down in a garage to allow the whole flower to dry. Just remember to periodically check them because the stems will shrink and easily slip through whatever you used to tie them. Rubber bands work well if they aren’t applied too tightly.

This dry wreath holds other dried flowers with special memories. (Photo by Charlotte Ekker Wiggins)

This dry wreath holds other dried flowers with special memories. (Photo by Charlotte Ekker Wiggins)

Once the flower head is dry, you can add them to a wreath or flower arrangement.

If you wait for the stem to dry, it may be a little brittle so I like to add the dry daffodils before the stems dry out. The still green stems make it easier to weave the stem through the wreath.

Take a look at what adding just solid yellow daffodils does to a dried flower wreath.

Dried yellow daffodils add a nice dash of brightness. (Photo by Charlotte Ekker Wiggins)

Dried yellow daffodils add a nice dash of brightness. (Photo by Charlotte Ekker Wiggins)

Dried daffodils hold their color and add a nice pop of spring colors to dry wreaths and flower arrangements. Our native wildflowers don’t dry as well as more domesticated and hybrid flowers so try drying the flowers you like and see what happens.

I was happy to discover the daffodils hold their color and dry so well. And what a nice way to preserve spring colors you can enjoy the rest of the year!

Charlotte

Sweet Gift Kits

Hand-embroidered kitchen towels get a couple of honey samples to sweeten the gift. (Photo by Charlotte Ekker Wiggins)

Hand-embroidered kitchen towels get a couple of honey samples to sweeten the gift. (Photo by Charlotte Ekker Wiggins)

Sweet Gift Kits

The customer wrote on her order form that this set of hand-embroidered kitchen towels were going to her best friend. She wanted the towels gift-wrapped and shipped directly to her best friend with a lovely card telling her how much she was loved.

Now that I have a working apiary, I keep a supply of small honey containers ready to include in these special custom gifts. In this case, I had small containers of honey and creamed honey so I added one of each. I also included a small wooden honey dipper.

If you want to make your own sweet gift kits, you will find some of these small Bluebird Gardens honey containers at Three Sisters Resale and Consignment at 713 Pine Street, downtown Rolla. Along with the various sizes of honey containers, you will also find wooden honey dippers, buzzing toy bees, a beekeeper’s gift kit and even a copy of my autographed book “A Beekeeper’s Diary Self-Guide to Beekeeping” so you can make your own sweet gift kits.

Three Sisters Resale and Consignment honey and gift display. (Photo by Charlotte Ekker Wiggins)

Three Sisters Resale and Consignment honey and gift display. (Photo by Charlotte Ekker Wiggins)

What’s even better is that you may find just the right gift items to go in your custom sweet gift kits. Krista keeps a supply of baskets you can fill to make a custom sweet gift kit from her collection of new and vintage items.

With Mother’s Day, Father’s Day and Grandparent’s Day coming up, stop by to find custom gifts for your loved ones to make your own sweet gift kits. She will have a vintage day in June and has new items coming in daily.

Three Sisters Resale and Consignment, 713 Pine Street, Rolla, Missouri. (Photo by Charlotte Ekker Wiggins)

Three Sisters Resale and Consignment, 713 Pine Street, Rolla, Missouri. (Photo by Charlotte Ekker Wiggins)

If this is the first time you are making your own sweet gift kits, try finding something fun, something practical and something delicious:

  • A porcelain teacup and saucer with a variety of teas, honey and a spoon, and a fun book to read.

  • Kitchen towels with a vintage cookbook and jar of honey.

  • A lovely book of photos with a coffee cup and jar of honey.

You can find interesting items at Three Sisters Resale and Consignment and make your own!

Charlotte

Cutting Lilacs

Old-fashioned lilacs now keeping me company in my den basket vase. (Photo by Charlotte Ekker Wiggins)

Old-fashioned lilacs now keeping me company in my den basket vase. (Photo by Charlotte Ekker Wiggins)

Cutting Lilacs

One of my favorite spring flowers are often overlooked for home decor. That’s a shame because old-fashioned lilacs have a lovely scent that can easily fill a room and, with a little trick, can be long-lasting as cut flowers.

The trick to using lilacs in flower vases is how you cut them.

With most flowers, a clean bottom cut will ensure that water gets into the flower and keeps them fresh longer.

I use clippers to carefully make two vertical cuts at the woody stem bottom. (Photo by Charlotte Ekker Wiggins)

I use clippers to carefully make two vertical cuts at the woody stem bottom. (Photo by Charlotte Ekker Wiggins)

The same principle works for lilacs only you also have to make a vertical cut at the stem bottom. The extra one or two vertical cuts provides a wider surface for water uptake, giving the lovely cut flowers a longer life in a vase.

Also cut the lilac flowers when they are still in bud and starting to open.

Finally don’t place flower vases full of lilacs close to warm spots like vents, televisions and sunny windows. Keep your flower base full of lilacs in a cool shady spot and you will enjoy the lovely scent for several days.

Now that the lilacs have bloomed, iris will be blooming next!

Charlotte

Fireplace Cover

Cozy winter fires can cool a room when not in use unless you have a fireplace cover. (Photo by Charlotte Ekker Wiggins)

Cozy winter fires can cool a room when not in use unless you have a fireplace cover. (Photo by Charlotte Ekker Wiggins)

Fireplace Cover

The forecast is for more snow, which I love - let it snow as long as we don’t get ice along with it. The forecast includes a few record cold weeks ahead so here’s how to make sure you stay cozy when you don’t have your fireplace going.

Some fireplaces have glass covers that keep cold out and harness the heat. If you don’t have a fireplace cover, this will come in handy when you are not at home and want to prevent cold air from coming in. This also works for covering your fireplace at nights when you don’t have the fireplace in use.

Whether you burn real wood or use gas in a fireplace with an opening to vent to the outside, the fireplace opening in your house can be a huge source of heat loss when not in use.

To keep your fireplace from loosing heat, you can make a fireplace cover. This one is made out of black quilted fabric with a quilt batting fill.

Cut the cover a good 4-6 inches larger than the opening on three sides.

Measure ties on either end that will attach to the fireplace cover grill to keep the fireplace cover safely in place.

This quilted fireplace cover with ties sits on the fireplace opening when not in use. (Photo by Charlotte Ekker Wiggins)

This quilted fireplace cover with ties sits on the fireplace opening when not in use. (Photo by Charlotte Ekker Wiggins)

Measure quilting fill to place inside. You can use sewn batting remnants together or double up batting.

Sew the batting to one side of the fireplace cover to keep batting in place. Then sew the back side onto the front, reverse it and finish by sewing the opening shut.

Add the ties. Once tied onto the metal grate, the metal grate is tucked up against the fireplace opening, sealing the opening so that cold weather doesn’t enter the room.

The fireplace cover keeps cold air from entering through the fireplace. (Photo by Charlotte Ekker Wigigns)

The fireplace cover keeps cold air from entering through the fireplace. (Photo by Charlotte Ekker Wigigns)

If you want something fancier, you could use the front of the fireplace cover for a design out of fabric and leave the back quilted.

I like the black quilted cotton fabric because once it is tied to the metal grate and tucked up close to the opening, you can’t even see that the opening is covered.

We often hear advice about wearing more sweaters and turning the thermostats down to cut down on heating costs. This little trick will also help keep you warm and cozy.

Charlotte

Last Minute Gift Idea

A good friend gave me this lovely bee skep ornament this year. (Photo by Charlotte Ekker Wiggins)

A good friend gave me this lovely bee skep ornament this year. (Photo by Charlotte Ekker Wiggins)

Last Minute Gift idea

Ever since early December, the emails and calls have been coming in from last minute shoppers wanting help with their gift giving. Maybe this year more than in previous years we want our gift giving to be comforting and hopeful.

So what to give if you have put off buying something to the last week before Christmas, or need to pick something up for someone at the last minute?

One of my all-time favorite gifts, whether you put off getting it until the last few days of Christmas or not, are Christmas tree ornaments. Especially ones that have a special meaning to the receiver.

It may be a little challenging to order it online at this point so look to your local retailers for possibilities. Antique and thrift stores usually have a nice interesting selection, as do pharmacies, home and garden centers and pet shops.

For a newlywed couple, give them a half dozen ornaments that mark the beginning of their lives together: a house ornament is a good place to start.

For that relative with a new baby, first baby’s Christmas ornament is a favorite addition to any tree. One of my friends gave her son one ornament a year that represented something special that year as he was growing up. When he finally married, he had a nice collection of ornaments for his first Christmas tree as a married couple.

Don’t forget the pets, an ornament marking who they are can become a favorite.

To make this a family activity and gift, shatterproof tree ornaments are readily available at most retailers. Let kids decorate them with magic markers, glitter and their own designs. This would work well for your own family Christmas tree.

Remember to date the ornaments on the bottom before giving so the receiver will have a little help later remembering what year the personalized ornament joined the others.

And as far as the bee skep ornament, it was a gift from a good friend and beekeeper. And I can personally attest to it as a gift, I love it!

Charlotte

How to Get It There by Christmas

Helps to look at the calendar to get the best estimate of shipping dates. (Photo by Charlotte Ekker Wiggins)

Helps to look at the calendar to get the best estimate of shipping dates. (Photo by Charlotte Ekker Wiggins)

How to Get It There by Christmas

To no one’s surprise, this year’s holiday shipping season is also very different from past years. In addition to a temporary price increase over the holidays, most of the shipping companies are suggesting the earlier you ship, the better.

To make sure your packages arrive before December 25th, here's when US Postal Service recommends you ship by:

  • First Class Package: Ship by December 18th.

  • Priority Mail: Ship by December 19th.

  • Priority Mail Express: Ship by December 23rd.

  • Media Mail & Parcel Select Ground: Ship by December 15th.

Keep in mind these are delivery estimates, not guarantees.

Frankly I have all of my personal packages, and Christmas cards, shipped. With the package traffic up by a good 30% this year, I want to make sure my packages and cards arrive on time.

For customers looking to ship something after December 10, I recommend shipping overnight fully realizing “overnight” does not mean next day, it could take 2-4 days for it to arrive at the destination.

One option is to take a picture of the item you want, put it in an envelope under the tree and order it after the holidays. Not as much fun as having it under the tree but it is an option especially if you want to make sure the colors are correct.

Charlotte

Covering Stains

Somehow I ended up with a stain on a favorite lightweight jacket. (Photo by Charlotte Ekker Wiggins)

Somehow I ended up with a stain on a favorite lightweight jacket. (Photo by Charlotte Ekker Wiggins)

Covering Stains

Do you ever get stains on your clothes?

So do I. Even worse, I sometimes get them on favorite pieces of clothing, usually ones I can’t easily replace. Since I shop at thrift stores, many of my favorite clothing pieces are not easily replaceable.

This lightweight beige jacket has been a wardrobe staple for years. Wish I could remember how it was stained but I frankly don’t know. What I do know is that the stain made the jacket unwearable.

Well, for a short time.

I took the jacket to my favorite embroidery shop and asked them to cover the stain with a floral pattern. After going through a number of pattern books, we settled on a design. The original order was tone on tone but a miscommunication gave me a red rose.

An embroidered red rose now covers the stained area. (Photo by Charlotte Ekker Wiggins)

An embroidered red rose now covers the stained area. (Photo by Charlotte Ekker Wiggins)

The left stain was not as easy to see as the right one. They added another embroidered rose pattern to the left side, nicely covering that stain.

Two roses now cover the jacket stains. (Photo by Charlotte Ekker Wiggins)

Two roses now cover the jacket stains. (Photo by Charlotte Ekker Wiggins)

The embroidered jacket is now back in use, the red roses a new favorite. And no thorns!

Charlotte

Last Flowers of Season

Zinnias and lantana in the last cut flower bouquet of the season. (Photo by Charlotte Ekker Wiggins)

Zinnias and lantana in the last cut flower bouquet of the season. (Photo by Charlotte Ekker Wiggins)

Last Flowers of Season

The first frost came early this year; about two weeks earlier than the usual Halloween frost that marks the first hard frost of the season. I live in USDA Hardiness zone 5 where we have four distinct seasons. With our rapidly changing climate, springs and falls are getting longer while summers and winters seem shorter.

I started bringing in my tropical plants a few weeks back which includes pots of annuals including geraniums, lantanas and salvia. The pots of zinnias have not survived well inside in the past so those are cut to preserve the last flowers of the season.

If you want to enjoy a few more cut flowers from your garden, cut them as you would any time of the year. Early morning is best, and use pruners or flower scissors to make a clean cut on the stem.

Lantana flowers are annuals that have a sharp scent as cut flowers. (Photo by Charlotte Ekker Wiggins)

Lantana flowers are annuals that have a sharp scent as cut flowers. (Photo by Charlotte Ekker Wiggins)

This time of year you can also cut the buds. In the case of zinnias, the buds very nicely open up inside to form full flowers in a vase.

You can cut zinnias in bud; they will unfurl into full flowers in a vase. (Photo by Charlotte Ekker Wiggins)

You can cut zinnias in bud; they will unfurl into full flowers in a vase. (Photo by Charlotte Ekker Wiggins)

Remove leaves from the stem bottoms.

Change water every day or so to keep the flowers blooming.

If the stem is collapsing, recut so the flower can still absorb water.

If you get the stems too short, consider putting them i a shorter flower vase instead of throwing them out.

You can also add wildflowers currently in bloom. The combination of annuals and wildflowers can make lovely combinations. Since I was cutting these flowers in the middle of the night I chose not to go looking for wildflowers. Wildflowers will make it through a frost much better than these tropical annuals.

Enjoy, and start planning next year’s garden!

Charlotte