Personalized Beekeeper Nutcracker
/
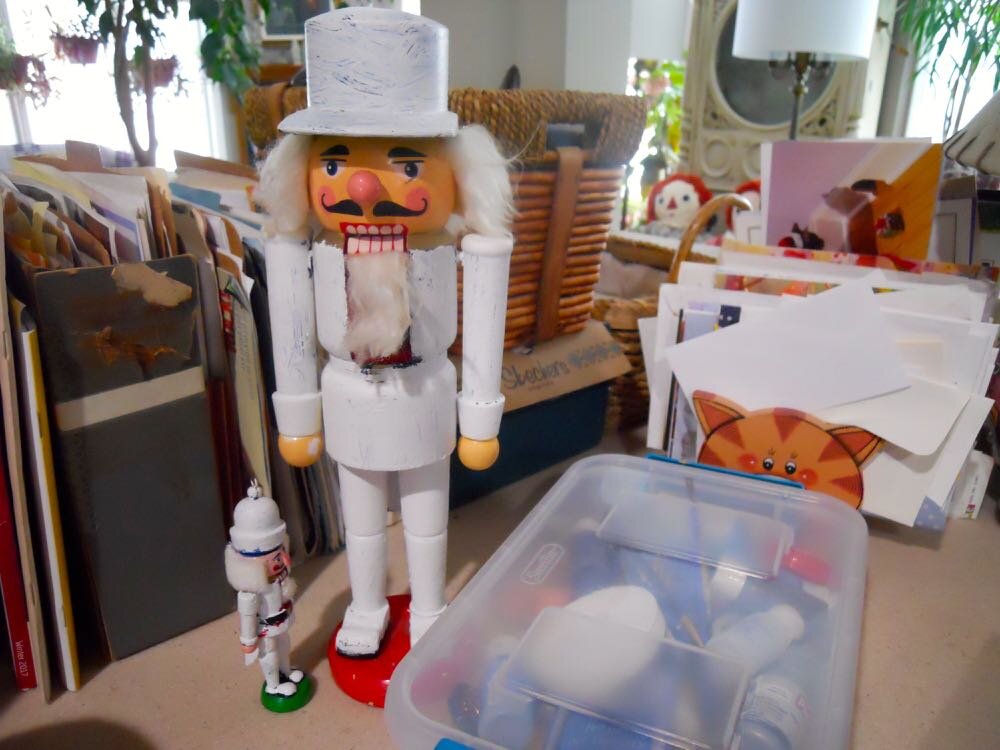
The finished beekeeper nutcracker with bee hives in the background. (Photo by Charlotte Ekker Wiggins)
Personalized Beekeeper Nutcracker
The soldier nutcracker is one of my favorite Christmas ornaments among the holiday traditions. I attend at least one “Nutcracker” ballet during the Christmas season and watch it on television whenever it is broadcast. Last year, I decided my bee buddy and gardening friend both deserved to get beekeeping nutcrackers but I couldn’t find any. I did find some soldier nutcrackers so I decided to make them into beekeepers.
Taking the traditional soldier nutcrackers, I painted them all white so I could add beekeeper details. Since we all wear a white beekeeping jacket over jeans, it was easy to outline what parts of the wooden beekeepers needed further painting.

Nutcrackers painted all white so I can start over with their details. (Photo by Charlotte Ekker Wiggins)
Both nutcrackers needed a detail on top to flush out their hat into a beekeeper’s veil.I measured the top hat and cut out two pieces of white cardboard to simulate a beekeeper’s veil. Black tulle fabric simulated the black mesh that protects beekeepers in their protective suits. The tulle was hot glued between the two round top cardboard pieces.
I then used black thread to gather the tulle at the bottom to cover the head.

The veil is glued between two white cardboard piecers surrounding the top. (Photo by Charlotte Ekker Wiggins)
The bottom was even more fun to customize with blue paint for jeans. Tiny cotton sock pieces simulated pulling socks over jeans to prevent bees from climbing up pants legs.
We had all met for a lunch during the lunar eclipse earlier that year so finding a wooden cat ornament that looked like one of his cats holding stars and half moons was very appropriate to add to the tableau. A tiny smoker off a keychain was perfect size so I added that to the base at the feet after painting it all green.
Little glue on bees were scattered all over.

A keychain smoker, a wooden cat ornament and socks over jeans finish the bottom. (Photo by Charlotte Ekker Wiggins)
I couldn’t resist adding some flowers so I found this old group of silk flowers that fit perfectly at a corner. I filled the back with dry hydrangeas spray painted green.

Silk flowers hot glued to the back with sprayed green dried hydrangeas. (Photo by Charlotte Ekker Wiggins)
My bee buddy now uses a photo of the beekeeper nutcracker as his profile photo. I told him that was appropriate only now he’s going to have to grow a handlebar mustache if he wants to look just like the beekeeper nutcracker!
Charlotte