Do Amaryllis Re-Bloom?

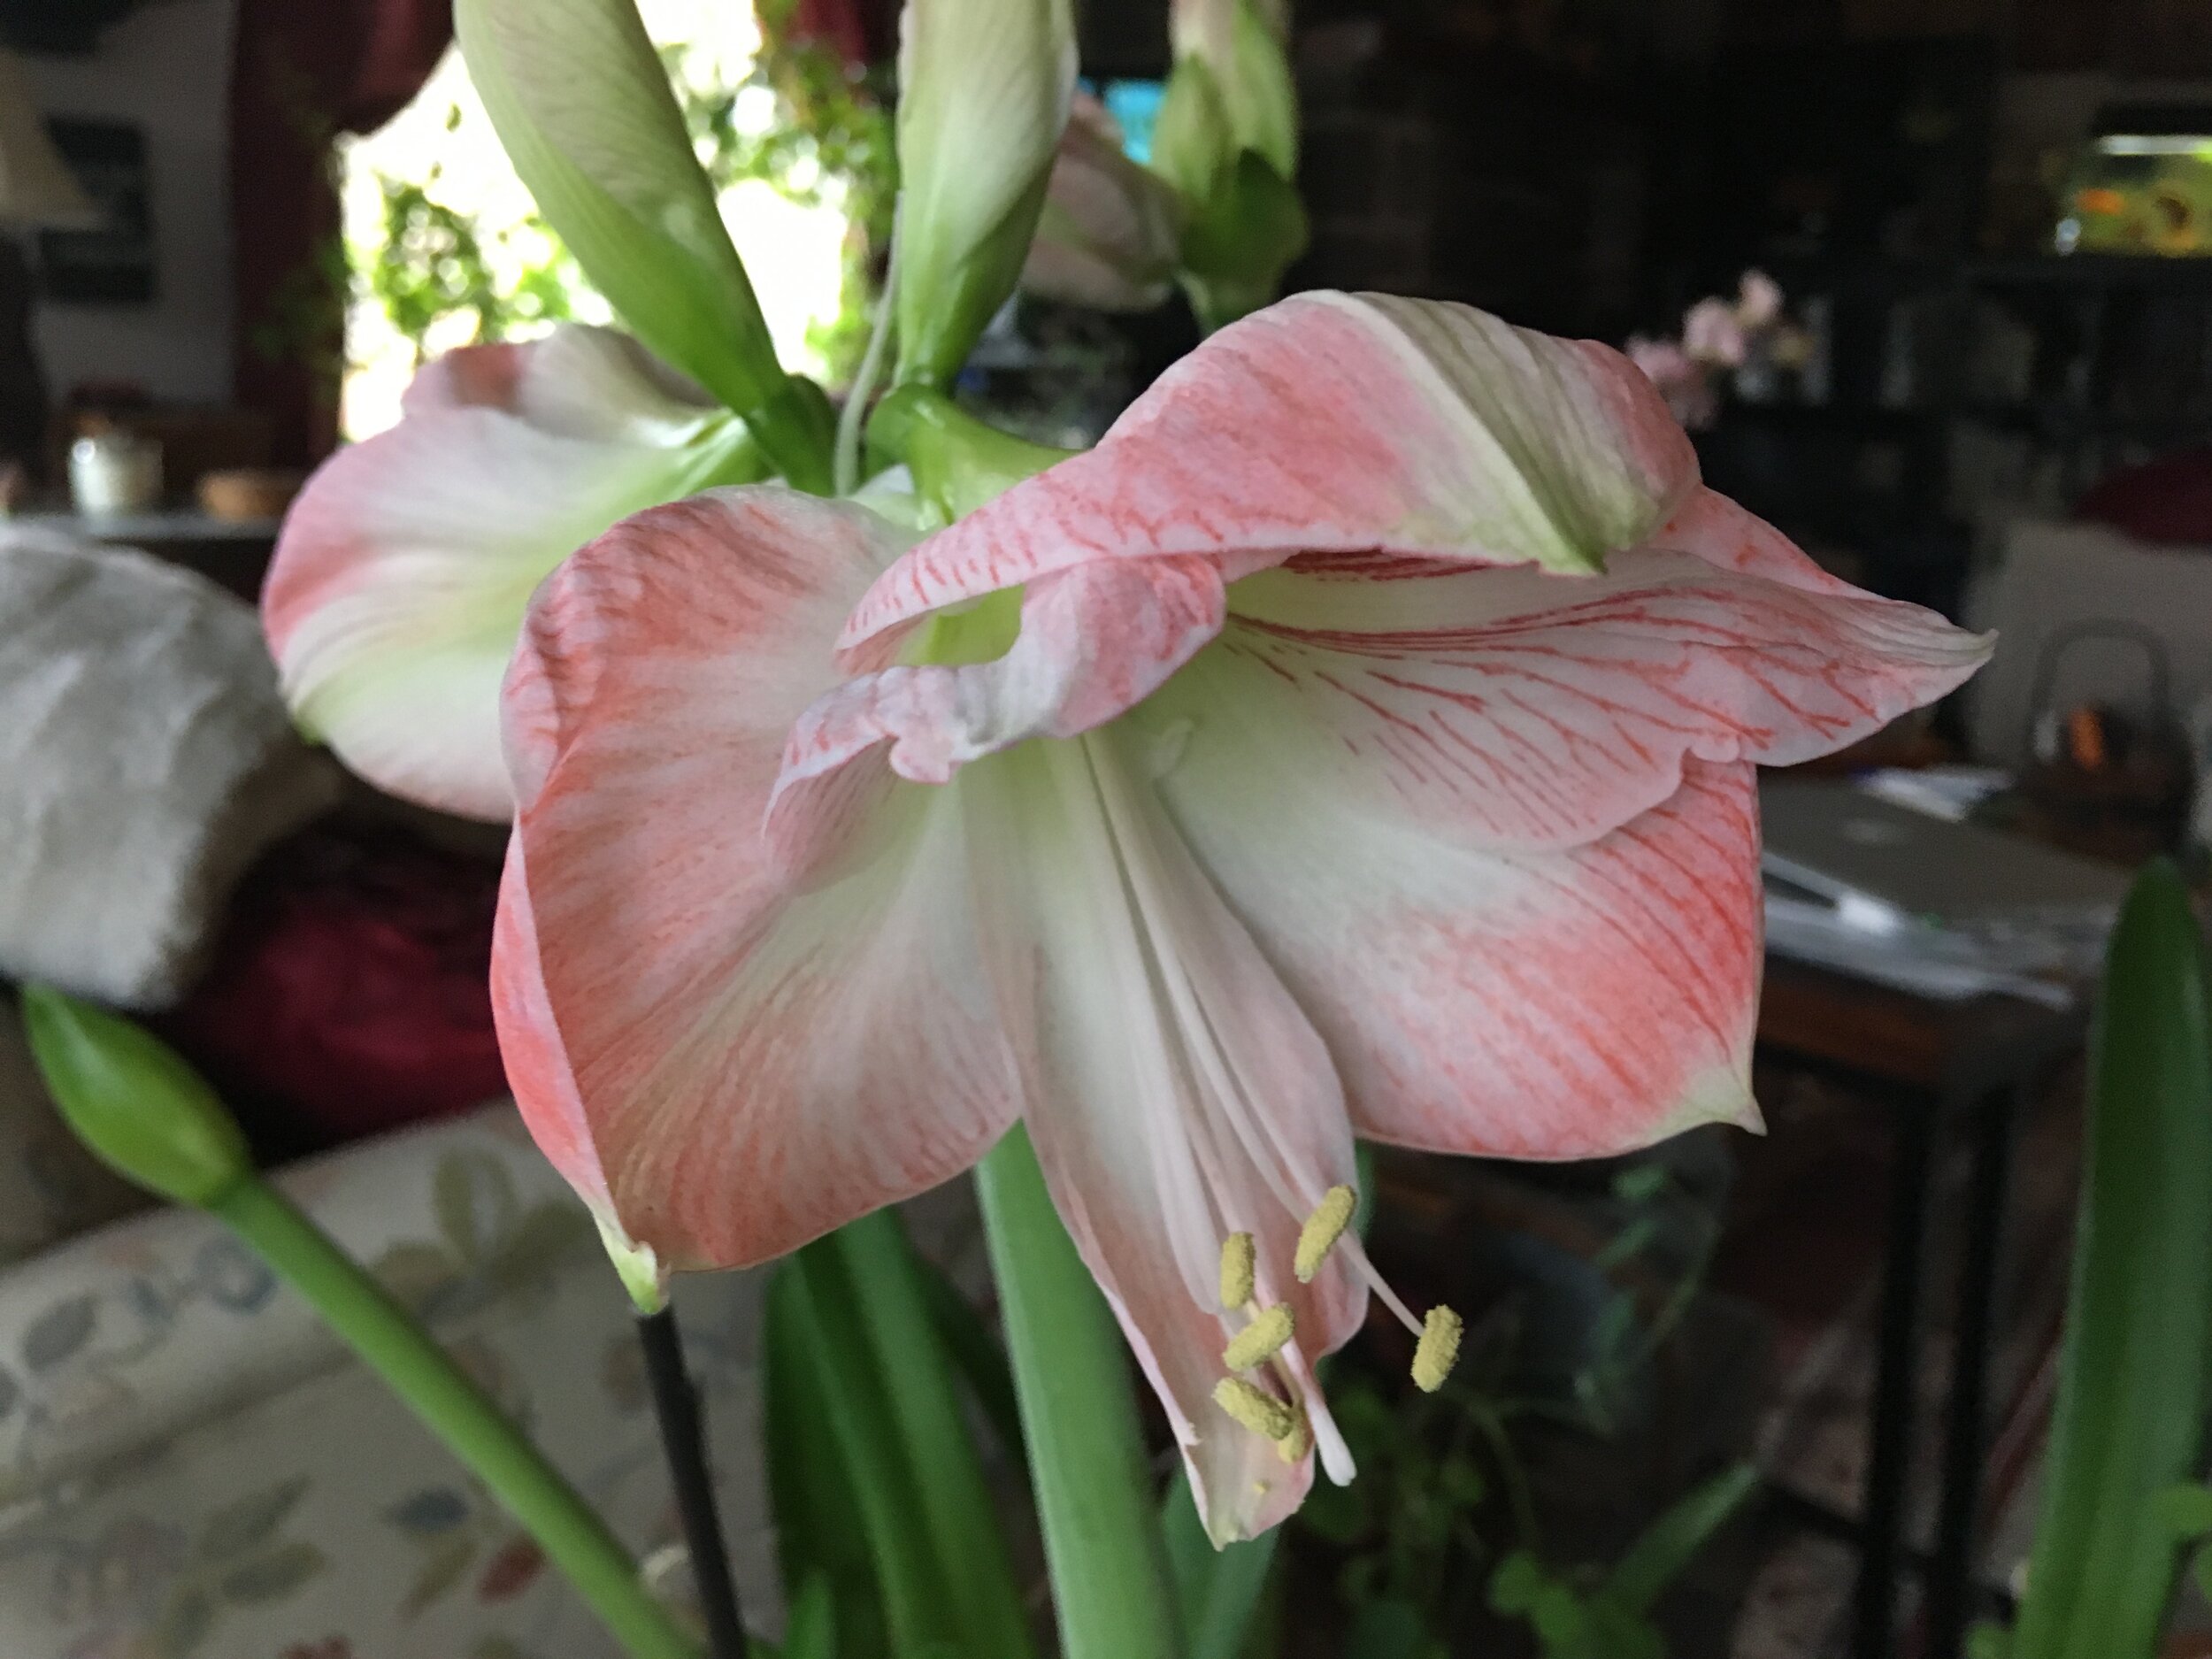
These Red Lion Amaryllis bulbs have re-bloomed for several years. (Charlotte Ekker Wiggins photo)

“Charlotte, I see your lovely Amaryllis pictures on Facebook. Are those Amaryllis bulbs you purchased or bulbs you’ve made re-bloom? I’m going to be sick if they re-bloom, I’ve tossed far too many away….” — Sally

Do Amaryllis Re-Bloom?

Hi Sally,

Amaryllis do certainly re-bloom but they do need a little time and patience. Some people have given me Amaryllis bulbs they were about to toss because they buy new ones the following year. Sorry you missed out on trying this with your previous bulbs but here’s how to care for your Amaryllis bulbs so they re-bloom.

Keep an eye out for new buds, they can show up in the middle of blooms. (Charlotte Ekker Wiggins phto)

First, once they do bloom, or you find spent bulbs on sale, get them in pots and let the leaves grow. Do keep an eye on the bulbs because they can throw a second bud without you knowing it, especially if you have a lot of leaves.

This is an old-fashioned Red Lion Amaryllis, popular at Christmas. (Charlotte Ekker Wiggins photo)

The showy flowers — and they are stunning — will have leaves following the blooms. The leaves are solar collectors, gathering sunshine to store as energy in the bulbs. The leaves can remain on the bulb for many months so that’s where patience comes in. You have to wait for the leaves to die off on their own. I still have a large pot of Amaryllis bulbs growing leaves from last year so I won’t see those blooming for awhile longer.

Once the flowers fade, cut the flowers off at the top of the bulb. Leave the growing leaves and keep them watered and fertilized. I use half the strength the fertilizer recommends; any multi-purpose fertilizer will work.

Amaryllis bulbs sometimes extend the bloom by budding at different times. (Charlotte Ekker Wiggins photo)

Once the danger of frost is over, I move my Amaryllis bulbs still in their pots outside to a shady area so that they can continue to grow and collect energy from the sun.

When the Amaryllis leaves die off on their own, here’s the second key step: don’t water them for a couple of months.

I have removed the bulbs out of their pots and saved them in a brown bag. I have also just left them sit in their pots without getting watered so do whatever fits your schedule, and your space.

If you bag the bulbs, you can then re-pot and water for when you want them to bloom. It takes 4-6 weeks from when they start budding at the tip of bulb to when they bloom.

Regardless of whether in a bag or pot, check them periodically for any signs of growth. Once you see a little green tip showing up at the top end of the bulb, that’s the sign the bulb is ready to start growing again.

Now they may start showing green and not have a bud. If you look closely, you can tell the difference between a flower bud where the tip is thicker and leaves, where the green tip is thin. If its just leaves growing, that means the bulb did not collect enough sunshine to re-bloom. Don’t toss it out, just let the leaves grow and collect more energy.

If you leave them in pots, start watering again after 8 weeks of a dry spell.

I find it easier to leave mine in their pots. I may remove the bulbs and either repot in new soil or add soil to existing potted bulbs to refresh their growing medium. Make sure only their roots are covered. You want the bulb to be sitting on top of the soil, not covered in soil.

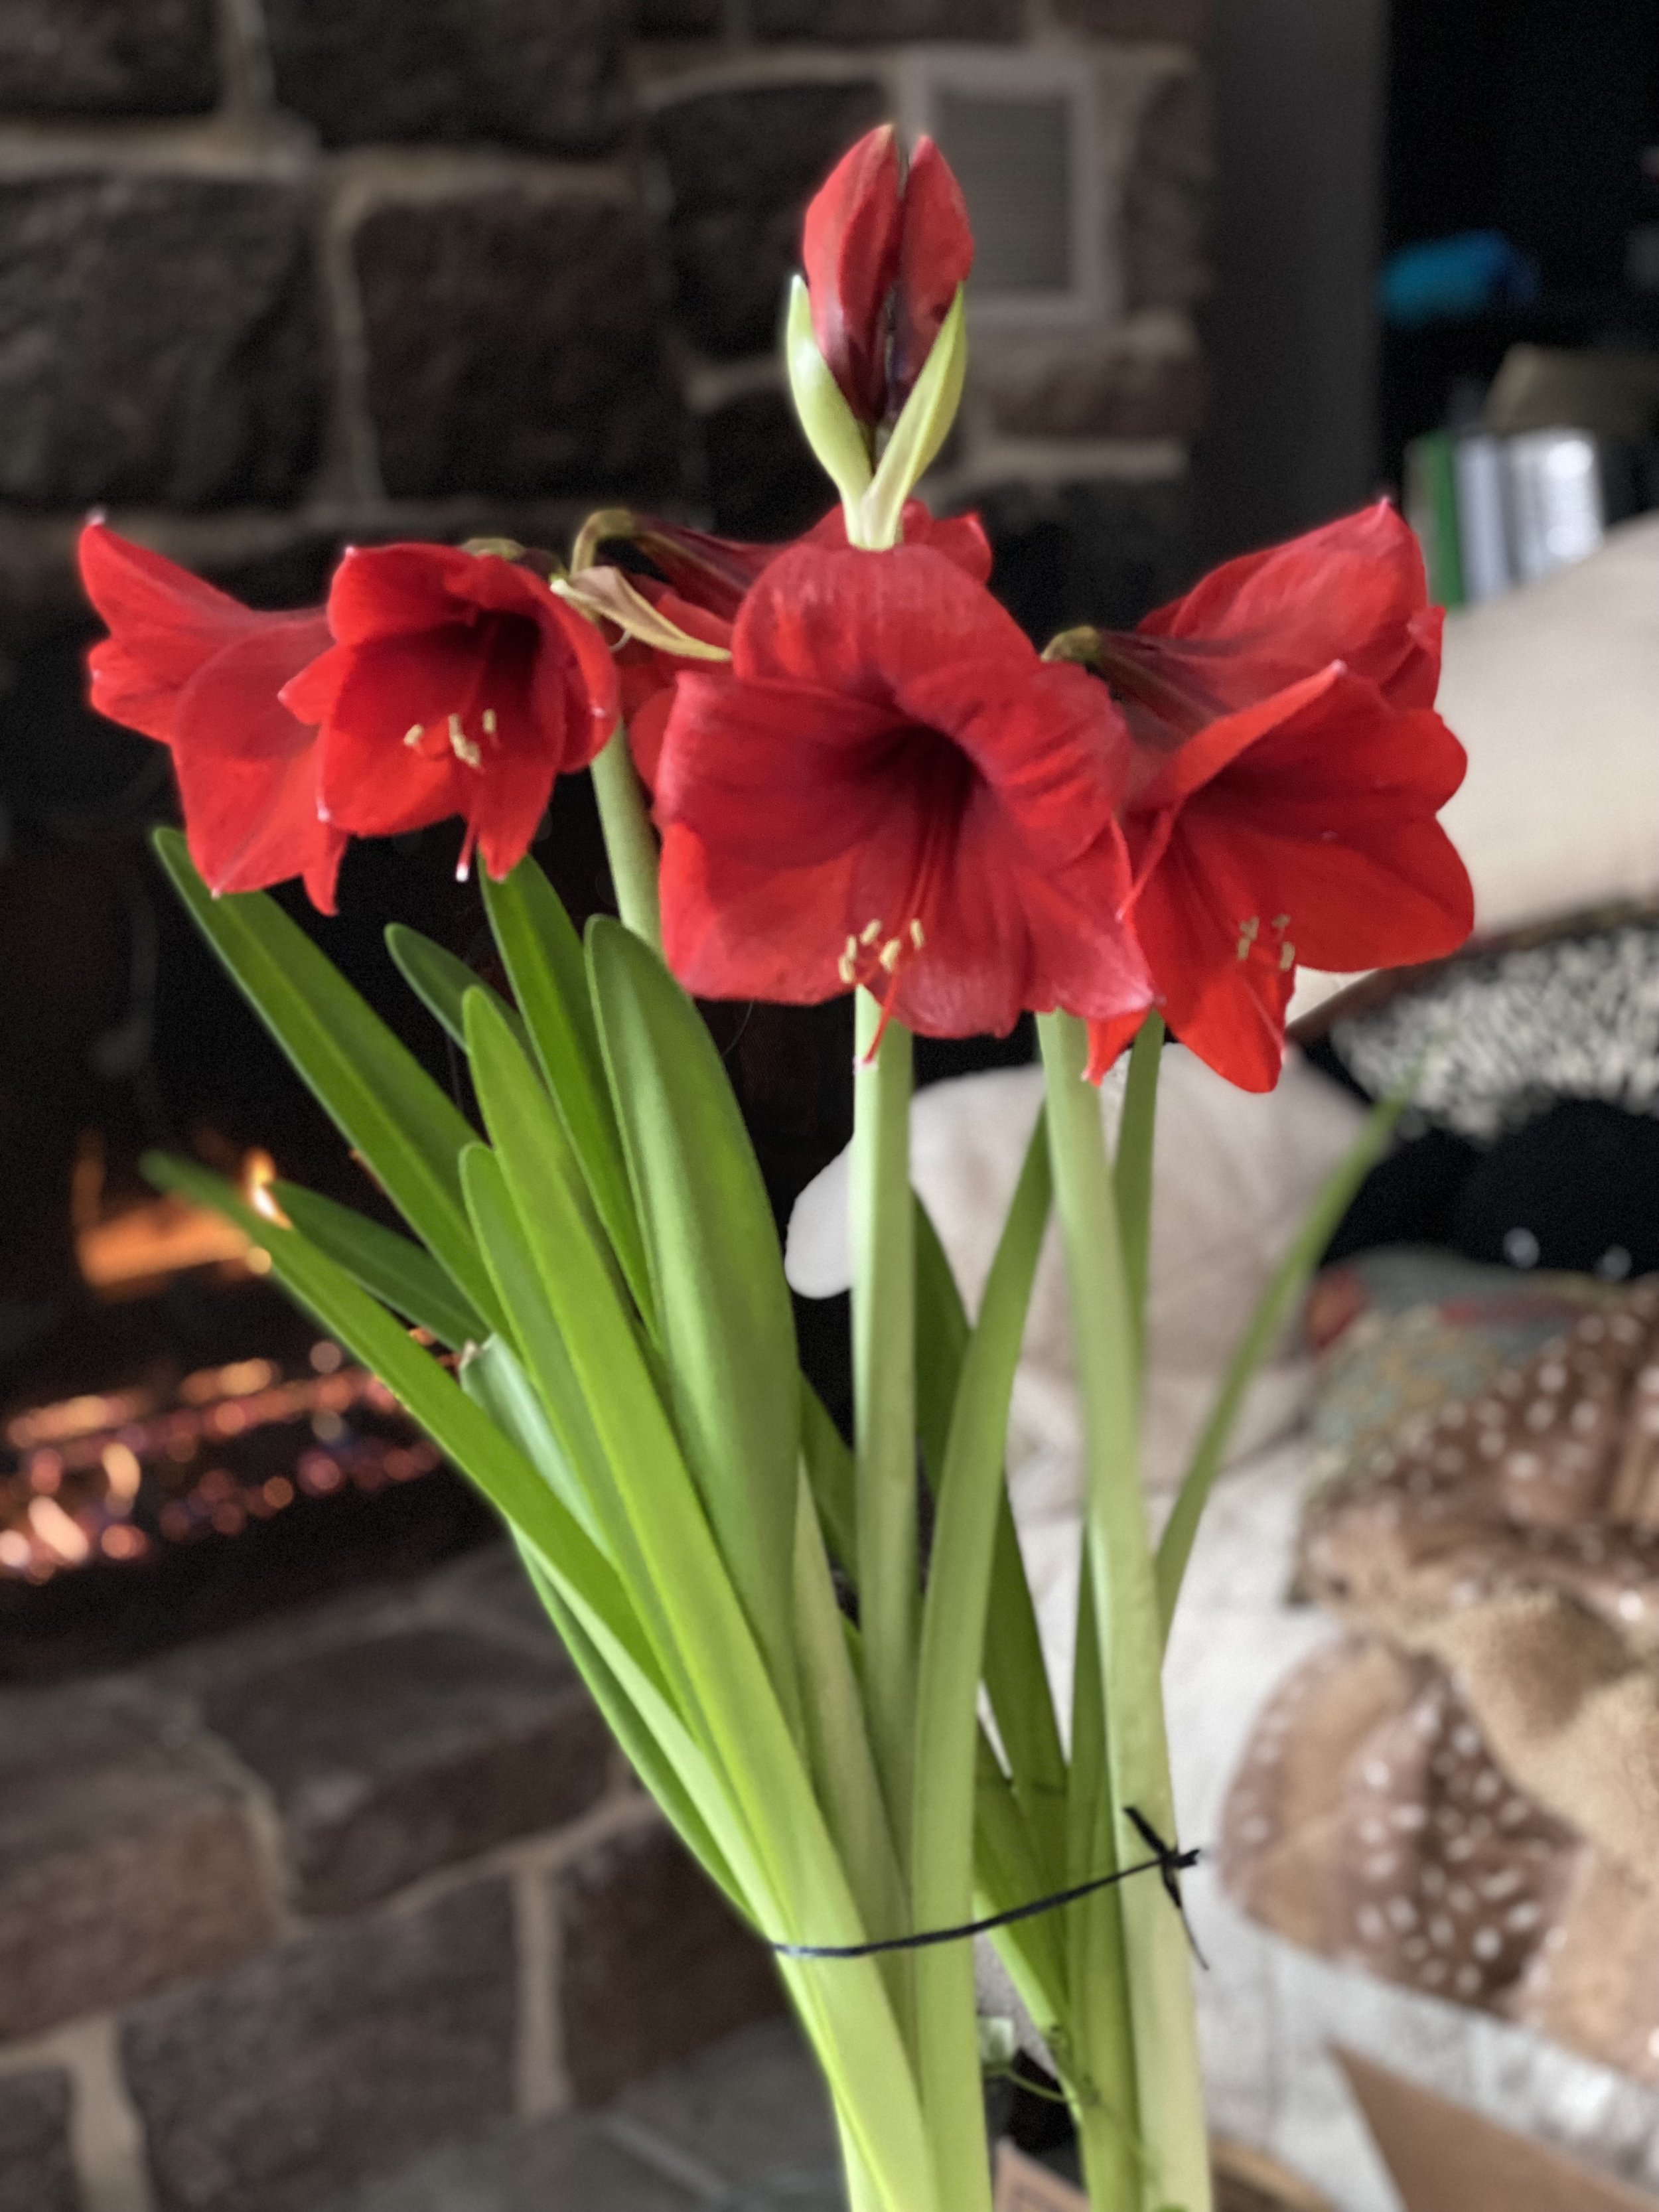
I usually have to tie up the flowers and leaves to keep them from taking over. (Charlotte Ekker Wiggins photo)

It helps to keep a few long thin sticks around to tie up the 2-3 feet high top heavy flower stems. If you have the space, let the leaves drape, they are quite lovely when they do. I happen to have cats who would take draping leaves as an invitation to wrestle so I have them tied up.

If you happen to break a stem, don’t worry. Amaryllis make lovely cut flowers.

Hope this helps, let me know how your next Amaryllis bulb does when you try to help it re-bloom!

Charlotte

For more tips on gardening, beekeeping, cooking and easy home decor, subscribe to my weekly Garden Notes.

Re-Blooming Christmas Cactus

This white Thanksgiving cactus is now blooming at Christmas. (Photo by Charlotte Ekker Wiggins)

This white Thanksgiving cactus is now blooming at Christmas. (Photo by Charlotte Ekker Wiggins)

“Help. My Christmas cactus is healthy but it’s not blooming, how do I get it to bloom?” -Ethel

Re-Blooming Christmas Cactus

Hi Ethel, if your plant has little spikes at the end of the leaves it is a Thanksgiving cactus, not a Christmas cactus.

Both of these plants are favorite plants for Christmas either as gifts or Christmas holiday decor like the Twelve Wishes lap quilt - I say they are excellent for both.

'“While these plants are indeed a cactus, it is actually a tropical plant that thrives in conditions that we do not usually associate with cactus,” said Patrick Byers, horticulture specialist with University of Missouri Extension.

If received as a gift, Christmas cactus should be placed in a sunny window. Avoid areas with hot drafts (heat vents, fireplaces) because that will cause the buds to drop. Find a window in a cooler room and the blossoms will hold longer.

While in bloom, water the plant when the top inch of the soil is dry.  Don’t overwater the plant.

When the blossoms drop, the plant begins a resting period. Keep the plant on the dry side, but water if the leaves shrivel. When new growth resumes, resume more frequent watering.

During the summer, a Christmas cactus will thrive outdoors, but be sure to place the plant in a shady or semi-shady spot.  Water as needed to keep the plant from shriveling.

Christmas cactus are short day plants. They set blossoms in response to long nights (12 hours of darkness) and short days.  This happens naturally in the fall.

Exposing a Christmas cactus to cool temperatures (50-55°F) will also encourage blossoming, so leave the plant outside as temperatures cool in the fall.  Bring the plant indoors gradually when temps get too cold, and keep in a cool, bright window.

Charlotte

Re-Blooming Amaryllis

These Amaryllis bulbs are reblooming at my house this year, see the bud? (Photo by Charlotte Ekker Wiggins)

These Amaryllis bulbs are reblooming at my house this year, see the bud? (Photo by Charlotte Ekker Wiggins)


”Charlotte help, I was gifted an Amaryllis bulb last year but I can’t seem to get it to re-bloom for Christmas. Is there a special trick?” - Amy

Re-Blooming Amaryllis

Hi Amy,

Congratulations on keeping your Amaryllis bulb alive for a year. Amaryllis may be the second most popular holiday gift plants behind Poinsettias and Thanksgiving cactus, often mislabelled as Christmas cactus. Although these are relatively easy bulbs to keep going, I know a number of people who killed theirs off after getting them for holiday gifts.

Amaryllis bulb leaves collecting sun and storing the energy in bulbs. (Photo by Charlotte Ekker Wiggins)

Amaryllis bulb leaves collecting sun and storing the energy in bulbs. (Photo by Charlotte Ekker Wiggins)

There is a “trick” to getting Amaryllis bulbs to re-bloom.

First, once they do bloom, you need to let the leaves grow. The leaves are solar collectors, gathering sunshine to store as energy in the bulbs. The leaves can remain on the bulb for many months. I still have a large pot of Amaryllis bulbs still growing leaves (see photo above)

Once the danger of frost is over late spring, I move my bulbs outside to a shady area so that they can continue to collect sunshine.

When the leaves die off on their own, here’s the second key step: don’t water for a couple of months.

I have removed the bulbs out of their pots and saved them in a brown bag. I have also just left them sit in their pots without getting watered so do whatever fits your schedule.

If you bag the bulbs, you can then re-pot and water for when you want them to bloom.

Regardless of whether in a bag or pot, check them periodically for any signs of growth.

If you leave them in pots, then start watering after 8 weeks of a dry spell.

I find it easier to leave mine in their pots. I will remove the bulbs and either repot in new soil or add soil to make sure only their roots are covered. You want the bulb to be sitting on top of the soil.

Make sure your potted Amaryllis roots are covered in soil. (Photo by Charlotte Ekker Wiggins)

Make sure your potted Amaryllis roots are covered in soil. (Photo by Charlotte Ekker Wiggins)

As you re-grow your Amaryllis, you may see little shoots to the sides of the bulbs. Those are baby Amaryllis growing off the mother bulb.

I leave those for several years until they are at least one-inch wide before I remove the baby bulb and plant it on its own. Something to look forward to doing!

This little side growth is a new Amaryllis bulb. (Photo by Charlotte Ekker Wiggins)

This little side growth is a new Amaryllis bulb. (Photo by Charlotte Ekker Wiggins)

Now not all Amaryllis bulbs will re-bloom the first year. If when you water your bulb and you only get leaves, that means the bulb did not collect enough energy to re-bloom.

Don’t get discouraged. Give your bulb water with fertilizer and place in indirect sun so the leaves can help rebuild the stored bulb energy. Once the leaves die off, let the bulbs rest for a couple of months and start to water.

These Amaryllis bulbs are growing again but not re-blooming, they need to collect more sun. (Photo by Charlotte Ekker Wiggins)

These Amaryllis bulbs are growing again but not re-blooming, they need to collect more sun. (Photo by Charlotte Ekker Wiggins)

So this year, this pot of 3 Apple Blossom Amaryllis may bloom around Christmas. I have them sitting in the pass through from my kitchen, where I’ve enjoyed watching them grow every day.

The tallest stem is 25 inches tall so I will be staking that shortly. Once the flowers bloom, they may cause the stem to bend with their weight.

Apple Blossom Amaryllis bulbs getting ready to bloom (Photo by Charlotte Ekker Wiggins)

Apple Blossom Amaryllis bulbs getting ready to bloom (Photo by Charlotte Ekker Wiggins)

All three bulbs have buds now so these three Amaryllis bulbs were able to collect enough energy to re-bloom.

And so what’s all the fuss about?

Take a look at what these Amaryllis bulbs look in bloom.

Amaryllis Apple Blossom in bloom, these flowers can be 12 inches wide. (Photo by Charlotte Ekker Wiggins)

Amaryllis Apple Blossom in bloom, these flowers can be 12 inches wide. (Photo by Charlotte Ekker Wiggins)

Amaryllis bulbs come in a variety of colors and shapes. The more common ones are Lions King and Apple Blossom, which I personally like.

Lovely way to celebrate the holidays!

Charlotte

Painted Cattle Panels

I paint the cattle panels flat black so they recede into the background. (Photo by Charlotte Ekker Wiggins0

I paint the cattle panels flat black so they recede into the background. (Photo by Charlotte Ekker Wiggins0

“…I love, love, love your cattle panel arbors. I’m trying to find a place to put one in my small garden. Did you first paint them?” — Sammie

Painted Cattle Panels

Hi Sammie,

Yes, I painted these originally grey galvanized cattle panels a flat black. I wanted the grid pattern to recede so that the climbing plants were the first thing that caught the eye.

These arbors are the larger panels often used for cattle fencing.

If you can use something smaller, look for the pig panels that are more narrow and still can provide a nice arch you can use as an arbor.

I used rebar to help secure the cattle panels into the ground against heavy winds and fumbling gardeners. I also spray painted those to keep rust at bay.

I would also recommend painting the panels before you install them. I used spray paint so that i could more easily reach all of the galvanized rungs. I have two panels in the arbor in the photo forming an alley to the north apiary.

in other parts of the garden I am using only one folded cattle panel. It’s an easy way to mark the entrance to new garden sections without spending a lot of money. These arbors, including rebar and paint, would average $25-$50 each compared to several hundred dollars for most individual arbors.

Several of the cattle panels have the traditional garden flower vines growing over them including clematis and grapes. On this arbor, I have those as well as blackberries, a nice mix of growing vines that will add interest at different times of the year.

Charlotte

Mum Still Alive?

This is a typical mum given as a gift and then tossed once flowers die. (Photo by Charlotte Ekker Wiggins)

This is a typical mum given as a gift and then tossed once flowers die. (Photo by Charlotte Ekker Wiggins)

“Charlotte, help. I was given three yellow mums for my birthday and I can’t tell if they are still alive. They look dead to me. How do I tell?” — Cecily

Mum Still Alive?

Hi Cecily, lucky you! If you have been watering the gift mums all along as the flowers fade, your plants may still be alive, even if they look dead.

Florist chrysanthemums are grown in greenhouses with artificial lights and stimulation. They are a little harder to transfer to a garden since they have never lived outside. Garden mums, those grown by nurseries, are easier to make the transition since they were grown in natural conditions.

Regardless, the key to determine if your mums are still alive is to “peek” into the bottom of the plant to spot any new growth. The yellow mum at the top has been planted in my garden for a good month now. Here is the bottom of the mum plant:

New growth in the bottom center is a good indication your mum is still alive. (Photo by Charlotte Ekker Wiggins)

New growth in the bottom center is a good indication your mum is still alive. (Photo by Charlotte Ekker Wiggins)

Those tiny green leaves are the start of a new mum plant and a sure sign the plant is still alive and growing. Leave the dead stems and flowers to protect the seedlings through winter.

Here is another mum where the flowers and stems appear to be dead. What do you think, is this mum still alive?

A mum where both the flowers and stems are dry and appear dead. (Photo by Charlotte Ekker Wiggins)

A mum where both the flowers and stems are dry and appear dead. (Photo by Charlotte Ekker Wiggins)

After planting your mums in the garden, make sure to water a couple of times a month through winter. The water will help keep the roots alive and get established.

I wouldn’t have bet on that mum plant until I gently pushed the stems side and looked at the bottom. The new starts are not very big so look closely and at the stem bottom.

Bottom of the dry mum has new growth in the center. (Photo by Charlotte Ekker Wiggins)

Bottom of the dry mum has new growth in the center. (Photo by Charlotte Ekker Wiggins)

Once the mums are established in your garden, they will come back on their own for several years.

Here is an established pink mum with the colors of our Pink Sleeping Cats Quilt. I didn’t trim back to the round shape earlier this year so that I could easily enjoy the flowers on longer stems as cut flowers. We’ve already had several hard frosts in mid-Missouri so the plant is looking a little worse for wear.

This pink mum has been growing in a flower bed for 3 years now. Is it still alive? (Photo by Charlotte Ekker Wiggins)

This pink mum has been growing in a flower bed for 3 years now. Is it still alive? (Photo by Charlotte Ekker Wiggins)

Checking the pink mum’s center, though, is what I like to see, tiny starts of next year’s plant already showing their little leaf tips.

Sure enough, little mum starts are at the bottom of the plant. (Photo by Charlotte Ekker Wiggins)

Sure enough, little mum starts are at the bottom of the plant. (Photo by Charlotte Ekker Wiggins)

It did cross my mind that it may appear odd for someone to be going from mum to mum, peering into the plant and laughing. It’s one of my favorite mid-winter past times on a sunny day when I am ready for spring. Seeing those tiny new leaves are a promise of another growing season ahead.

So what do you see when you peek at your mums centers?

Charlotte

Where Do You Get Your Inspiration?

Native Black eye susans are long-lasting cut flowers and are one of my favorite summer flowers. 

Native Black eye susans are long-lasting cut flowers and are one of my favorite summer flowers.


"Where Do You Get Your Inspiration?" -- Marie

Charlotte: Some people shop; I go out into my garden. Whether it is something to celebrate a special day, or moment, or cheer someone up, I can usually find something on my one-acre Missouri hillside garden.

It's not always flowers but those aren't a bad choice. Flowers are always welcome, especially ones we have "grown ourselves."

My garden also inspires me in terms of colors. Nature in a garden has a way of blending colors beautifully, a wonder place to be inspired when stumped selecting quilt fabrics.

I also enjoy my garden for all of the living creatures it hosts. Now when I look at a flower, I also look for its tenant, whether a spider or frog or ladybug. If I'm lucky, it's one of my honeybees visiting to pick up pollen. I sometimes stop for a minute. That is all it takes for some scene to unfold right before my camera eyes, if I'm lucky enough to remember to take my camera. Now I try to have it in hand at all times; I don't want to miss what my certified wildlife garden and monarch way station has to offer. 

So what else can you get inspired to do? 

Let's see, a jar of fresh herbs is a wonderful gift for a cook; a plant start is always welcome to a gardening friend. I will also share recipes to make gifts from the garden, and I look forward to hearing about the garden gifts you make. 

What kind of gifts do you like to give from your garden?