Paper Clip Ornament Hangers

The Nutcracker is one of our Christmas traditions as in hanging ornaments with paper clips. (Photo by Charlotte Ekker Wiggins)

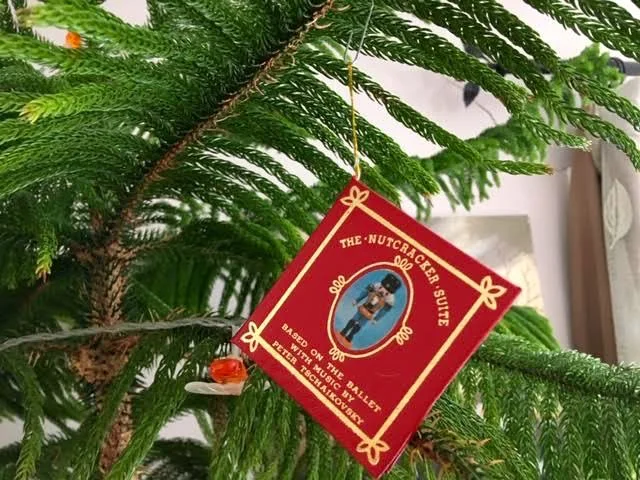
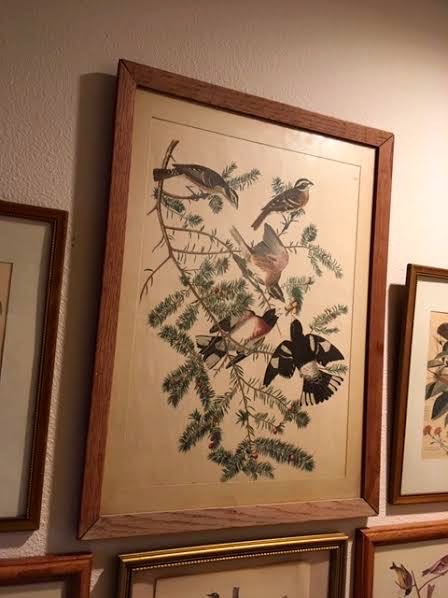
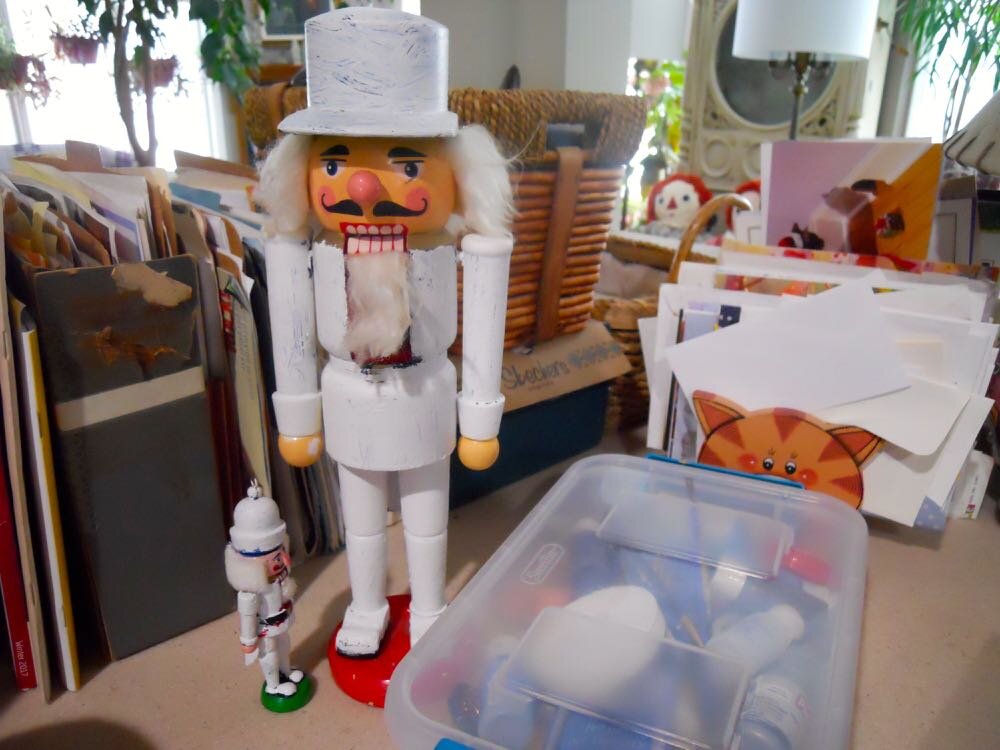
The Nutcracker is one of our Christmas traditions as in hanging ornaments with paper clips. (Charlotte Ekker Wiggins photo)

Paper Clip Ornament Hangers

Are you getting excited about decorating for the season? We all have holiday traditions and this hack now is one of mine. This is such a handy little trick for hanging ornaments, it surprised me over the years how many people had not thought of doing this.

I was among that group when one holiday past I was in an office after hours decorating for Christmas. I was the visitor so I took up the mundane tasks - removing ornaments from the box, separating the broken ones for repair and/or disposal and lining up the rest for tree hanging.

These are traditional ornament hooks for holiday decorating. (Photo by Charlotte Ekker Wiggins)

These are traditional ornament hooks for holiday decorating. (Charlotte Ekker Wiggins photo)

In the middle of this little enterprise we ran out of ornament hangers, those little slight pieces of pre-formed wires that hold an ornament on one end and hang it from a tree on the other. One of my associates volunteered to head off to get some when the senior administrative assistant said no need and headed off to the supply closet.

A few minutes later she handed me a box of office paper clips and started to unbend one end. She attached the short end to an ornament, opened up the larger end and said “back to the eggnog.”

Unbent paper clips can easily be used to hang ornaments. (Photo by Charlotte Ekker Wiggins)

Unbent paper clips can easily be used to hang ornaments. (Charlotte Ekker Wiggins photo)

Over the years, I have worked in many offices over the holidays to give full-time workers time off with their families. That has given me the opportunity to share this little hack many times.

It also works to attach decorations to wreaths and, if the Christmas stockings are not too heavy, hang stockings from the top of an office cubicle.

Unbent paper clip used as an ornament hanger. (Photo by Charlotte Ekker Wiggins)

Unbent paper clip used as an ornament hanger. (Charlotte Ekker Wiggins photo)

And yes, she really did say “back to the eggnog.”

For more tips on gardening, beekeeping, cooking and easy home decor, subscribe to my weekly Garden Notes.

Do you have a favorite Christmas decorating hack to share?

Charlotte

Door Wreath Visitors

My neighbor’s front door wreath including a bird’s nest. (Photo by Charlotte Ekker Wiggins)

My neighbor’s front door wreath including a bird’s nest. (Photo by Charlotte Ekker Wiggins)

Door Wreath Visitors

The sign on the front door said “Please place packages in front of the garage door.” I was at my neighbor’s house with yet another package addressed to them and delivered to my door step by mistake.

As I picked up the box I had just placed on the door step, I saw the evidence of recent visitors. Scattered on the front door mat where twigs and dried grasses, a sure sign of bird nest building.

Signs of recent birds nest building activity at the door. (Photo by Charlotte Ekker Wiggins)

Signs of recent birds nest building activity at the door. (Photo by Charlotte Ekker Wiggins)

Looking at the wreath, I spotted the birds nest at the top.

I held my camera up as high as I could to see if there were any occupants.

Sure enough, the birds nest was occupied.

See the robin blue eggs in the top birds nest? Photo by Charlotte Ekker Wiggins)

See the robin blue eggs in the top birds nest? Photo by Charlotte Ekker Wiggins)

Over the years I have had birds nesting in my outside wreaths. i now add a birds nest to my front door wreath. Some years it gets occupied, other years it is just decorative.

The wreath at my front door with its birds nest. (Photo by Charlotte Ekker Wiggins)

The wreath at my front door with its birds nest. (Photo by Charlotte Ekker Wiggins)

I can usually find the nests around my garden in fall after the leaves have dropped. It’s fun to go looking for them and picking just the right one to add to a wreath. Some birds reuse nests so leave the ones you find and don’t use.

Adding a birds nest to a door wreath is a sweet way to personalize the wreath and recognize that song birds in the garden are sharing this earth.

Charlotte

Mouse Toy Installations

Shirley Honey with her latest installation, Two Mice on Coffee Table. 2019. (Photo by Charlotte Ekker Wiggins)

Shirley Honey with her latest installation, Two Mice on Coffee Table. 2019. (Photo by Charlotte Ekker Wiggins)

Mouse Toy Installations

It’s officially fall and I’m not the only one decorating my house for the new season. I came home earlier this week to find someone else had carefully added toy mice decorations to my living room.

This was not the first time.

The artist known as Shirley Honey has made other installations over the years. There was a toy frog left in the middle of a sink in her early days; I think she was trying to find her aesthetic. Then there was a thin blue ribbon left in one of my shoes that was curious and posed a bit of a problem when I tried to wear them. She seemed to think the ribbon should remain inside the shoe because she kept returning it to the shoe whenever I had the shoe off.

She regularly spreads toys over the hallway rug with periodic moments of - well, artistic brilliance may be too strong a word but there does seem to be a design of some sort with the toys she drags out of her toy baskets.

I don’t know how many cats have an artistic aesthetic for home decor but Shirley Honey seems to have an extra dose.

She leaves several toys at the bedroom entrance every morning. I know which ones are her favorites by how often they show up. The arrangements are fine until I find one that isn’t a toy. Shirley Honey has been known to leave a dead mouse in the middle of the toys.

When Shirley Honey first started, I made the gauche mistake of removing the items. They were returned where they had been initially left. Err, I mean installed. And Shirley Honey sat next to them, staring at me as if to say they didn’t leave until she moved them.

I got the message.

The artist known as Shirley Honey making sure I don’t disturb her art work. (Photo by Charlotte Ekker Wiggins)

The artist known as Shirley Honey making sure I don’t disturb her art work. (Photo by Charlotte Ekker Wiggins)

If you have lived with cats, you know how unique their personalities can be. Shirley Honey was a rescue, I found her on my deck one hot August, possibly one of the cats my neighbor complained was living in his compost pile. The vet said she is part Maine Coon, which explains why she is always ready to play and invents her own rules. These installations were all her idea.

After a period of time, the artist herself may move them elsewhere or, better yet, not mind my doing the clean up but she does decide how long the installations stay. If I try to move them too early, she will return the items where she originally put them.

Now that I am properly trained, I leave the artwork untouched. After all, who am I to know when the installation has lost its artistic and viewing value.

This time I took photos and ran an errand. When I got back and went to check on her curled up in her favorite napping spot, I found another work of art. Apparently this toy mouse decor look is a personal fall favorite.

The artist known as Shirley Honey with a toy mouse installation by her chair. (Photo by Charlotte Ekker Wiggins)

The artist known as Shirley Honey with a toy mouse installation by her chair. (Photo by Charlotte Ekker Wiggins)

No, I didn’t put it there. And I didn’t touch it.

If I could just convince her to return the toys to her toy baskets…

I have to confess, it is a cute home decor look having the toy mice next to the napping cat. Maybe I’m starting to understand her artistic point of view?

Ah, the life of a feline artist.

Charlotte

Mum Bouquet

Yellow mums from my garden bring a hint of fall into my den. (Photo by Charlotte Ekker Wiggins)

Yellow mums from my garden bring a hint of fall into my den. (Photo by Charlotte Ekker Wiggins)

Mum Bouquet

One easy way to bring fall into our homes is to have a fresh bouquet of chrysanthemums. It doesn’t have to be very big, some of the smallest flower vases with a tiny sprig of mums will do. These hardy, easy to grow flowers also make nice long lived cut flowers. You can extend their time in a vase by changing the water every few days and keeping them away from heat sources.

If you are having a fall gathering outside, mums are natural bug deterrents so scatter small pots of mums around the gathering area. Then give them away at the end as a thank you gift.

If they are in the right conditions, you may also find mum stems sprouting tiny white hairs, which are roots. If you see roots, you can plant the stem in new potting soil and grow more mums. Keep hydrated. Within a couple of months, you will have a new mum plant you can move out into your garden next spring.

Garden hardy mums will return from year to year once established. (Photo by Charlotte Ekker Wiggins)

Garden hardy mums will return from year to year once established. (Photo by Charlotte Ekker Wiggins)

Garden Hardy Mums v. Florist Mums

Garden hardy mums are perennials. Once established, they will come back year to year. You can sometimes find them in the fall to add to your garden. They come in a range of colors from yellows; white; pink through lavender, orange and brown in a variety of flower shapes.

If you plant them in the fall, you will need to water them through winter a couple of times a month to keep their roots moist as they get established.

If you think ahead, spring is a better time to buy mums and get them planted. Then they have a good three of the four seasons to grow and establish themselves.

A little mum start this year can easy grow into a nice size plant next year. (Photo by Charlotte Ekker Wiggins)

A little mum start this year can easy grow into a nice size plant next year. (Photo by Charlotte Ekker Wiggins)

If you already have established mums, you can take cuttings, put them in water and plant them in new garden areas once roots appear.

Florist mums are grown in greenhouses and usually don’t survive exposure to cold weather. They are fun to have in the house for awhile; potted mums will usually last longer than cut mums.

Charlotte

Foot Stool Gift

The refinished and recovered walnut foot stool presented as a gift. (Photo by Charlotte Ekker Wiggins)

The refinished and recovered walnut foot stool presented as a gift. (Photo by Charlotte Ekker Wiggins)

Foot Stool Gift

One of my beekeeping friends surprised me with this recovered foot stool as a 5th Anniversary gift for our local bee club.

I found the fabric several years ago at a conference auction for our state beekeeping association. The upholstery fabric piece was not very big but I loved the elegant embroidered bees on a solid tan background.

Having far too many “projects” to tackle, this friend volunteered to help me with a few including reclaiming this walnut stool.

I found it at a local thrift store. I kept it by the side of my bed with a towel covering it so my older cat Margaret could easily jump onto the bed. Margaret was prompt about bedtime at 10 p.m. but at 20 years, climbing on top of the bed became a challenge.

When I mentioned to this friend I had a stool that needed some tender loving care, it took me several days scouring the house to finally remember it had been sitting all along next to my bed. It was the towel hiding it that threw me off.

The original upholstery was a green solid fabric with a gold trim. See why I kept a towel over it?

This was the original foot stool as I found it at a thrift store. (Photo by Charlotte Ekker Wiggins)

This was the original foot stool as I found it at a thrift store. (Photo by Charlotte Ekker Wiggins)

The renovated stool not only has brand new fill and bee fabric but my friend tripled the gold cord around the fabric edge to finish it off. The gold cord came from my mother’s arts and crafts supplies stash.

Stools are great to have around the house tucked under chairs and sofas. I like to pick up unusual ones to keep my chairs company. They also come in handy for my aging cats who like to spend their days curled up in easy chairs in sunny windows. My latest find has a drawer in the middle, the better to stash cat toys.

This renovated stool is now back beside my bed, a nice addition to my bedroom. It is also a lovely reminder of our local bee club reaching the 5 year mark, as well as the beekeeper who made this look SO much better.

Thanks, Jessie!

Charlotte

Water Ring Protection

Easily protect wood furniture with glass tops. (Photo by Charlotte Ekker Wiggins)

Easily protect wood furniture with glass tops. (Photo by Charlotte Ekker Wiggins)

Water Ring Protection

A friend recently bemoaned that a party at her house ended with a number of water rings from drinks marring her grandmother’s antique furniture. I have a few of those myself but I also have a plan to prevent that from happening again.

This look familiar?

Water ring damage to a wood radio cabinet can be fixed two ways. (Photo by Charlotte Ekker Wiggins)

Water ring damage to a wood radio cabinet can be fixed two ways. (Photo by Charlotte Ekker Wiggins)

Makes you want to cringe, doesn’t it. I know it does me.

Even if you have coasters, and hand them to people, and place them under their drinks, for some reason glasses end up on wood leaving their mark.

The good news is that I know how to fix those water rings with Howard Furniture Refinishing products, which we offer in these handy Furniture Refinishing Gift Kits. To make it easy for you, the gift kit has everything you need to refinish one piece of wood furniture, something we have been doing with Howard furniture refinishing products for several decades now.

Before I refinish, though, I take another step. I order a glass cover so that I have it in hand before I start the refinishing process. This way I make the repairs and protect the piece of furniture from future damage with glass and don’t get caught up in forgetting to get the glass - or putting it off - after I get the piece refinished.

To order the glass, take careful measurements knowing the glass cutters will get the glass piece as close to the size you provide them as you can. You can get glass pieces cut at any glass store. If in doubt, go in and chat with them to find out what they can do and how they like to handle furniture pieces.

When I started with one of these folding round tables, I cheated two ways. First, I took the table in so they could get the correct measurements and secondly, I ordered the poly plastic as opposed to glass. I wasn’t sure how safe it was to put glass on a side table that easily folded over. Turns out what was a good call especially when two cats are chasing each other and decide to take a nose dive from the chair into the side table.

The plastic protects the center of the side table and easily falls off without breaking when the table is knocked over. I keep it in place with one of the rubber feet used to keep pictures on walls.

If unsure, try a poly cut first to make sure it will work with your furniture. (Photo by Charlotte Ekker Wiggins)

If unsure, try a poly cut first to make sure it will work with your furniture. (Photo by Charlotte Ekker Wiggins)

For non-moving tables, I still drag those into the glass shop for them to take the correct measurements, especially ones that have odd shapes. Be ready to chat about where the furniture piece came from, my glass shop loves to hear the stories behind the furniture pieces and sometimes make me an offer to buy it from me.

No such luck, the ones I have I plan to keep.

There are two sizes of glass available, at least at my glass store; 1/8th inch and 1/4 inch.

I order the 1/4 inch for those pieces of furniture that will get a lot of wear, mostly coffee tables.

This is a vintage 1920s art deco table I can now easily use without worrying the top will get damaged now that it has a glass cover.

Take the furniture in to get a good fit with unusual shapes. (Photo by Charlotte Ekker Wiggins)

Take the furniture in to get a good fit with unusual shapes. (Photo by Charlotte Ekker Wiggins)

The 1/4 inch glass also makes excellent tops for unusual furniture pieces, such as using trunks for tables.

Trunks are great places to story extra bedding and handmade quilts. We grew up moving and each child was given one trunk to hold all of our precious possessions, which may explain why I like trunks. I have them for storing Christmas decorations, bee club materials, handmade quilts and a tiny trunk that holds a plastic bag with catnip toys. My cats get very excited when the tiny trunk comes down from the bookcase and the toys come out.

I found this trunk at a sale at a neighbor’s house and had it stored in my basement for several years storing wrapping paper. The trunk has a multi-level surface so adding glass makes it flat and now usable as a coffee table and side table.

Not sure what’s stored in there now, I should check.

Repurpose trunks as side tables by adding a glass top. (Photo by Charlotte Ekker Wiggins)

Repurpose trunks as side tables by adding a glass top. (Photo by Charlotte Ekker Wiggins)

This is a new white cedar trunk that someone embellished by adding feet and lettering on the top. I liked the trunk for a coffee table in a guest room so added 1/4 inch glass to protect the top. This way if the plant gets over watered or someone spills a drink, it should not damage the trunk finish and lettering.

Trunks with glass also make handy coffee tables. (Photo by Charlotte Ekker Wiggins)

Trunks with glass also make handy coffee tables. (Photo by Charlotte Ekker Wiggins)

Simple 1/4 glass pieces like this cost $25-50, which to me is an excellent investment to preserve the older wood pieces I have.

To clean, I use a glass cleaner and newspapers, just as one would clean window glass.

If you don’t like the edges, you can ask them to round them off for an additional fee. I don’t tend to get them rounded off because they fit snuggly on corners and I don’t have any young ones in the house.

Glass corners can be rounded if you don’t like the basic cut. (Photo by Charlotte Ekker Wiggins)

Glass corners can be rounded if you don’t like the basic cut. (Photo by Charlotte Ekker Wiggins)

It’s simple enough to get those corners rounded for another $15-30 per glass piece.

Those quarter-size clear circles are provided free and they keep the glass off the wood so that the wood doesn’t get scratched.

The last time I was in the glass store, I said something tot he effect that I have all of my surfaces protected in glass now and may not be coming in for awhile. The glass employee carrying the glass piece out to my car said “nah, you’ll have another project in here in no time.”

How right he was!

Charlotte

June Wildflowers Bouquet

These are Missouri wildflowers cut from starts I am planting. (Photo by Charlotte Ekker Wiggins)

These are Missouri wildflowers cut from starts I am planting. (Photo by Charlotte Ekker Wiggins)

June Wildflowers Bouquet

In addition to adding a touch of nature and beauty to a room. I am going to add “relaxing” to the reasons why you should have a bouquet of flowers in your most-used room.

This is a bouquet of Missouri native wildflowers from a pile of plants someone tossed. The wildflowers were broken at the top of the plants so I cut them off and placed them in a jar of water before trimming the rest of the plants so I could more easily plant them in my garden.

By cutting off the flowering sections, the plants will concentrate their energy on establishing their roots in their new homes and may bloom again later in the growing season.

In the bouquet, there is a mixture of hardy perennials that will start blooming this month and continue until fall. How do I know?

In addition to having some of these already growing in my garden, I easily keep track of what is blooming in nature through Missouri Department of Conservation’s Natural Events calendar. These calendars are usually available October through the beginning of the new year.

Missouri Department of Conservation’s Natural Events calendar lists what wildflowers are in bloom. (Photo by Charlotte Ekker Wiggins)

Missouri Department of Conservation’s Natural Events calendar lists what wildflowers are in bloom. (Photo by Charlotte Ekker Wiggins)

This wonderful annual calendar also has a natural event on every day of the week including when hummingbirds migrate and when honey bees swarm. This year, the honey bee swarm season began May 9, 2019.

These calendars are now staples in the beginning beekeeping classes I teach through Rolla Bee Club. It is helpful as a beekeeper to know what is blooming because that is the source of nectar and pollen for insects.

Now that you see the list of Missouri wildflowers in bloom, can you identify some of them in this flower bouquet?

Can you identify some of the Missouri wildflowers? (Photo by Charlotte Ekker Wiggins)

Can you identify some of the Missouri wildflowers? (Photo by Charlotte Ekker Wiggins)

Here is a hint, purple coneflowers are among these bouquet flowers.

And yes, I find it very relaxing to sit in my den sofa and look at the bouquet of flowers. Some of them are still opening up so it’s interesting to see the flower bouquet evolve as the flowers bloom.

Charlotte

Neighbor's Auction Gifts

My neighbor brought me these vintage items from a weekend auction. (Photo by Charlotte Ekker Wiggins)

My neighbor brought me these vintage items from a weekend auction. (Photo by Charlotte Ekker Wiggins)

Neighbor’s Auction Gifts

One of my neighbors surprised me today with a couple of vintage items she picked up at a weekend auction. We were meeting to try to identify the leaves of a tree she was interested in planting in her yard.. As we caught up on family news she gave me a couple of items that now are prominently part of my home decor.

If you notice the items we carry, they reflect my philosophy that we should surround ourselves with items that have good memories attached and yes, bring us joy. Although I have been clearing closets and donating items I no longer use or want this summer, I tend to keep things that make me smile. I think we need more smiles these days, don’t you?

Here are a couple of ways to inspire you to find gift items that will also bring joy to your family and friends:

One of my favorite garden residents are frogs. I have a lot of them, especially in my small front ponds. So does my neighbor, especially when the kids of another resident bring us buckets of spring peepers out of their swimming pool. We solemnly take them it, dump them in our small ponds and keep our fingers crossed that at least some of them will stay. We know the kids will come by later to check on them!

A friend gave me this print of orange poppies, each with their own frog. This sprint sits in the place of honor in the middle of my basement bookcase, where I have a tiny bar attached I call the “Bee Bar.”

The little oil and vinegar jars are now keeping the frogs company. I will now see those and remember all of the frogs we have shared over the years.

The oil and vinegar jars now are in my basement “Bee Bar” kitchen. (Photo by Charlotte Ekker Wiggins)

The oil and vinegar jars now are in my basement “Bee Bar” kitchen. (Photo by Charlotte Ekker Wiggins)

As for the second gift, it is tied to where I live and all of the birds and bird houses I have set up around the property. Since I live on Bluebird Lane, my neighbor thought I needed this vintage blue glass bluebird, which is now keeping a couple of other gifts company on my den fireplace mantle. The glass swizzle sticks and glass jars were gifts from the glass blower and a Navy friend. The birdhouse was a gift from a publishing friend. The wooden bee was a gift from a local club where I spoke recently and now the bee has a friend in the bluebird.

The little bluebird has joined a gift bee from a lecture and a birdhouse from a friend. (Photo by Charlotte Ekker Wiggins)

The little bluebird has joined a gift bee from a lecture and a birdhouse from a friend. (Photo by Charlotte Ekker Wiggins)

So considerate of my neighbor to share these with me and a reminder that you can bring joy to people with vintage as well as new items, the key is that they have something meaningful attached.

Charlotte

Spring Flowers Bouquet

My spring flowers bouquet on my den coffee table. (Photo by Charlotte Ekker Wiggins)

My spring flowers bouquet on my den coffee table. (Photo by Charlotte Ekker Wiggins)

Spring Flowers Bouquet

It’s easy to think that a flower bouquet has to be carefully coordinated and immaculate so let me suggest another option. Welcome to my den and, more particularly, to the flower vase I keep filled on my den coffee table.

One of the ways to enjoy spring is to bring some of the flowers inside. Instead of cutting a whole bouquet at once, start with a few flowers and keep adding. Change the water every day or every other day, make a new cut at the bottom of the flower stem and remove whatever is starting to fade.

To add flowers, one would need to take a walk in the garden, preferably in the morning with flower snips to easily cut off a couple of flowers. Maybe even stop and admire them on the plant as you decide whether you want to cut them or not. Look at what may be visiting the flowers and what they are doing. Most flowers should have visitors on them this time of year.

I sometimes also take a jar with water so I can quickly add the cut flowers to water as I take them inside because I know I may get distracted. If you know you will make a quick trip around the garden then no need to take a jar with water, you are going to take them straight back to your kitchen and to your own flower vase.

In this bouquet, I started with two yellow roses still in bud form. I added the coral roses a couple of days later followed by three ox-eye daisies, one of my favorite Missouri native wildflowers.

Today I added beards tongue, another white Missouri wildflower, and the purple self heal, a particularly favorite native Missouri wildflower in the mint family.

Well, yes, I tend to have a lot of favorite flowers, wild or not.

I passed up several patches of self heal close to my hives; I didn’t want to deprive my bees of a potential source of nectar and pollen. As thunder rolled overhead, however, I decided the bees would be safe inside their hives and wouldn’t miss if I took a couple of flowers to enjoy.

Ah, there’s also one sprig of midnight blue Salvia I found already cut in the garden. Not sure what did that but the salvia is now spending a few more days in bloom, even if it is inside.

Two more flowers added to my coffee table flower bouquet. (Photo by Charlotte Ekker Wiggins)

Two more flowers added to my coffee table flower bouquet. (Photo by Charlotte Ekker Wiggins)

If your rose petals start going brown around the edges, do what florists do and carefully remove them. The flowers should be fine for several more days.

I just added another couple of flowers to the bouquet, can you tell what they are?

(Hint: bright yellow coreopsis, just starting to bloom this afternoon)

Charlotte


Hanging Bird Prints

Some of my vintage bird prints along a hallway. (Photo by Charlotte Ekker Wiggins)

Some of my vintage bird prints along a hallway. (Photo by Charlotte Ekker Wiggins)

Hanging Bird Prints

This is inspiration for those of you who have saved prints but still don’t have them hanging in their permanent location.

Over the years, I have collected a variety of vintage and new bird prints. They were partly inspired by a local bird artist whose original paintings I could not afford. When I first came across vintage bird prints, I would pick them up at thrift stores and sales, then tuck them away for later framing. When a couple of the prints were in good frames, those went up on a wall.

Last year, a workman damaged my mother’s Japanese silk print hanging in the hallway. The insurance company was fabulous, finding someone who could repair the silk.

When I hung it back up in its space in my business office hallway, I was reminded of the other bird prints. The Japanese screen is a scene of birds in trees over peony bushes, one of my favorite late spring flowers.

My mother’s Japanese print that inspired where to place the rest of bird prints. (Photo by Charlotte Ekker Wiggins)

My mother’s Japanese print that inspired where to place the rest of bird prints. (Photo by Charlotte Ekker Wiggins)

I didn’t realize just how many I had collected over the years until I placed them all together in the hallway, starting with this large print.

This first bird print started the collection. (Photo by Charlotte Ekker Wiggins)

This first bird print started the collection. (Photo by Charlotte Ekker Wiggins)

They were mostly in oak frames, although a couple had more of a washed out color to the frames. Five still needed frames so I scoured local thrift shops to find something that was complimentary.

I didn’t want perfect matches but more similar colors and frame patterns. Actually it was harder to just find frames that fit the prints so I focused on that part of this project first.

The bird prints are not in matching frames but they do have similar trim. (Photo by Charlotte Ekker Wiggins)

The bird prints are not in matching frames but they do have similar trim. (Photo by Charlotte Ekker Wiggins)

On the right side now is a print of western bluebirds and, on the left side, the side closest to my business office, a print of the bird artist who first inspired this collection.

David Plank is now a renown Missouri bird artist but when I first met him several decades ago, he was just starting his career. I made the mistake of telling myself I could buy his original work later. By the time I had the funds to do so, his prices were out of my reach so I settled on finding vintage bird prints.

My Eastern Bluebird print signed by Missouri artist David Plank. (Photo by Charlotte Ekker Wiggins)

My Eastern Bluebird print signed by Missouri artist David Plank. (Photo by Charlotte Ekker Wiggins)

When I started to hang the prints, I thought I would have to reframe a few of the prints.

After I had them spaced and all on one wall, they looked quite nice and I have decided I don’t need to reframe any of them.

The older oak frames were treated with Howard RestoraFinish oak color and left to dry before hanging on the wall. The rest were all treated with Howard Feed N Wax to rehydrate the frame wood. The two Howard Furniture Refinishing products in a furniture refinishing kit are my go-to whenever I am working with cleaning up anything out of wood.

So here is the collection of bird prints now finished and hanging in the hallway opposite my mother’s Japanese silk screen.

The row of bird prints guiding me down my hallway. (Photo by Charlotte Ekker Wiggins)

The row of bird prints guiding me down my hallway. (Photo by Charlotte Ekker Wiggins)

I love walking by these prints, it makes me feel like I am also in the trees among the birds!

Charlotte

Storage Baskets

My collection of storage baskets in use by my garage entrance. (Photo by Charlotte Ekker Wiggins)

My collection of storage baskets in use by my garage entrance. (Photo by Charlotte Ekker Wiggins)

Storage Baskets

Baskets for storage have become, and continue to be, popular for home decor. In my house, however, they are more than decor, they are practical and handy for a variety of uses sometimes currently addressed with plastic.

I started to collect baskets that would fit my little metal book case at the house entrance from my garage. By having the storage space there, I can easily lean in and grab what I need without dragging mud through the house. Having the items easy to see also help me make sure the supplies are available.

The challenge in getting storage baskets to work for a specific space is to find sizes that will fit. I kept the available space measurement handy whenever I saw a basket so I could easily decide whether it would work.

The other decision is to settle on a basket style that was relatively available and one I liked. I ended up with this large weave basket in a honey color for inspiration.

I look for baskets with this color and weave. (Photo by Charlotte Ekker Wiggins)

I look for baskets with this color and weave. (Photo by Charlotte Ekker Wiggins)

You can find similar baskets at big box stores. The ones I found that were similar to these started at $24.95 each with the larger ones $34.95 each.

With summer starting, you can save money and have some treasure hunting fun shop garage sales, auctions and thrift stores. Keep one basket handy or take a photo of the basket color and style so you have it easily available to match other finds. These baskets I use ranged from $1-$2 each. You do the math in terms of the cost of big box store baskets compared to thrift store finds.

If you are concerned about cleanliness, only pick up baskets that look brand new. I wash them with hot water and Dawn laundry detergent; then allow to dry.

If you are enterprising, you can also take a basket-weaving class and make your own baskets.

If you find something that will work to store items but isn’t a basket, pick something in the same color. On this shelf I have a wooden box with gardening supplies, see the box on the right in the middle shelf.

The baskets make a handy collection point. (Photo by Charlotte Ekker Wiggins)

The baskets make a handy collection point. (Photo by Charlotte Ekker Wiggins)

In addition to not using plastic and ready storage, now I also have a supply of easy to find baskets that I can use to carry things.

Actually they can also be used for storage in cabinets. I use baskets to sort out my freezer bags and storage containers in my kitchen. These baskets vary in color and weave but all have an easy handle to grab.

Baskets used for storage inside a kitchen cabinet. (Photo by Charlotte Ekker Wiggins)

Baskets used for storage inside a kitchen cabinet. (Photo by Charlotte Ekker Wiggins)

Not an issue in most households but in mine, baskets tend to be quickly claimed for other purposes.

This was a woven basket I found at a thrift shop that I thought would work well to store magazines under my den coffee table.

Shirley Honey had different plans for my magazine storage basket. (Photo by Charlotte Ekker Wiggins)

Shirley Honey had different plans for my magazine storage basket. (Photo by Charlotte Ekker Wiggins)

At least the basket made its way under the coffee table. Some baskets don’t make it that far before getting claimed for napping spots.

Storage baskets can also be used next to easy chairs and on top of cabinets. I love having them easily accessible to carry things, even if it is a sleepy cat!

Charlotte

Tiny Flower Vases

A close up of the toothpick holders turned flower vases. (Photo by Charlotte Ekker Wiggins)

A close up of the toothpick holders turned flower vases. (Photo by Charlotte Ekker Wiggins)

Tiny Flower Vases

I like to include fresh flowers in most of our beekeeping classes and meetings. It’s a good reminder that bees have a special relationship to plants as nature’s matchmakers and that we wouldn’t have one without the other one.

I collect baskets with the same thought. Sometimes a flower vase can be set inside a basket to bring flowers into a room, just as this handmade quilt has Tulips in Basket.

In one of our late winter bee club meetings, several attendees were struck by the tiny flower vases holding early daffodils. One said she was looking for something similar for a wedding. Another said she would love to have some small flower vases to easily scatter fresh flowers around her house, something I can relate to and do.

The trick to finding tiny flower vases is to be creative. The “vases” at the meeting started their live as toothpick holders. The reason I like to use them for flowers is they have wider bases to hold water. None of the toothpick holders were the same but they were the same height.

Early daffodils cheered up this beekeeping meeting. (Photo by Charlotte Ekker Wiggins)

Early daffodils cheered up this beekeeping meeting. (Photo by Charlotte Ekker Wiggins)

Some miniature orchid pots, the ones without holes in the bottom, also work well as tiny flower vases.

I once used asparagus cans with their paper removed as flower vases so you are only limited by your imagination.

Now can someone pass me a toothpick, please?

Charlotte

Framing Flower Prints

Framed flower prints now in my basement hallway. (Photo by Charlotte Ekker Wiggins)

Framed flower prints now in my basement hallway. (Photo by Charlotte Ekker Wiggins)

Framing Flower Prints

A friend recently gave me these sweet US wildflower prints. No, they are not cut out of a book, the set was a reprint of flower plates found in US Wildflower books. Not wanting to spend the hundreds of dollars to have them professionally framed, I settled with five $2.99 per sheet of art paper a little darker than the actual prints.

A visit to area thrift shops turned up the ten 11x14 inch frames, seven matching and three with thinner frames.

Flower prints raspberry.jpg

They all had some wear along the frames so before adding the prints, I rubbed them with Howard RestorAFinish in Walnut. Counter-intuitive, I know, but over the years I have found using the walnut color on oak, for example, nicely covers nicks and keeps them covered.

After they were dry, I cleaned the glass on both sides, cut the art paper to size and added the flower prints.

I did think through which ones would look better in the different-sized picture frames. For example, I focused on the narrow edge frames at each corner to make sure the flowers were in the right direction.

Flower print thin frame.jpg

The frames were hung so that I can read the flower names as I walk by although I recognize some by sight. The calla lilies, for example, are easy to spot in the flower prints without reading the name on the bottom.

Flower print thick frame.jpg

I also placed the tiger lilies over the wall lamp, which nicely now illuminates the print.

The wall sconce now highlights the tiger lily print. (Photo by Charlotte Ekker Wiggins)

The wall sconce now highlights the tiger lily print. (Photo by Charlotte Ekker Wiggins)

Here are all ten prints now lining my basement hallway. Can you see where the third mismatched frame is?

Here’s a hint, take a look at the print under the wall sconce.

The ten flower prints in my basement hallway. (Photo by Charlotte Ekker Wiggins)

The ten flower prints in my basement hallway. (Photo by Charlotte Ekker Wiggins)

I didn’t have to polish or do anything else to the wooden frames, with Howard RestorA Finish they now look good as new.

Now to tackle that gold strip on the wall sconce, maybe I should paint that silver?

Charlotte

Days of the Week Beekeeping Kitchen Towels

bee towels.jpg

Days of the Week Beekeeping Kitchen Towels

It’s beginning to look like spring - or at least sound like spring where I live. We had almost a day of thunderstorms followed by a few hours of sunshine punctuated by a serenade of spring peepers, tiny frogs that can make a huge sound.

These warmer days are also a welcome sight for beekeepers since temperatures over 50F bring honeybees out of hives in droves. They are not only cleaning house in those warmer sunny days but they are also scouting for pollen. The sight of their packed legs returning to their hives is a sure sign that spring has almost arrived.

One of my friends decided she also wants to keep bees as I do but wasn’t sure about having the actual little flying machines in her garden. As a combined birthday and housewarming gift, I sent her a unique, one of a kind Days of the Week Beekeeping Kitchen Towels set .

Made in Missouri from brand new muslin towels we make ourselves, each of the 16x32 inch towels are hand embroidered with different beekeeping scenes, one for each day of the week. Just as we have in this gift set, I included a jar of honey from the Bluebird Gardens Apiaries to use in her tea.

She was thrilled. She said now she can claim to be a beekeeper and won’t get stung!

Charlotte

Santa Doll on His Way

Not a sleight but should still get this Santa to his destination! (Photo by Charlotte Ekker Wiggins)

Not a sleight but should still get this Santa to his destination! (Photo by Charlotte Ekker Wiggins)

Santa Doll On his Way

One of my favorite handmade Santa dolls is on his way to Minnesota. Every handmade Santa doll is unique and the face of this one made me smile every time I saw it so I featured it on our home decor page banner.

Most of these Santa dolls are made out of cutter quilts for their suits, giving yet another way to repurpose these pre-loved handmade quilts. Cutter quilts are quilts that now only have pieces that are salvageable so are often cut up into pillows, stuffed animals and, in this case, Santa doll suits.

This Santa doll was a little different. He is wearing a burgundy red suit with a few patches, which is how I imagine the real Santa suit would be after all of those chimney visits!

To get this Santa doll ready for his box ride, I added a label inside his suit.

The last step, adding a label. (Photo by Charlotte Ekker Wiggins)

The last step, adding a label. (Photo by Charlotte Ekker Wiggins)

All of our unique Santa dolls are shipped with a brand new, collapsible doll stand so they can be placed standing near a Christmas tree. The dolls also easily sit for posing on fireplace mantels, gift packages, doll chairs - and they are most definitely huggable.

Every Santa doll is shipped with a collapsible display stand for easy storage. (Photo by Charlotte Ekker Wiggins)

Every Santa doll is shipped with a collapsible display stand for easy storage. (Photo by Charlotte Ekker Wiggins)

Just in case something happens to the shipping box, each Santa doll is tucked into a plastic bag only for the trip to their final destination. We recommend you store the Santa dolls as you would lap quilts and regular-sized quilts, in cotton pillow cases or cotton fabric. Plastic doesn’t allow the cotton to breath and can accelerate cotton fiber deterioration.

The Santa doll is in a temporary bag only for shipping. (Photo by Charlotte Ekker Wiggins)

The Santa doll is in a temporary bag only for shipping. (Photo by Charlotte Ekker Wiggins)

Oops, almost forgot to add the good wishes!

This Santa doll is also delivering good wishes. (Photo by Charlotte Ekker Wiggins)

This Santa doll is also delivering good wishes. (Photo by Charlotte Ekker Wiggins)

A little bubble wrap to keep Santa doll from moving around in the box and off he goes. Not exactly a sleigh with reindeer but it should get him to his final destination nevertheless so that he can continue to make wishes come true!

Charlotte

Paper Clip Ornament Hangers

The Nutcracker is one of our Christmas traditions as in hanging ornaments with paper clips. (Photo by Charlotte Ekker Wiggins)

The Nutcracker is one of our Christmas traditions as in hanging ornaments with paper clips. (Photo by Charlotte Ekker Wiggins)

Paper Clip Ornament Hangers

Are you getting excited about decorating for the season? We all have holiday traditions and this hack now is one of mine. This is such a handy little trick for hanging ornaments, it surprised me over the years how many people had not thought of doing this.

I was among that group when one holiday past I was in an office after hours decorating for Christmas. I was the visitor so I took up the mundane tasks - removing ornaments from the box, separating the broken ones for repair and/or disposal and lining up the rest for tree hanging.

These are traditional ornament hooks for holiday decorating. (Photo by Charlotte Ekker Wiggins)

These are traditional ornament hooks for holiday decorating. (Photo by Charlotte Ekker Wiggins)

In the middle of this little enterprise we ran out of ornament hangers, those little slight pieces of pre-formed wires that hold an ornament on one end and the tree on the other. One of my associates volunteered to head off to get some when the senior administrative assistant said no need and headed off to the supply closet.

A few minutes later she handed me a box of office paper clips and started to unbend one end. She attached the short end to an ornament, opened up the larger end and said “back to the eggnog.”

Unbent paper clips can easily be used to hang ornaments. (Photo by Charlotte Ekker Wiggins)

Unbent paper clips can easily be used to hang ornaments. (Photo by Charlotte Ekker Wiggins)

Over the years, I have worked in many offices over the holidays to give full-time workers time off with their families. That has given me the opportunity to share this little hack many times. It also works to attach decorations to wreaths and, if the Christmas stockings are not too heavy, once hung stockings from the top of an office cubicle.

Unbent paper clip used as an ornament hanger. (Photo by Charlotte Ekker Wiggins)

Unbent paper clip used as an ornament hanger. (Photo by Charlotte Ekker Wiggins)

And yes, she really did say “back to the eggnog.”

Do you have a favorite Christmas decorating hack to share?

Charlotte

Tiny Personalized Holiday Decor Gift

This tiny holiday scene is an easy personalized gift. (Photo by Charlotte Ekker Wiggins)

This tiny holiday scene is an easy personalized gift. (Photo by Charlotte Ekker Wiggins)

Tiny Personalized Holiday Decor Gift

This is as close to holiday decorating in a box as I can make it. A friend moved into her first house earlier this year. She wasn’t sure she would have time to put up any holiday decorations so I thought about how I could help her have a little taste of the holidays. I was going to send her our Happy Holidays Cardinal Lap Quilt then remembered she doesn’t have a lot of room so I came up with this tiny personalized holiday decor gift.

I started with a tiny artificial tree, tiny garland and a set of small dog ornaments from our local hobby shop.

If you don’t have a hobby shop you can find tiny trees at any big box store. If you can’t find the traditional garland in a small size, the tiny Christmas tree garland can be anything from a small ribbon to a tiny necklace chain.

I added a few tiny cookie ornaments from my own tiny tree.

The dog ornament at the top has her dog’s name written on the back of the ornament.

Tiny artificial Christmas tree with dog ornaments. (Photo by Charlotte Ekker Wiggins)

Tiny artificial Christmas tree with dog ornaments. (Photo by Charlotte Ekker Wiggins)

So that she can finish decorating the tree, four cat ornaments with personalized cat names on the back are in a tiny gift box.

Cat ornaments in a box so she can add them. (Photo by Charlotte Ekker Wiggins)

Cat ornaments in a box so she can add them. (Photo by Charlotte Ekker Wiggins)

I picked up a cute Santa at the fireplace photo frame at a local thrift shop and repainted it with more primary colors. The original frame had a pink Santa Claus, pink Christmas stocking and hard to distinguish books on the mantle top.

A little paint to brighten the frame and a personalized photo now makes this fireplace ready to place next to the tiny tree.

Repainted fireplace photo frame. (Photo by Charlotte Ekker Wiggins)

Repainted fireplace photo frame. (Photo by Charlotte Ekker Wiggins)

When I was looking for a gift box, I found the little dog ornament that barks “jingle bells” so I had to add that, even if it is not to scale.

Now she can either use this in her home or take it to the office to decorate her desk. Or she can take the singing dog toy to the office and keep the tree and fireplace mantle at home and she will be all set for Christmas!

Can you think of anyone on your gift list who could use a tiny holiday decor gift?

Charlotte

Custom Love Seat

New upholstered love sofa with the new cover and throw pillows. (Photo by Charlotte Ekker Wiggins)

New upholstered love sofa with the new cover and throw pillows. (Photo by Charlotte Ekker Wiggins)

Custom Love Seat

Does this look familiar, someone sitting on a love seat - well, in this case - sleeping on the love seat and falling through the cushions? Better yet, have you tried to find a love seat with a solid back and cushion so that your sleeping cat doesn’t fall in between the pillows? And maybe you don’t as well??

One of my cats is slowly disappearing between the two love seat cushions. (Photo by Charlotte Ekker Wiggins)

One of my cats is slowly disappearing between the two love seat cushions. (Photo by Charlotte Ekker Wiggins)

From what I could gather from my research, all love seats have two bottom cushions and two back pillows, assuming two people will be seating on the furniture. In my household, however, one person tends to sit on the love seat with a cat on either side, leaving the one person to fall into the center opening between the bottom and back cushions. Or, in this case, the cat slowly disappears between the cushions since we all know cats have to sit and sleep in the smack dab middle of everything.

One of my cats volunteered to demonstrate, see how the back pillows are spineless and it’s easy to fall through the seat cushions? He really is trying to sleep but his back paws are straddling the moving love seat cushions.

My cat is straddling the moving love seat cushions while he tries to sleep. (Photo by Charlotte Ekker Wiggins)

My cat is straddling the moving love seat cushions while he tries to sleep. (Photo by Charlotte Ekker Wiggins)

I called a local upholstery shop and explained the problem. Maggie said she could easily make a solid bottom cushion and add fill to a solid back cushion as well.

Once I settled on the fabric and it was in the shop, it took about a month for the “new” love seat to come back home. What a difference!

This is my new old love seat with a solid bottom cushion and solid back. (Photo by Charlotte Ekker Wiggins)

This is my new old love seat with a solid bottom cushion and solid back. (Photo by Charlotte Ekker Wiggins)

In terms of cost, it was less expensive to have the piece reupholstered than it would have been to go out and buy a new love seat. Even if I wanted something new, I would not have found one with a solid bottom or back cushion.

To make sure we are warm and cozy over winter, I found a matching fake fur sofa cover.

Love sofa covers, this one is fake fur and matches the new upholstery. (Photo by Charlotte Ekker Wiggins)

Love sofa covers, this one is fake fur and matches the new upholstery. (Photo by Charlotte Ekker Wiggins)

Hmmm, doesn’t quite look right. Let me make a few adjustments to show you how this really will be allocated and used!

Now this is how the cats will really use this love seat! (Photo by Charlotte Ekker Wiggins)

Now this is how the cats will really use this love seat! (Photo by Charlotte Ekker Wiggins)

Had to add the Cat Mischief lap quilt, it’s perfect to brighten up the corner. Isn’t it amazing how cats can find the exact center of everything??

Charlotte

Santa Dolls Getting Shipped

One of two Santa dolls from cutter quilts climbing into the shipping box. (Photo by Charlotte Ekker Wiggins)

One of two Santa dolls from cutter quilts climbing into the shipping box. (Photo by Charlotte Ekker Wiggins)

Santa Dolls Getting Shipped

Two more of our handmade Santa Claus dolls made out of old patchwork quilts are getting ready to travel East. These unique, one of a kind dolls add charm to any holiday home decor and are squeezable, too.

To get the Santa dolls ready to be shipped, their brand new metal doll stands go into the bottom of the box. The doll stands give posing options, including having Santa stand on a mantle or on a side table. These Santa dolls can also be posed sitting.

Each doll is shipped with a doll stand so they can be posed among presents. (Photo by Charlotte Ekker Wiggins)

Each doll is shipped with a doll stand so they can be posed among presents. (Photo by Charlotte Ekker Wiggins)

Before going into the box, I add labels to the back of the old quilt doll garment. As I sew on the labels, I imagine Santa in his new home, bringing the holiday spirit.

The last step before shipping, adding our label. (Photo by Charlotte Ekker Wiggins)

The last step before shipping, adding our label. (Photo by Charlotte Ekker Wiggins)

Each Santa Doll gets packed in a clear plastic bag to ensure it gets to its new home safely.

Ho Ho Ho, happy holidays! (Photo by Charlotte Ekker Wiggins)

Ho Ho Ho, happy holidays! (Photo by Charlotte Ekker Wiggins)

In past years I have given these Santa dolls as gifts and since have seen them return year after year as part of the holiday home decor.

Yes, Virginia, these dolls do bring the holiday spirit!

Charlotte

Last Roses of the Season

My little collection of homegrown roses welcoming kitchen visitors.

My little collection of homegrown roses welcoming kitchen visitors.

Last Roses of the Season

Over the years whenever I was living somewhere besides at home, I had fresh flowers in my room. Usually they were nothing fancy, maybe a sprig of wildflowers growing nearby or a tiny bouquet from a corner florist. When I was working in Japan, one of the embassy staff shared their one weekly chrysanthemum with me. In that country, they appreciate and celebrate the beauty of one flower.

Now that I am working from home, one of my priorities continues to be to have fresh flowers nearby. They may be growing in a pot, which is my favorite way to have that touch of greenery in my rooms, or they can be something I cut from my hillside garden.

As a cold front moved into Missouri, evening temperatures plunged in the high 40s, cooling daytime temperatures into the delightful 70s. My plants appreciated the reprise from hot and humid conditions and delivered a delightful crop of one of my favorite flowers, roses.

The yellow hybrid tea was munched by a couple of insects but it joins the peach hybrid tea with a lovely fragrance. This long-stemmed rose reminded me of the vintage yellow roses quilt I found a few years ago at an estate sale. The two smaller miniature roses made their second garden appearance since spring. I have them tucked away in garden borders to surprise me when they bloom and all I can say, it worked this fall!

I suspect these are the last roses of the season, a lovely way to end the gardening year and extend the growing season if just for a few more days.

Charlotte