Front Door Wreath
/
Inspiration to make a simple and inexpensive decorative door wreath. (Photo by Charlotte Ekker Wiggins)
Front Door Wreath
Years ago, I kept a small dried wreath on my front door with dried flowers I picked during my walks. One day I opened the door to find a small deer munching on the greenery. Ever since, I have kept that in mind as I decorate my front door. I tended to use natural items in case deer decided to nibble on the decor for a snack.
For a couple of years, I have decorated my front door with a small grapevine wreath cut from my Missouri hillside garden. For some reason this year I became restless about that wreath and decided to replace it.
After shopping at several local home decor stores as well as craft stores, I decided I could remain restless until I found something that struck my fancy at a local thrift store. Some wreaths start at several hundred dollars and I was not interested in frustrating my grazing deer with silk greenery. I suspect they would just tear it apart trying to eat it.
Several weeks ago, I saw this square fake greenery covered wreath. I passed it the first time I saw it, then went back hoping it was still there. Even though I had a priced something similar at a crafts store, it was the shape that stayed with me. Having a different shape was a good option next to the larger, 5-foot grape vine wreath hanging nearby. Something similar to the square one was close to $50 at a crafts store.
As I was taking the green square wreath to the cash register ,I saw another smaller wreath that usually runs around $20.
The two at the thrift store, in excellent condition, cost $9.

I decided to replace the grapevine wreath on the left. (Photo by Charlotte Ekker Wiggins)
I tucked the smaller round wreath inside the larger, square one. I thought about attaching it but if my deer decide to nibble on it, this way they can remove it without taking the whole door. Or at least the rest of the square wreath.
My biggest challenge was where to place the '"home sweet bees” sign, and the little skep, in relation to the rest of the two wreaths.
The sign is attached with two small wires on either end so I turned the wreaths over to attach the sign. There are several spots along the back of the square wreath to easily attach the wires.

Wires on the back of the square wreath are good for attaching signs. (Photo by Charlotte Ekker Wiggins)
I found the little skep, or tiny basket that beekeepers once used to use to keep bees, for a quarter. I have it on a thin mental strand so that I can easily add it to wreaths or what strikes my fancy. Some years it has paid a Christmas tree a short visit.
This was the front door wreath version with the skep on the top and the sign attached to the front instead of the back of the wreath.
I moved the wire through the greenery to secure it to the back of the wreath.

The Home Sweet Bees sign is attached to the back of the square wreath. (Photo by Charlotte Ekker Wiggins)
Then I tried the sign at the top of the wreath as I dabbed burgundy paint on some of the tiny foam balls that make up the fake berries.
The foam makes these substantial-looking wreaths lightweight, making them usable on door hooks.
See the metal ring in the upper right? This wreath can also be hung in a diamond shape thanks to that hook. Love having that option, makes this front door wreath even more versatile.

A few minutes of dabbing paint and the worn spots are covered. (Photo by Charlotte Ekker Wiggins)
After looking at both options and removing the extra paint on my fingers, I decided this is the version I like best.
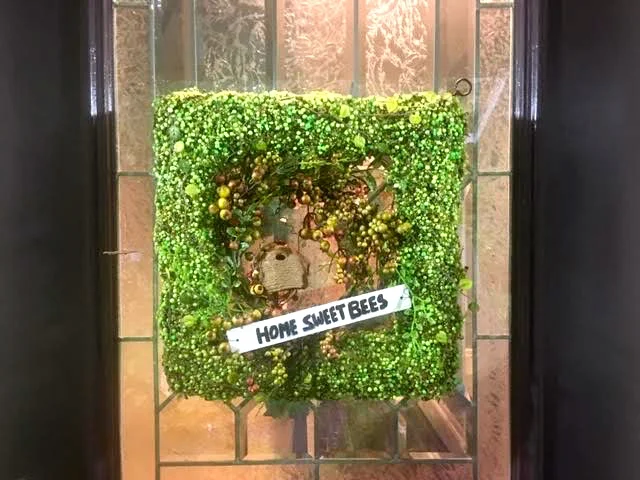
This is the current placement of the sign on the wreath. (Photo by Charlotte Ekker Wiggins)
One of these days I will get a better sign made but, in the meantime, I am very happy with the combination of square green wreath with the inside garland and skep.
The wreath colors pick up the chartreuse colors in deck pillows and compliment the rest.
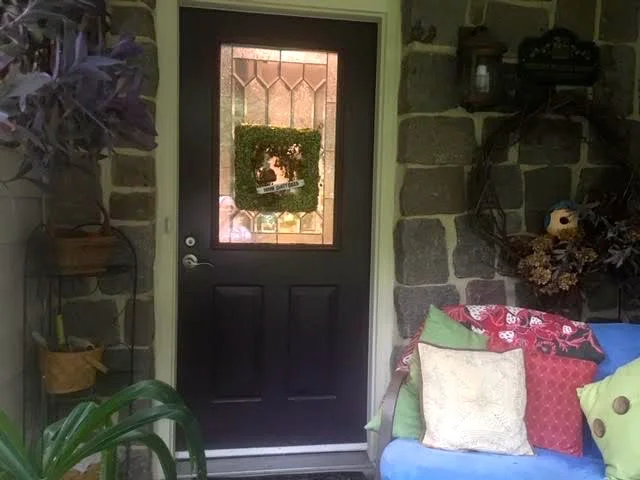
My “new” square green door wreath fits in nicely on my front deck. (Photo by Charlotte Ekker Wiggins)
Now tomorrow, who knows. I may move the sign again.
Or maybe the deer will. What am I saying, we now have black bear sightings in the area, it could also be a bear!
Charlotte